19
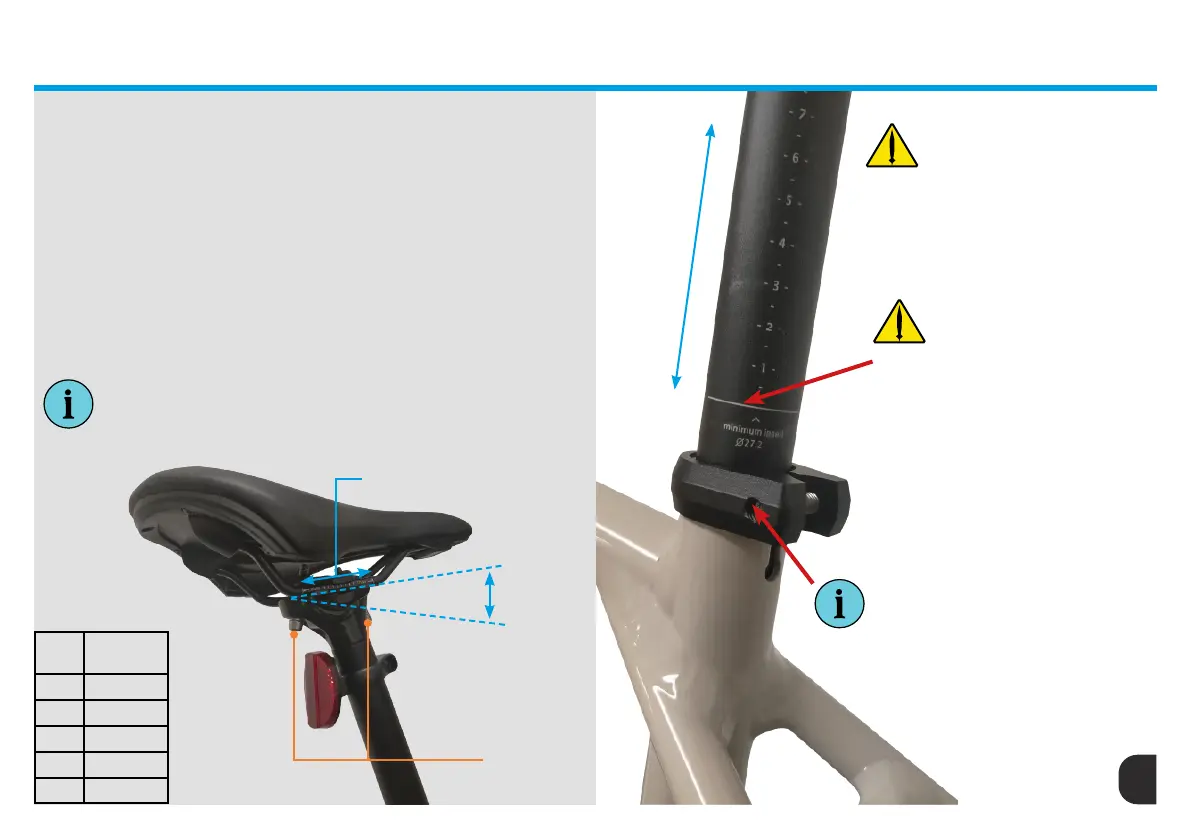
WARNING - Do not exceed the
minimum seat-post insertion details
indicated on the main body of the
seat-tube. Failure to correctly install
and adjust your seat-post can lead
to mechanical failure of the post
or frame. If there is any confusion
regarding your seat-post insertion
markings please contact your Whyte
Retailer.
INFO: Saddle angle and position can be adjusted to suit riders
preferred position. Using a 5mm Allen Key loosen the two saddle
bolts pictured below. When the desired position/angle has been
achieved, re-tighten bolts to a maximum torque setting of 10Nm.
WARNING - Before every ride, check
and conrm the seat-post does not
slip in the frame. Check and conrm
the saddle rails do not slip in the seat-
post clamp.
If tting or adjustment is required please consult the seat-post
manufacturers manuals. Follow the installation instructions closely! Pay
attention to specied torques and proper tools needed.
Do not exceed the minimum insertion line. This can cause the post and/
or your frame to fail. If you are not comfortable with the installation,
set-up or use of your Seat-Post, please contact your local Whyte Bikes
Retailer.
For optimal performance and maximum life of your seat-post, be sure
to follow the maintenance schedule outlined by the manufacturer. After
a crash, accident or if you suspect possible damage, have the post
inspected by a professional bike mechanic.
Adjusting Seat Post Height
Using a 5mm Allen Key loosen the
seat-clamp bolt. Slide the seat post
up or down to desired height. Fix seat
post in position by tightening the
seat clamp bolt to a maximum torque
setting of 5Nm.
Frame
Size
Max. Insertion
Depth (mm)
XS 180
S 200
M 220
L 250
XL 280
Saddle
Angle
Min. - Max. Saddle
Insertion Depths
Saddle
Bolts
Min. - Max.
Rail Position
SEAT POST & SADDLE


 To Next Page