Rear Wheel Installation.
Please note your Whyte bike will come fully built. If maintenance to your wheel is required
these steps are here to help. Maintenance may be required for cleaning, replacement
brake pads, replacement brake disc, or a new tyre. To remove the rear wheel follow these
instructions in reverse order. If you have any doubt please contact your Whyte dealer for
further advice.
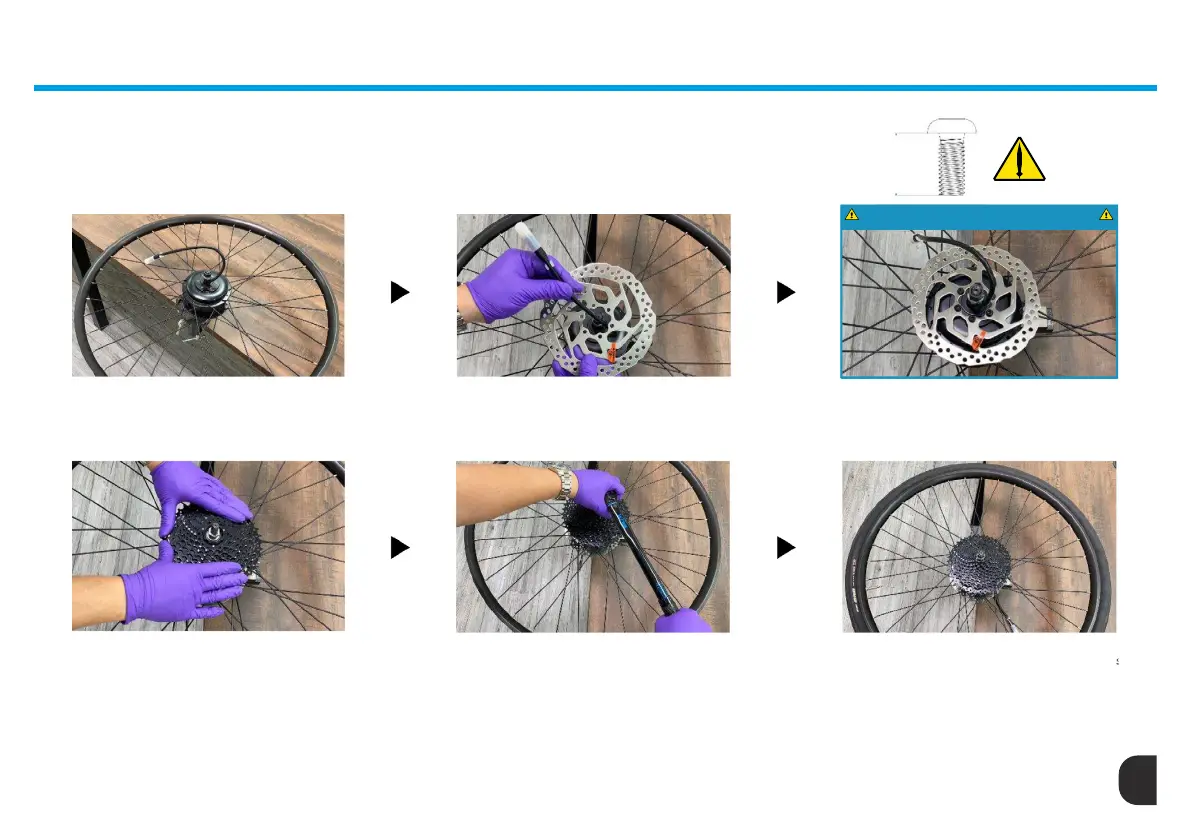
MIN. 8mm
MAX. 10mm
Step 1
Secure the rear hub motor to a stable
mount cable side up.
Step 2
Before installing the disc rotor, ensure the
motor cable passes through the centre of
the rotor
Step 3
Using a T25 Torx wrench tighten the M5
rotor screws equally to 4Nm.
Step 4
Flip the wheel over to the opposite
side and re-secure the wheel in the
mount. The hub body uses a Shimano
HG interface. Connect the cassette
following Shimano’s instructions. https://
si.shimano.com/en/pdfs/dm/RACS001/
DM-RACS001-03-ENG.pdf
Step 5
After tting the cassette, Use an a torque
wrench and secure the cassette to a
value of 40Nm
Step 6
Once your tyre has been tted to the rim
the wheel is ready to be installed. Please
see tyre manufacturers manuals for
correct installation.
49
ATTENTION - Use specied screws
RHEO 2 & 3 - REAR WHEEL INSTALL & REMOVAL
 Loading...