48
STEP 1
STEP 2STEP 3
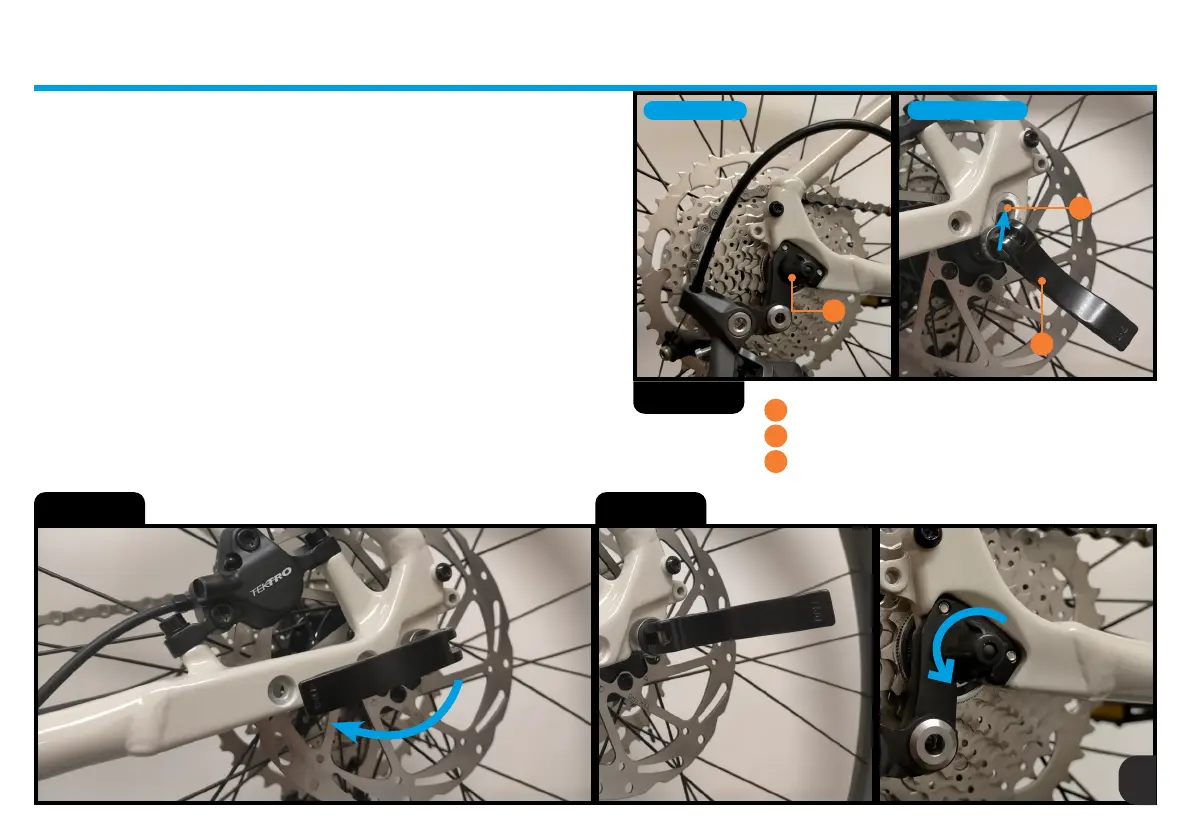
STEP 1 - Locate the rear wheel so that the disc rotor aligns to the centre of
the brake calliper. Ensure the rear cassette is positioned above the dérailleur
maintaining the correct chain path. Slide the wheel into the frame Drop Outs
(3). Insert the quick release axle through from the non-drive side of the hub,
With the lever (2) in the open position and the Adjusting Nut (1) removed.
Consult your Whyte retailer for further assistance.
STEP 2 - Push and hold the lever (2) cam and nut against the non-drive side
dropout. Thread the adjusting nut (1) onto the axle by hand until it contacts
the dropout (3). The adjusting nut must be threaded clockwise a minimum of
four full turns on the axle.
STEP 3 - Close the lever toward the rear of the bicycle, parallel to the ground.
Note: Align the lever with the curved surface of the cam bushing. Clamping
force is sufcient if the lever leaves an imprint on your hand and the adjusting
nut is engaged with at least 4 threads on the axle. To increase clamping force,
open the lever and turn the adjusting nut clockwise. Close the lever to recheck
clamping force. Repeat until the clamping force is sufcient, then close the
lever. If further assistance is required, consult your Whyte retailer.
Drive Side Non-Drive Side
1
2
3
1
2
3
Adjusting Nut
Lever
Drop Out
CLOSED POSITION
OPEN POSITION
RHEO 1 - REAR WHEEL INSTALL & REMOVAL
 Loading...