Installation
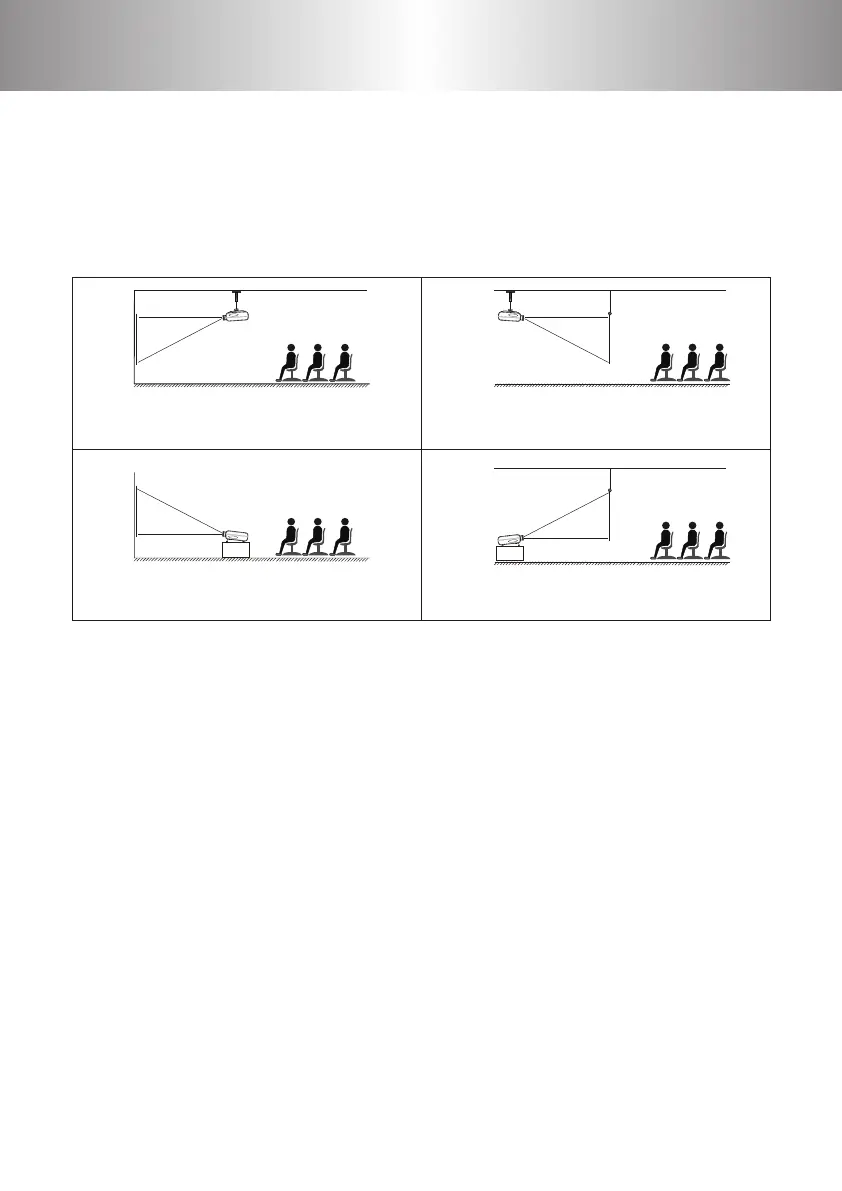
Installation Method
1.Front projection Ceiling mount.
3. Front projection Table mount.
2. Rear projection Ceiling mount.
4. Rear projection Table mount.
Attention:
1 2 3 4
5 6 7 8
9 10 11 12
13 14 15 16
17 18 19 20
21
22 23 24 25
26 27 28 29
30 31 32 33
34 35 36 37
38 39 40 41
42 43
44 45 46
47 48 49
50 51 52 53
54 55 56 57
58 59 60 61
62 63
64 65 66 67
68 69 70 71
72 73 74 75
76 77
Contact a professional service technician to mount this projector to a
ceiling. Follow the instruction below for the correct projector positions:
1. The projector might damage beyond repair when it is incorrectly mounted on the
ceiling or when it is incorrectly installed on a surface or installed on an incorrect surface.
It may also inict damage to people nearby.
2. Please do not install the projector with power to avoid electricshock and electrical
faults.
3. The sharpness of the screen might be interrupted when the projector is being used in
a dusty, wet, moist or smoke lled environment. The projector might malfunction in a
moist or wet environment.
4. Take care of the sucient ventilation around the projector. Otherwise this projector
might overheat and cause life threatening situations.
5. The rst operation of the projector may cause an unclear image, Please refer to the
image adjustment for help.
 Loading...