14
For the Installer
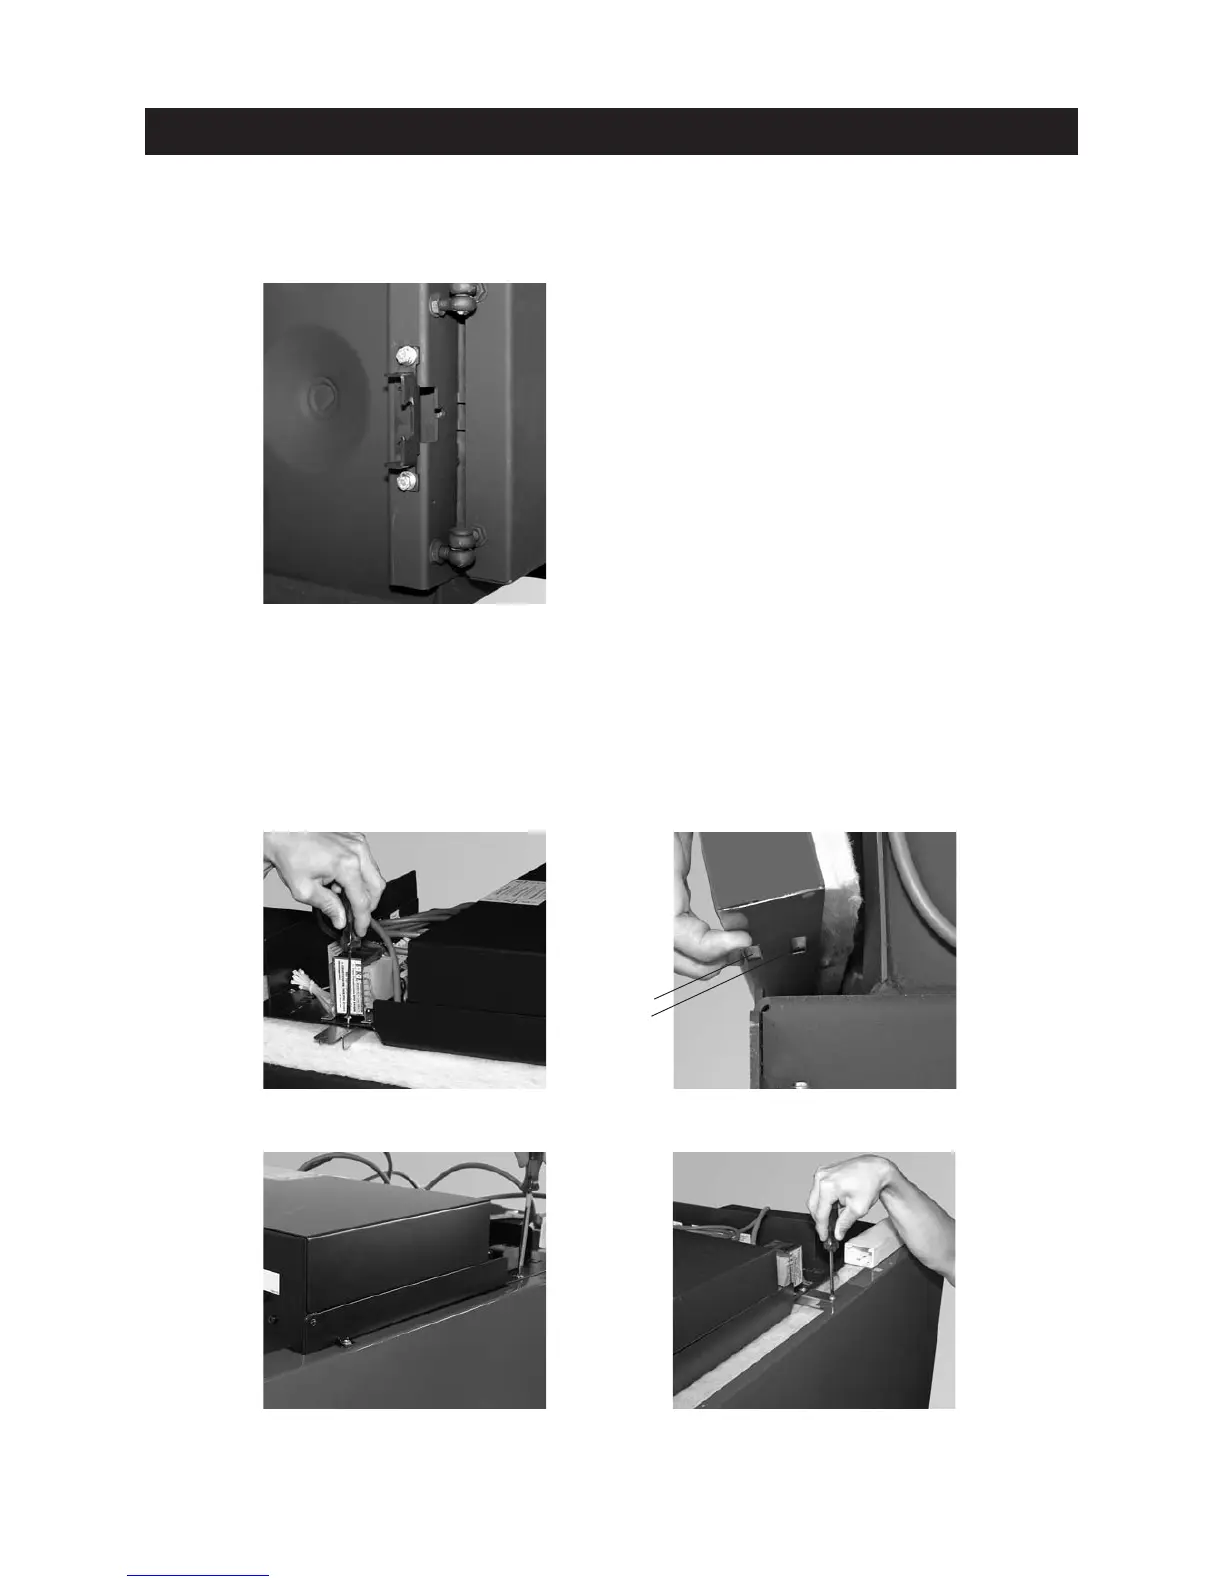
– Only for LogWIN 360 – 500: Slide connecting bracket cladding under control panel and secure to control panel
with 2 screws – Fig. 15.
– Fit side walls; depending on boiler model, at bottom adjust at base in cuttings (Fig. 18) and at top screw
onto control panel or connecting bracket – Figs. 16, 17, 18.
Fig. 17 Screwing down LogWIN 180–300 side
walls with control panel in four places
Fig. 16 Hooking in side panels at the bot-
tom
Fig. 18 Screwing down LogWIN 360, 500 side walls
with connecting bracket in two places
Fig. 15 Sliding connecting bracket under control
panel and screwing on in two places
– Screw both brackets for the cladding door hinges (different hole spacing) onto the boiler door rail at the top
and bottom – Fig. 14.
Note:The brackets for the cladding door can either be screwed on for a door catch on the left or right.
Cutting for LWP
180–300
LWP 360, 500
Fig. 14 Fitting brackets for door hinge