Maintenance2722−1/A2
RT-flex58T-E
Winterthur Gas & Diesel Ltd.
2/ 12
2. Checking an injection valve
Before commissioning the instructions and directions of the test bench manufac-
turer must be observed.
From time to time check the pressure gauges of the test bench with a master
pressure gauge and adjust them if necessary.
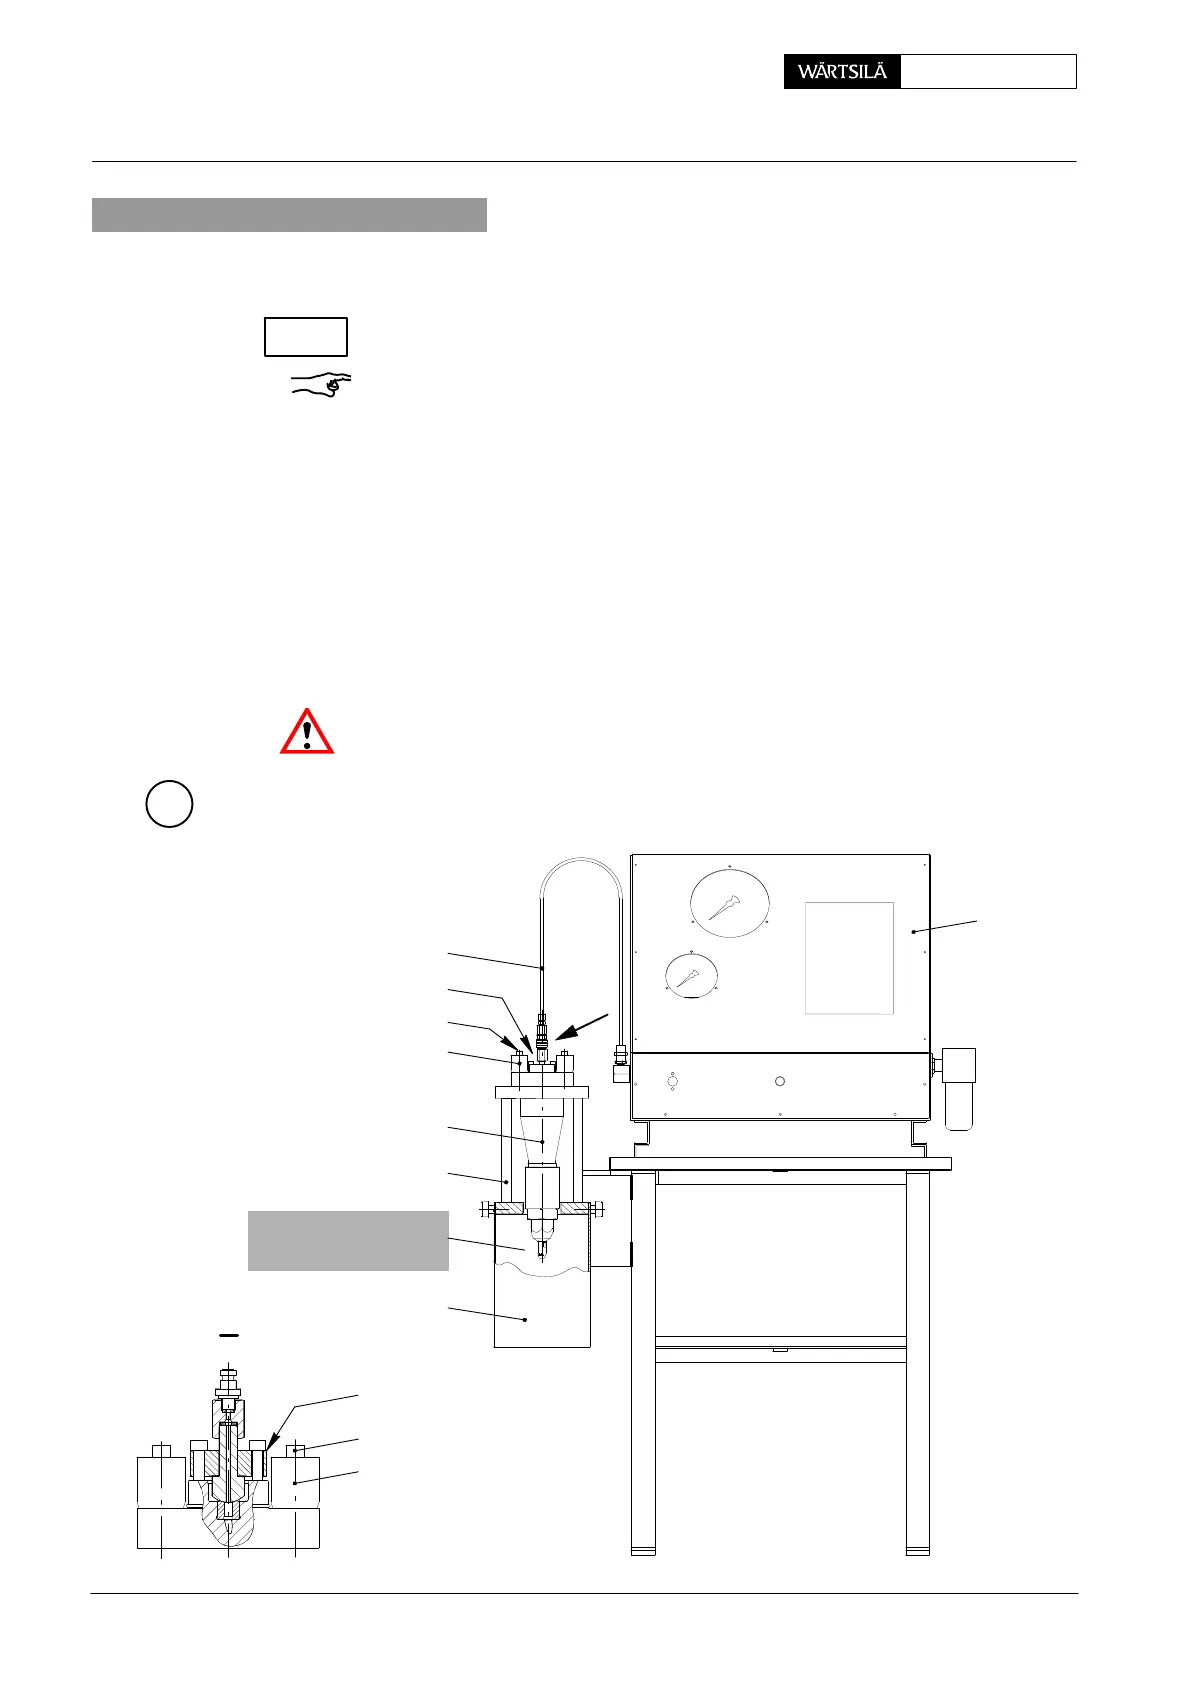
Remark: The work station must be clean; welding and grinding should not be done
nearby! Moreover, the support must be removed from the valve holder when
placing the injection valve with FAST (Fig. ’A’).
⇒ Remove combustion residues and clean nozzle tip externally with a brass
wire brush.
⇒ Place injection valve 1 with nozzle tip pointing downwards into valve holder
94273 and fasten it with Allen screws 2 and spring cages 19.
⇒ Tighten HP hose 94275 to connecting piece 94272B.
⇒ Start the test bench following the proper manufacturer’s instructions.
⇒ Bring the injection valve to spray with a few short pump jerks, and then
observe at what pressure the injection valve opens, applying slow, equal
pump jerks.
Danger of injuries! Never hold fingers or hands directly before the spray holes of
the nozzle tip!
A
94275
94272
2
19
1
94273
20
94272B
WCH01205
017.670/08
I
I
94272B
19
2
SUPPORT REMOVED
FOR INJECTION VALVE
WITH FAST
013.488/05
2013-08 / ER-3
Injection Valve: Checking, Dismantling, Assembling and Adjusting Injection Valve with FAST
CHECK