1145200 Upgrading from Original SmartPAC or SmartPAC 2 to SmartPAC PRO
18 Instruction Sheet
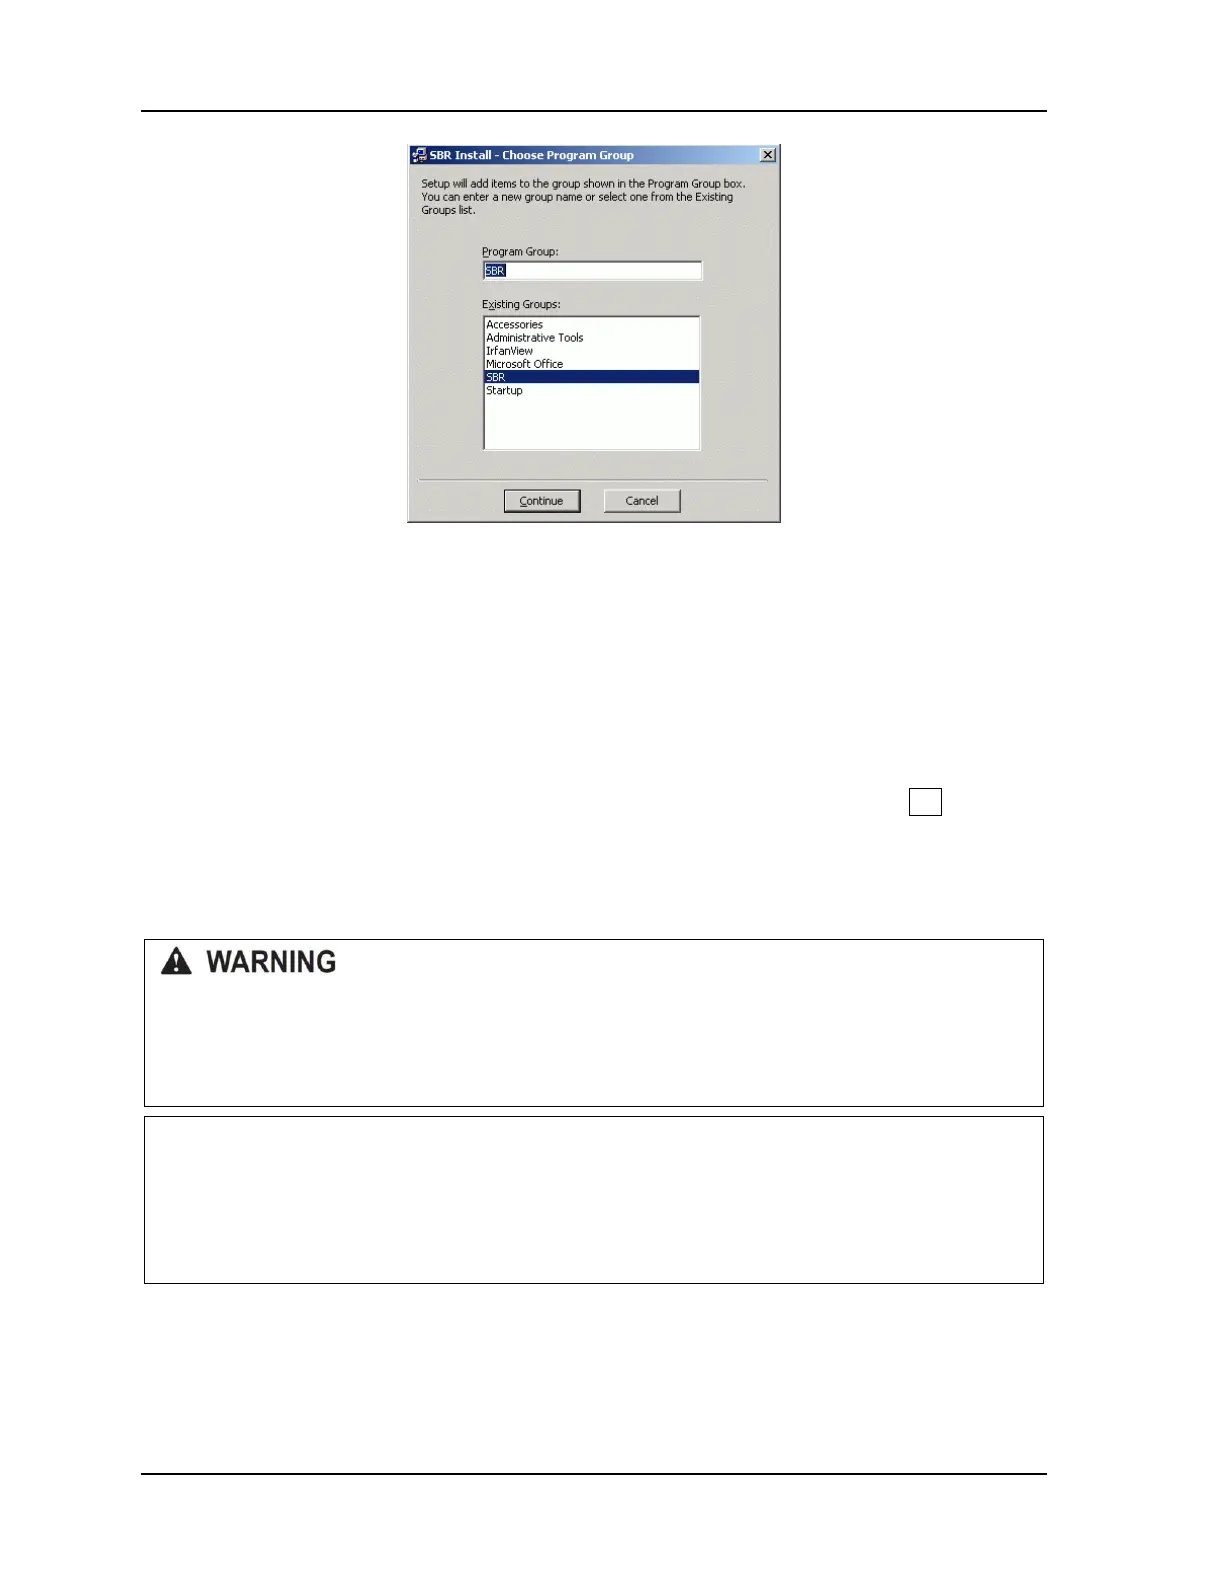
Figure A - 2. SBR Install – Choose Program Group Screen
5. Click on Continue if you want SBR installed in the group shown in the “Program Group:”
window (“SBR” is the default entry).
If you want to specify a different Program Group name, select an item in the “Existing Groups:”
window by clicking on it, or type a new entry in the “Program Group:” window, then click on
Continue.
6. A screen displays briefly, showing the progress of the installation, followed by a screen
displaying the message “SBR Install Setup was completed successfully.” Click on OK to return
to your desktop.
Connecting Your Laptop to SmartPAC
ELECTRIC SHOCK HAZARD
Before making any wiring connections turn off and disconnect power from the SmartPAC you are
backing up and from the machinery it is connected to.
Failure to comply with these instructions could result in death or serious injury.
CAUTION
DAMAGE TO BOARD FROM STATIC DISCHARGE
Ground yourself before touching circuit boards or chips by touching a large metal object such as
the press. Static electricity can destroy electronic components.
Failure to comply with these instructions could result in property damage.
To establish communications between your laptop and the SmartPAC you wish to back up, you need
to connect the computer’s serial port to the communications port on the SmartPAC. The
communications port is labelled TB103 on original SmartPAC, TB104 on SmartPAC 2. To make the
connection, use an SBR cable (Wintriss part #4199105) with a 9-pin DB-9 female connector at one
 Loading...