SETUP & OPERATION
Planning / Thicknessing
EGdoc052521 3-7
3
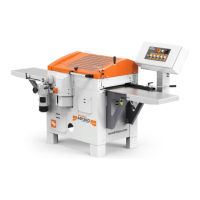
SETTING THE MACHINE FOR PLANING/THICKNESSING
The top cutter is fix
ed to the housing and hung at both ends. Two planing knives are mounted in two
cutter sockets (planer knife 410 mm HSS).
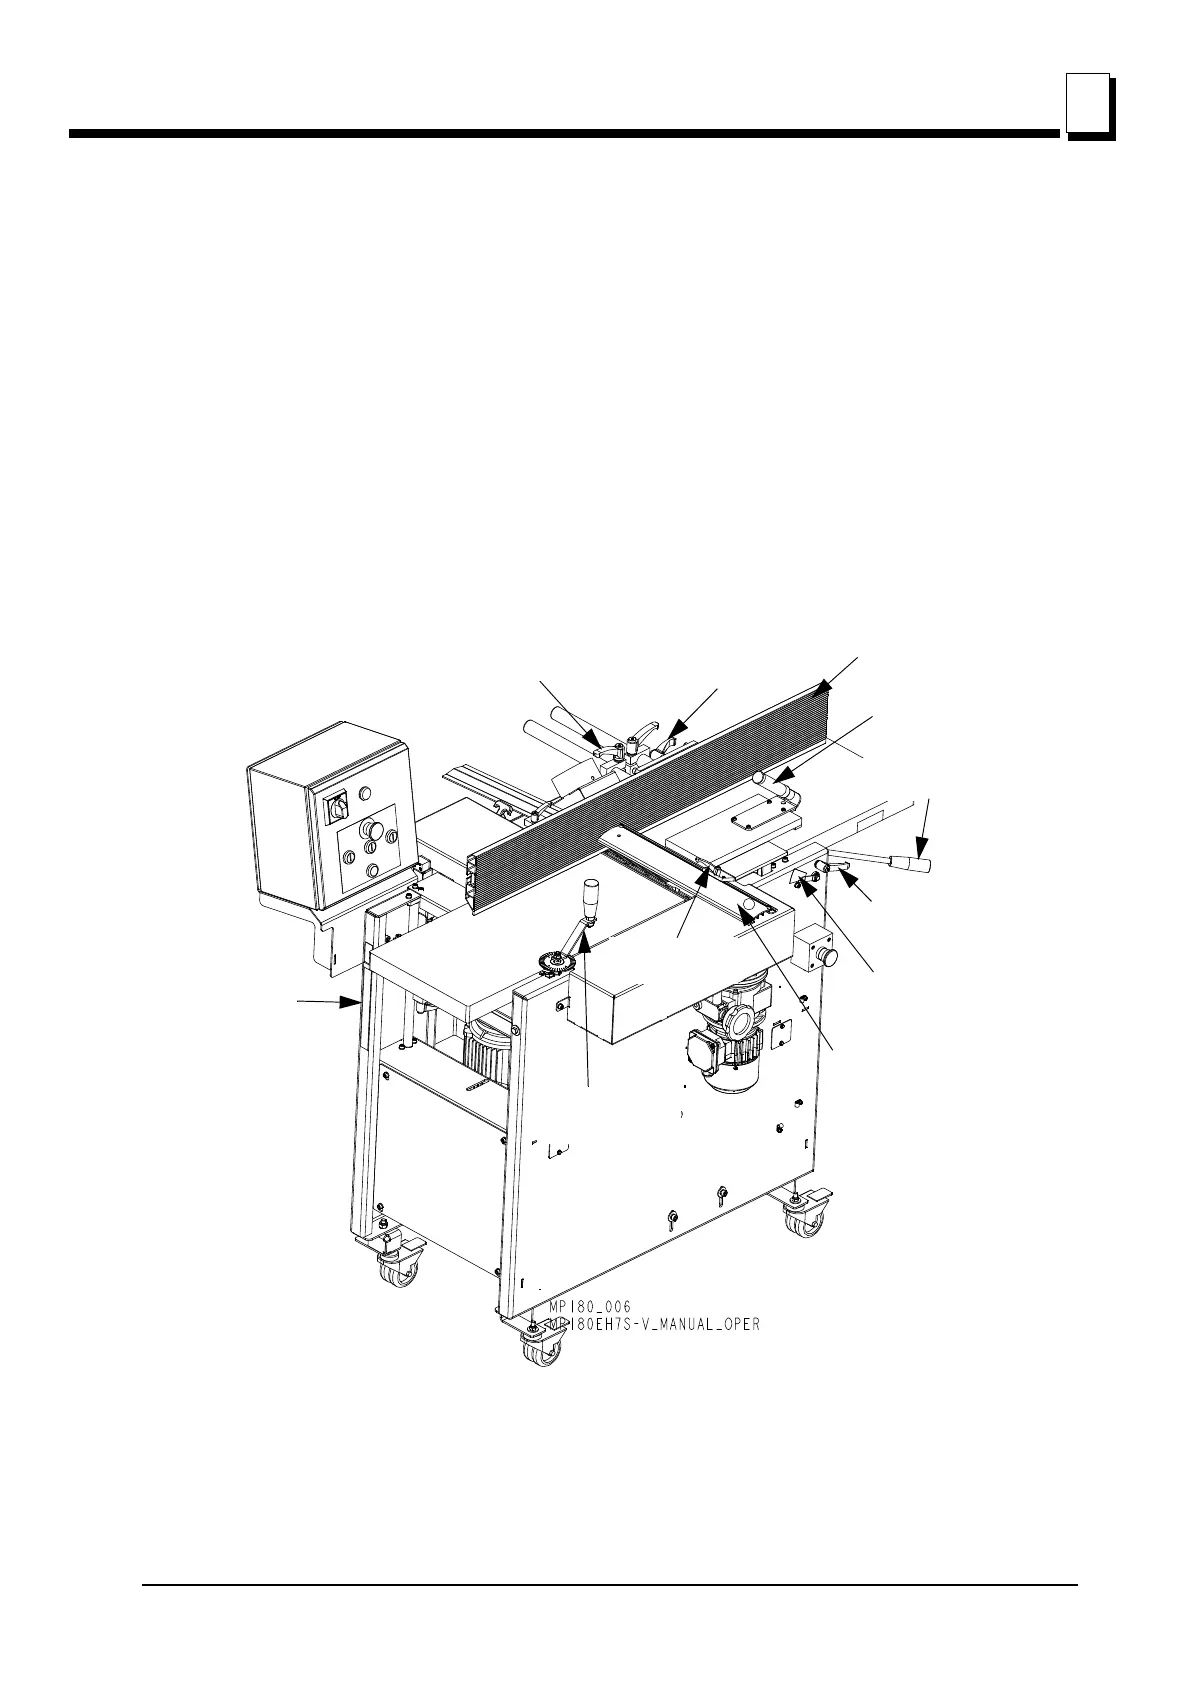
The planing thickness is adjusted with the planing (top) table handle (A). After performing the
adjustment, lock the table position with the locking handle (B). The set thickness can be read
on the scale (C). Set the protective guard (E) so it covers the workpiece from the upper side (for
the workpiece height up to 75mm). When angle-planing (or the workpiece is higher than
75mm), the protective guard should be completely lowered and set that the workpiece fit
between the guard (E) and the fence (G). The planing angle (0-45 degrees) can be adjusted
after loosening the angle locking handle (H). The fence position can be changed after
loosening the fence locking handles (I).
See figure 3-6.
FIG. 3-6 MP180
Upper Table Height
Scale (C)
Upper Table Height
Adjustment Handle(A)
Upper Table Locking
Handle (B)
Protective Guard (E)
Pusher (D)
Fence (G)
Guard Locking
Handle (F)
Angle Locking
Handle (H)
Fence Locking
Handles (I)
Lower Table
Height Adjusting
Handle (J)
Lower Table
Height Scale (K)
 Loading...