21PN-52886 (4/97)
Leakage Repair
Recommended sealant for gearbox repair is Perma-
tex Aviation 3D Form-A-Gasket
or equivalent.
Leakage can occur at the vertical or horizontal
gaskets and shaft seals. Leakage at the horizontal
gasket or seal can be repaired without removing the
gearbox from the cutter.
Horizontal Shaft Leak Repair
(Figure 18)
Disconnect and remove driveline from gearbox.
Remove drive shield.
Remove vent plug (25) and siphon gear lube from
housing through this opening.
If leak occurred at the horizontal O-ring, remove cap
(6) and snap ring (17). Replace O-ring with new one,
install cap (6) and install snap ring (17).
If leak occurred at the horizontal seal (20), remove
and replace the old seal. Refer to seal installation.
Fill gearbox with SAE 80W or 90W gear lube until it
runs out the level plug (18).
Install drive shield and driveline and place unit in
service.
Seal Installation
(Figure 16 & Figure 17)
Proper seal installation is important. An improperly
installed seal will leak.
Clean area in housing where seal outer diameter
seats and apply a thin coat of Permatex.
Inspect area of shaft where seal seats and remove
any burrs or nicks with emery cloth.
Place seal (spring-loaded lip toward housing) square-
ly on cap. Select a piece of pipe or tubing with an OD
that will set on outside edge of seal but will clear the
housing. Tubing with an OD that is too small will bow
seal cage and ruin seal.
Lubricate gear shaft and seal lips.
Carefully press seal into housing, preventing distor-
tion to the metal seal cage. Vertical seal should be
recessed 0.275” in housing. Horizontal seal should be
pressed flush with outside of housing.
Distortion to seal cage or damage to seal lip will cause
seal to leak.
Remove and replace any seal damaged in installa-
tion.
CD1092
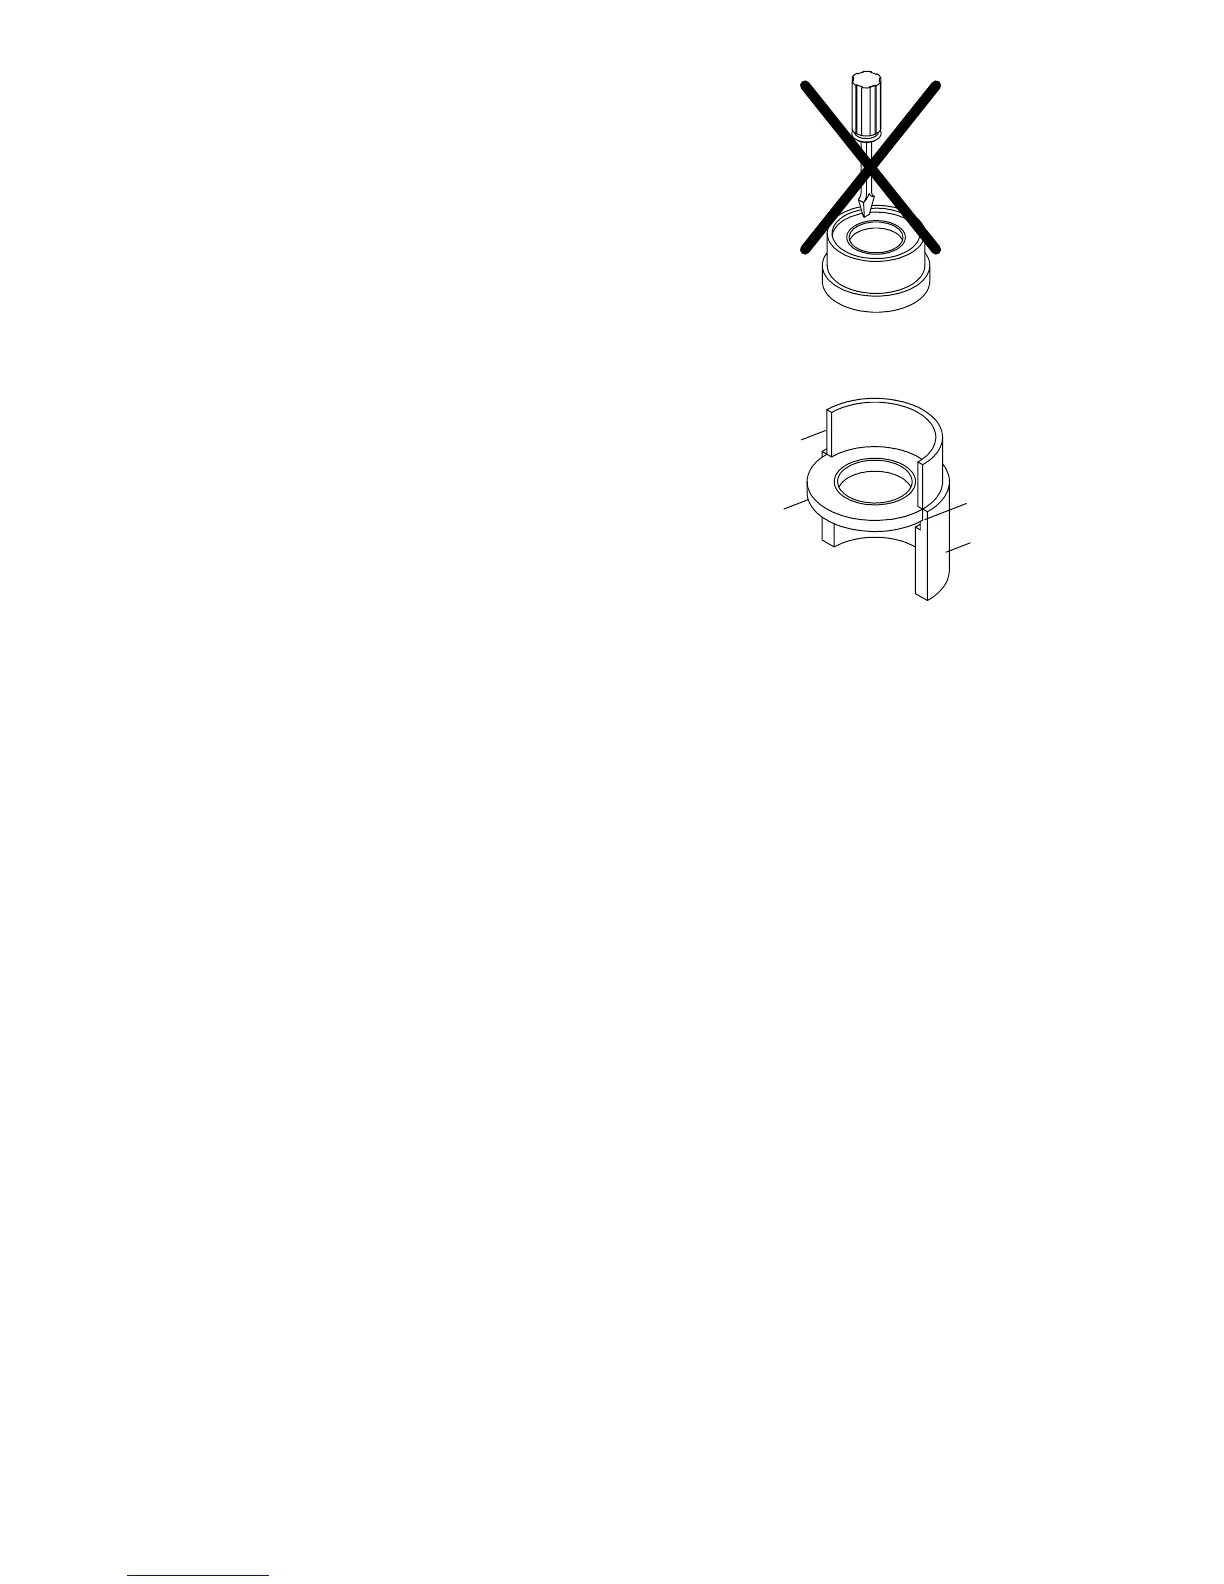
Figure 16. Incorrect Seal Installation
CD1094
1
2
3
4
Pipe or tube must press
at outer edge of seal
1. Seal
2. Pipe or tube
3. Seal seat
4. Casting
Figure 17. Seal Installation
Removing Gearbox from Mower
(Figure 18)
Remove belt shields.
Remove driveline from gearbox input shaft. Remove
drive shield.
Remove belt from gearbox sheave.
Remove gearstand from mower.
Remove gearbox sheave from gearbox by removing
cotter pin and castle nut.
Remove gearbox from gearbox stand.
Gearbox Disassembly
(Figure 18)
Remove gearbox from mower.
Remove 3/8” plug (18) from side of gearbox and pour
out gear oil.
Remove internal snap ring (17) holding front cover (6)
using two screwdrivers. Remove cap (25).
Support gearbox in hand press and push on input
shaft (3) to remove front cover (6), and bearing (8).
Remove O-ring (21) from housing. Remove gear (1)
and rectangular key (13) from horizontal input shaft
(3).