15
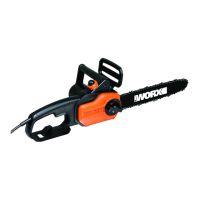
Cordless Chainsaw
EN
TENSIONING CHAIN (See Fig. E1, E2)
NOTE: New saw chains will stretch. Check the chain tension
frequently when first used and tighten when the chain
becomes loose around the guide bar.
WARNING:
Removing the battery pack before adjusting saw chain
tension.
Cutting edges on chain are sharp. Use protective gloves
when handling chain.
Maintain proper chain tension always. A loose chain will
increase the risk of kickback. A loose chain may jump
out of guide bar groove. This may injure operator and
damage chain. A loose chain will cause chain, bar, and
sprocket to wear rapidly.
1. Place the Chainsaw on any suitable flat surface.
2. Turn the chain tensioning knob clockwise until it is hand
tight.
NOTE: The tension is automatically increased while the
chain tensioning knob is being turned in a clockwise
direction. The built-in ratchet mechanism prevents the
chain tension from loosening.
3. Tilt the saw forward (See E1) where the guide bar tip is
pushed in an downward direction. This will remove slack
from the chain.
4. Fully tighten the chain tensioning knob by turning it
clockwise.
5. Double check the tension set by the automatic chain
tensioning knob. The correct chain tension is reached
when the chain can be raised approx. Half the drivelink
depth from the guide bar in the center. This should be
done by using one hand to raise the chain against the
weight of the machine. (See Fig. E2)
NOTE: The chain is properly tensioned when it can be
lifted off of the Guide Bar and the drivelink is within the
rail of the Guide Bar.
NOTE: The chain will stretch while cutting and lose
proper tension. When the chain becomes loose,
completely unscrew the chain tensioning knob or turn
the knob around three full turns in a counter-clockwise
direction, then retighten the chain tensioning knob to
properly reset the chain tension by repeating Steps 1-4
listed above.
LUBRICATION (See Fig. F)
IMPORTANT The Chainsaw is not filled with oil.
It is essential to fill with oil before use. Never
operate the Chainsaw without chain oil or at an
empty oil tank level, as this will result in extensive
damage to the product.
NOTE Chain life and cutting capacity depend
on optimum lubrication. Therefore, the chain is
automatically oiled during operation.
FILLING OIL TANK
WARNING: Removing the battery pack before
filling the oil tank.
1. Set Chainsaw on any suitable surface with oil filler cap
facing upward.
2. Clean area around the oil filler cap with cloth and
unscrew the cap by turning it counter clockwise.
3. Add bar and chain oil until tank is full.
4. Avoid dirt or debris entering oil tank, refit oil filler cap and
tighten by turning clockwise until hand tight.
IMPORTANT To allow venting of the oil tank,
small breather channels are provided between
the oil filler cap and the strainer, to prevent
leakage, and ensure machine is left in a horizontal
position when not in use.
It is important to use bar and chain lubricant (not
provided) that is formulated to perform over a wide
temperature range with no dilution required. This can
be found at the location where you purchased this saw
or your local hardware store. Do not use dirty, used or
otherwise contaminated oils. Damage may occur to
the bar or chain.Use of non approved oil will void the
warranty.
Do not swallow. If swallowed, call a physician
immediately. Keep out of reach of children. Store away
from heat or open flame.
CHECKING THE AUTOMATIC OILER
Proper functioning of the automatic oiler can be checked
by running the Chainsaw and pointing the tip of the
guide chain bar towards a piece of cardboard or paper on
the ground. If an increasing oil pattern develops on the
cardboard, the automatic oiler is operating fine. If there is
no oil pattern, despite a full oil reservoir, contact
WorxNITRO
customer service agent or
WorxNITRO
approved service
agent.
CAUTION Do not touch the ground with the
chain. Ensure safety clearance of 40cm.
OPERATION
1. BEFORE USING YOUR CORDLESS TOOL
WARNING! The charger and battery pack are
specially designed to work together so do not
attempt to use any other devices. Never insert or
allow metallic objects into your charger or battery pack
connections because of an electrical failure and hazard will
occur.
NOTE: Your battery pack is UNCHARGED and you must
charge once before use.
The battery charger supplied is matched to the Li-ion
battery installed in the machine. Do not use another battery
charger.
2. CHECKING THE BATTERY CHARGE CONDITION (See
Fig. G)
The battery level can be known from the battery indicator
light by pressing the button beside the lights.
NOTE Fig. G only applies for the battery pack with battery
indicator light.
3. CHARGING YOUR BATTERY PACK (See Fig. H)
The Li-ion battery is protected against deep discharging.
When the battery is empty, the machine is switched off by
means of a protective circuit. Each battery must be fully
charged before the first use.
In a warm environment or after heavy use, the battery pack