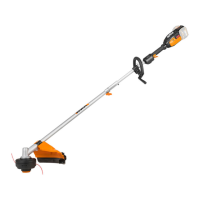
Attachment-Capable String Trimmer EN
15
BATTERY STATUS (See Fig. E5)
Before starting or after use, press the button beside
the power indicator light on the machine to check
the battery capacity. During operation, the battery
capacity will be indicated automatically by the battery
power indicator.
The indicator constantly senses and displays the
battery condition as follows.
For the machine with 2 battery packs with different
power, the power indicator light displays the battery
condition with the lower one of the two batteries.
Battery power
indicator status
Battery condition
Five green lights
(
) are
illuminated.
The two batteries are in a
highly charged condition.
Two, three or four
green lights are
illuminated.
The two batteries have a
remaining charge. The more
lights are illuminated, the
more battery capacity.
Only one green light
(
) is
illuminated.
At least one battery is
almost depleted and needs
to be charged.
No light is
illuminated.
At least one battery is not
fully installed or battery may
be defective.
Only one light is
flashing twice per
cycle.
At least one battery is
over discharged (please
refer to the battery charge
condition), please recharge
the two batteries at once
before use again or storage.
Only one light is
flashing three times
per cycle.
At least one battery is hot,
wait for them cool down
before start again.
Only one light is
flashing four times
per cycle.
The machine is over load.
Raise the cutting height or
push slowly.
OPERATION INSTRUCTIONS
WARNING! The charger and battery pack
are specially designed to work together so do
not attempt to use any other devices. Never insert or
allow metallic objects into your charger or battery
pack connections because of an electrical failure and
hazard will occur.
1. Bump-line feed system (See Fig. I)
The trimmer is equipped with a bump-line system.
Just bump the trimmer head while the machine is
running, new line will feed out.
2. Winding the trimmer line (See Fig. K1, K2)
Ensure the arrow indicator markings are aligned on the
bump-feed cap and trimmer head. Insert the replacement
line through the eyelet and feed it through the other side.
Ensure both ends of the line are even on each end of the
trimmer head (max 3m) and cut the line. Turn the dial
clockwise to wind the line around the spool until about
19cm remains on either side.
STORING YOUR GRASS
TRIMMER
Always remove the battery pack from
your trimmer after use.
To store your GRASS trimmer
The trimmer is provided with a hanging slot for
storing the trimmer on the wall. (See Fig. N)
Store in a dry place where the trimmer and battery
can be protected from damage.
MAINTENANCE
Always remove the battery pack from
your trimmer after use.
Always check the product prior to being used
for any damage.
After use, disconnect the battery from the tool and
check for damage.
Your power tool requires no additional lubrication
or maintenance. There are no user serviceable parts
in your power tool. Never use water or chemical
cleaners to clean your power tool. Wipe clean
with a dry cloth. Always store your power tool in
a dry room temperature location. Keep the motor
ventilation slots clean. Keep all working controls
free of dust.
FOR BATTERY TOOLS
The ambient temperature range for the use and
storage of tool and battery is 0°C-45°C (32°F-113°F).
The recommended ambient temperature range for
the charging system during charging is 0°C-40°C
(32°F-104°F).
ENVIRONMENTAL
PROTECTION
Waste electrical products must not be disposed
of with household waste. Please recycle where
facilities exist. Check with your local authorities
or retailer for recycling advice.

 Loading...