Mini-circular saw WX420
12
NOTE: If using the saw without a vacuum attached,
in some circumstances after lengthy operation, dust
can accumulate at the rear of the base and prevent
it from reaching full depth. You can prevent this by
occasionally shaking the dust out.
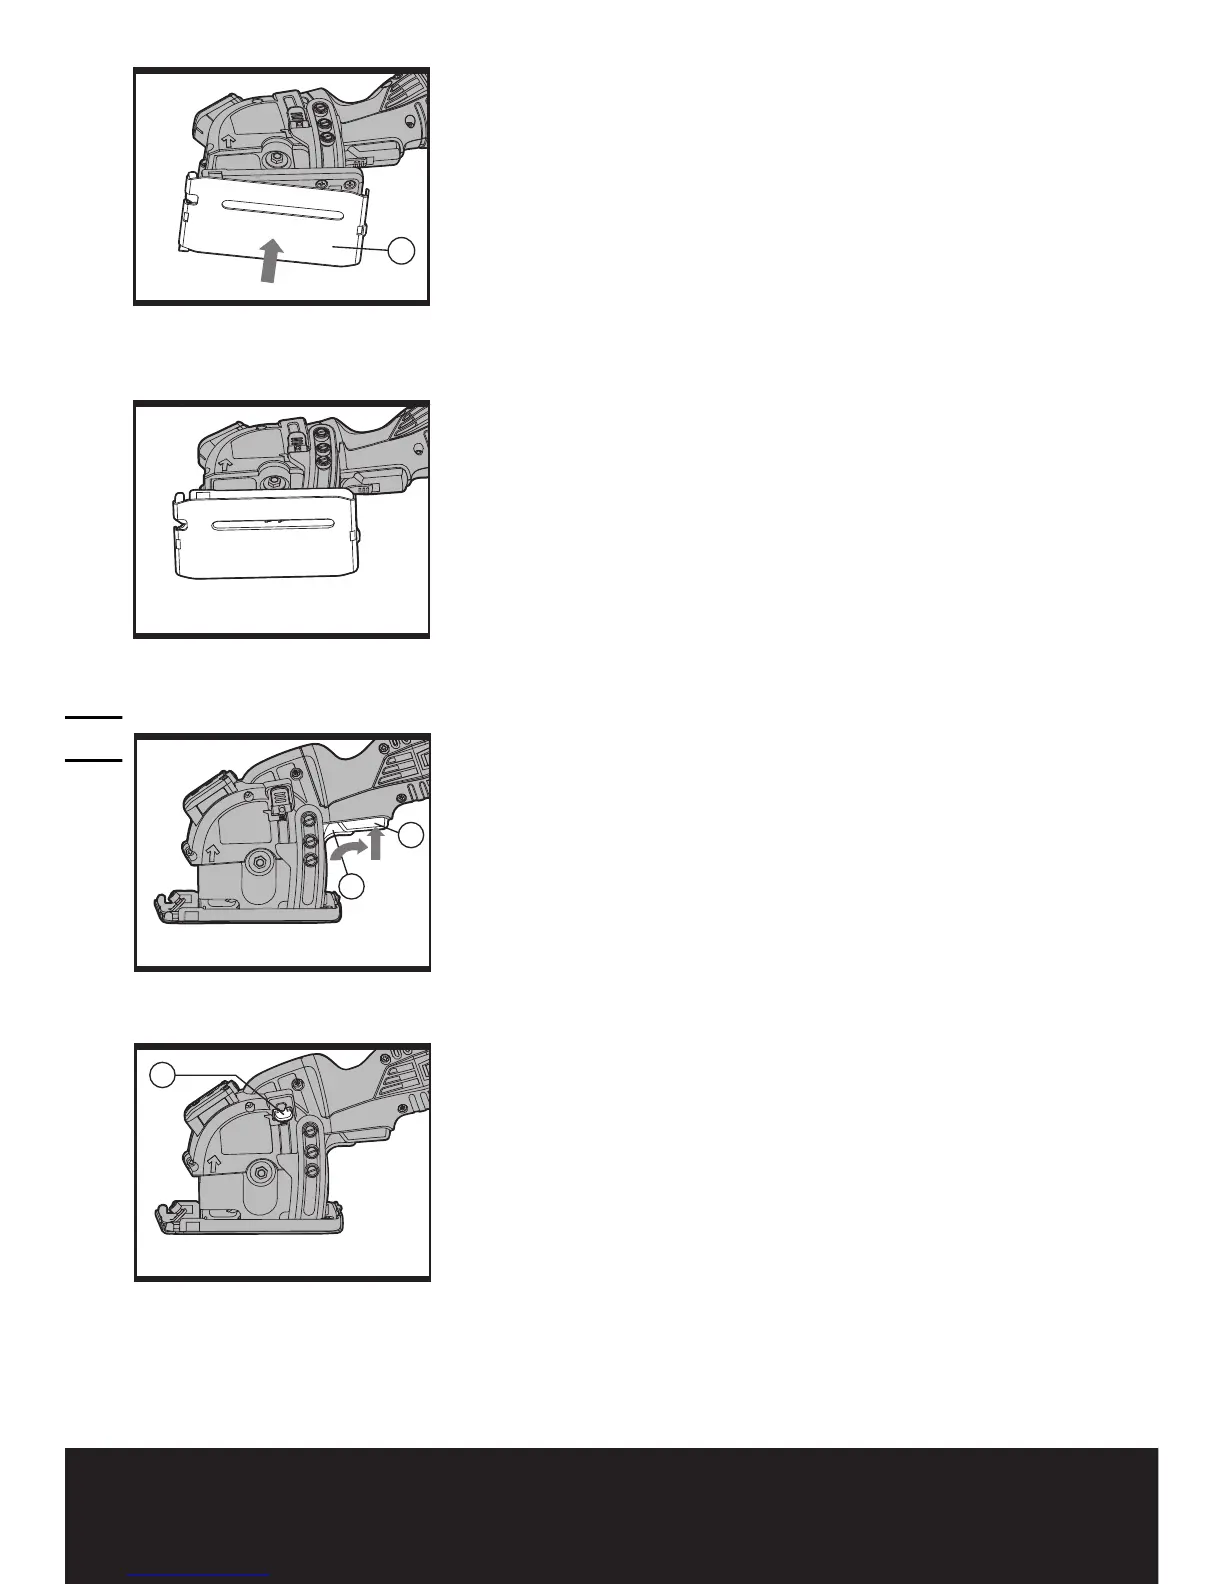
4. PLASTIC BASE PLATE COVER
(See Fig. F1, F2)
Your saw includes a plastic base plate cover (21). Attach
it to your saw’s base when you are cutting work pieces
that have delicate surfaces (finishes) such as vinyls,
plastics, fiberglass, laminate flooring and tiles that
could easily be scratched by the steel base.
oPeraTion
1. TRIGGER SWITCH (See Fig. G)
The on/off switch is locked off to prevent accidental
starting. In order to turn the machine on, depress and
hold the lock off switch (6), then depress the on/off
switch (1) and release the lock off switch. Your switch is
now on. To switch off, just release the on/off switch.
NOTE: When the machine is not in use, the lock off
switch rests against the blade guard in order to block
the plunge function and prevent the blade from being
exposed unnecessarily.
2. SET THE BLADE DEPTH
NOTE: The correct choice of cutting depth can improve
ease of cutting and cut quality.
Always use the minimum cut depth that is required for
your particular cut, which should just cut through the
material plus a small allowance e.g. 3 mm.
Excessive cutting depth increases splintering in wood,
chipping in tile and causes severe chatter in sheet steel
and aluminum (which can quickly blunt the blade).
Maximum depth can be used when cutting internal cut-
outs in wood as this reduces the overcutting required.
1) Determine the desired depth according to the
thickness of the material plus a blade allowance of
1/8" (3 mm).
2) Unlock the depth of cut adjustment and lock lever
(8). (See Fig. H1)
3) Slide the depth of cut indicator to the desired depth
of cut. Lock down the depth of cut adjustment and
lock lever (8). (See Fig. H2)
When plunge or pocket cutting into the middle (or
interior) of the work piece, through the narrow slot,
you can easily see the cutting mark you draw and the

 Loading...