FLEXCOMM 2000
(P-2000/C-2000/RT-2000)
Installation Manual
Page 14 of 56 Publication No. 150-049106
P-2000 Installation Manual Rev. F
Nov 2007
(4) Use only recommended wire sizes and wire type for interwiring. Wire sizes and wire type
are listed on the interwiring diagrams.
C. C-2000 Mechanical Installation
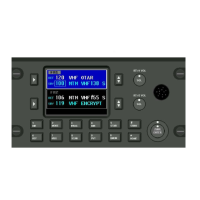
(1) Select the C-2000 mounting location. The LCD display’s vertical viewing angle is 10°
towards the 12 o’clock position and 30° towards the 6 o’clock position. It is best to locate
the C-2000 as high as possible on the front panel or far back on the center pedestal to take
advantage of the best vertical viewing angle. Insure that the unit will be easily accessible
and clearly visible to the operator.
The location should be free from excessive moisture, vibration, heat and noise generating
sources. The unit has standard Dzus mount dimensions as shown in Figure 2-1. Allow
adequate space and service loops for installation of cables and connectors.
(2) The installing agency will supply and fabricate all external cables. The connectors are
supplied separately and are listed in Section 1.F.
(3) The length and routing of the external cables must be carefrully studied and planned before
attempting actual installation. Avoid sharp bends and placing cables too close to other
aircraft cables.
(4) Use only recommended wire sizes and wire type for interwiring. Wire sizes and wire type
are listed on the interwiring diagrams.
D. RT-2000 Mechanical Installation
(1) Select the RT-2000 mounting location. The location should be free from excessive moisture,
vibration, heat and noise generating sources. The unit can be rigidly mounted. Allow at least
one inch of free air space around the top and rear of the unit and one-half inch along each
side. Allow adequate space for installation of cables and connectors.
(2) Refer to Figure 2-4 for the RT-2000 mounting dimensions.
(3) Mark, punch, and drill the mounting holes. Care must be taken to avoid damage to adjacent
equipment or cables.
(4) Secure the mounting tray firmly in place.
(5) Secure the RT-2000 to the mounting tray and connect all appropriate connectors taking care
to apply the correct RF connector to the desired transceiver.
These commodities, technology or software are controlled in accordance with the United States Export Administration Regulations, Export Classification
Control Number (ECCN) 7E994. When exporting, diversion contrary to U.S. law is prohibited.