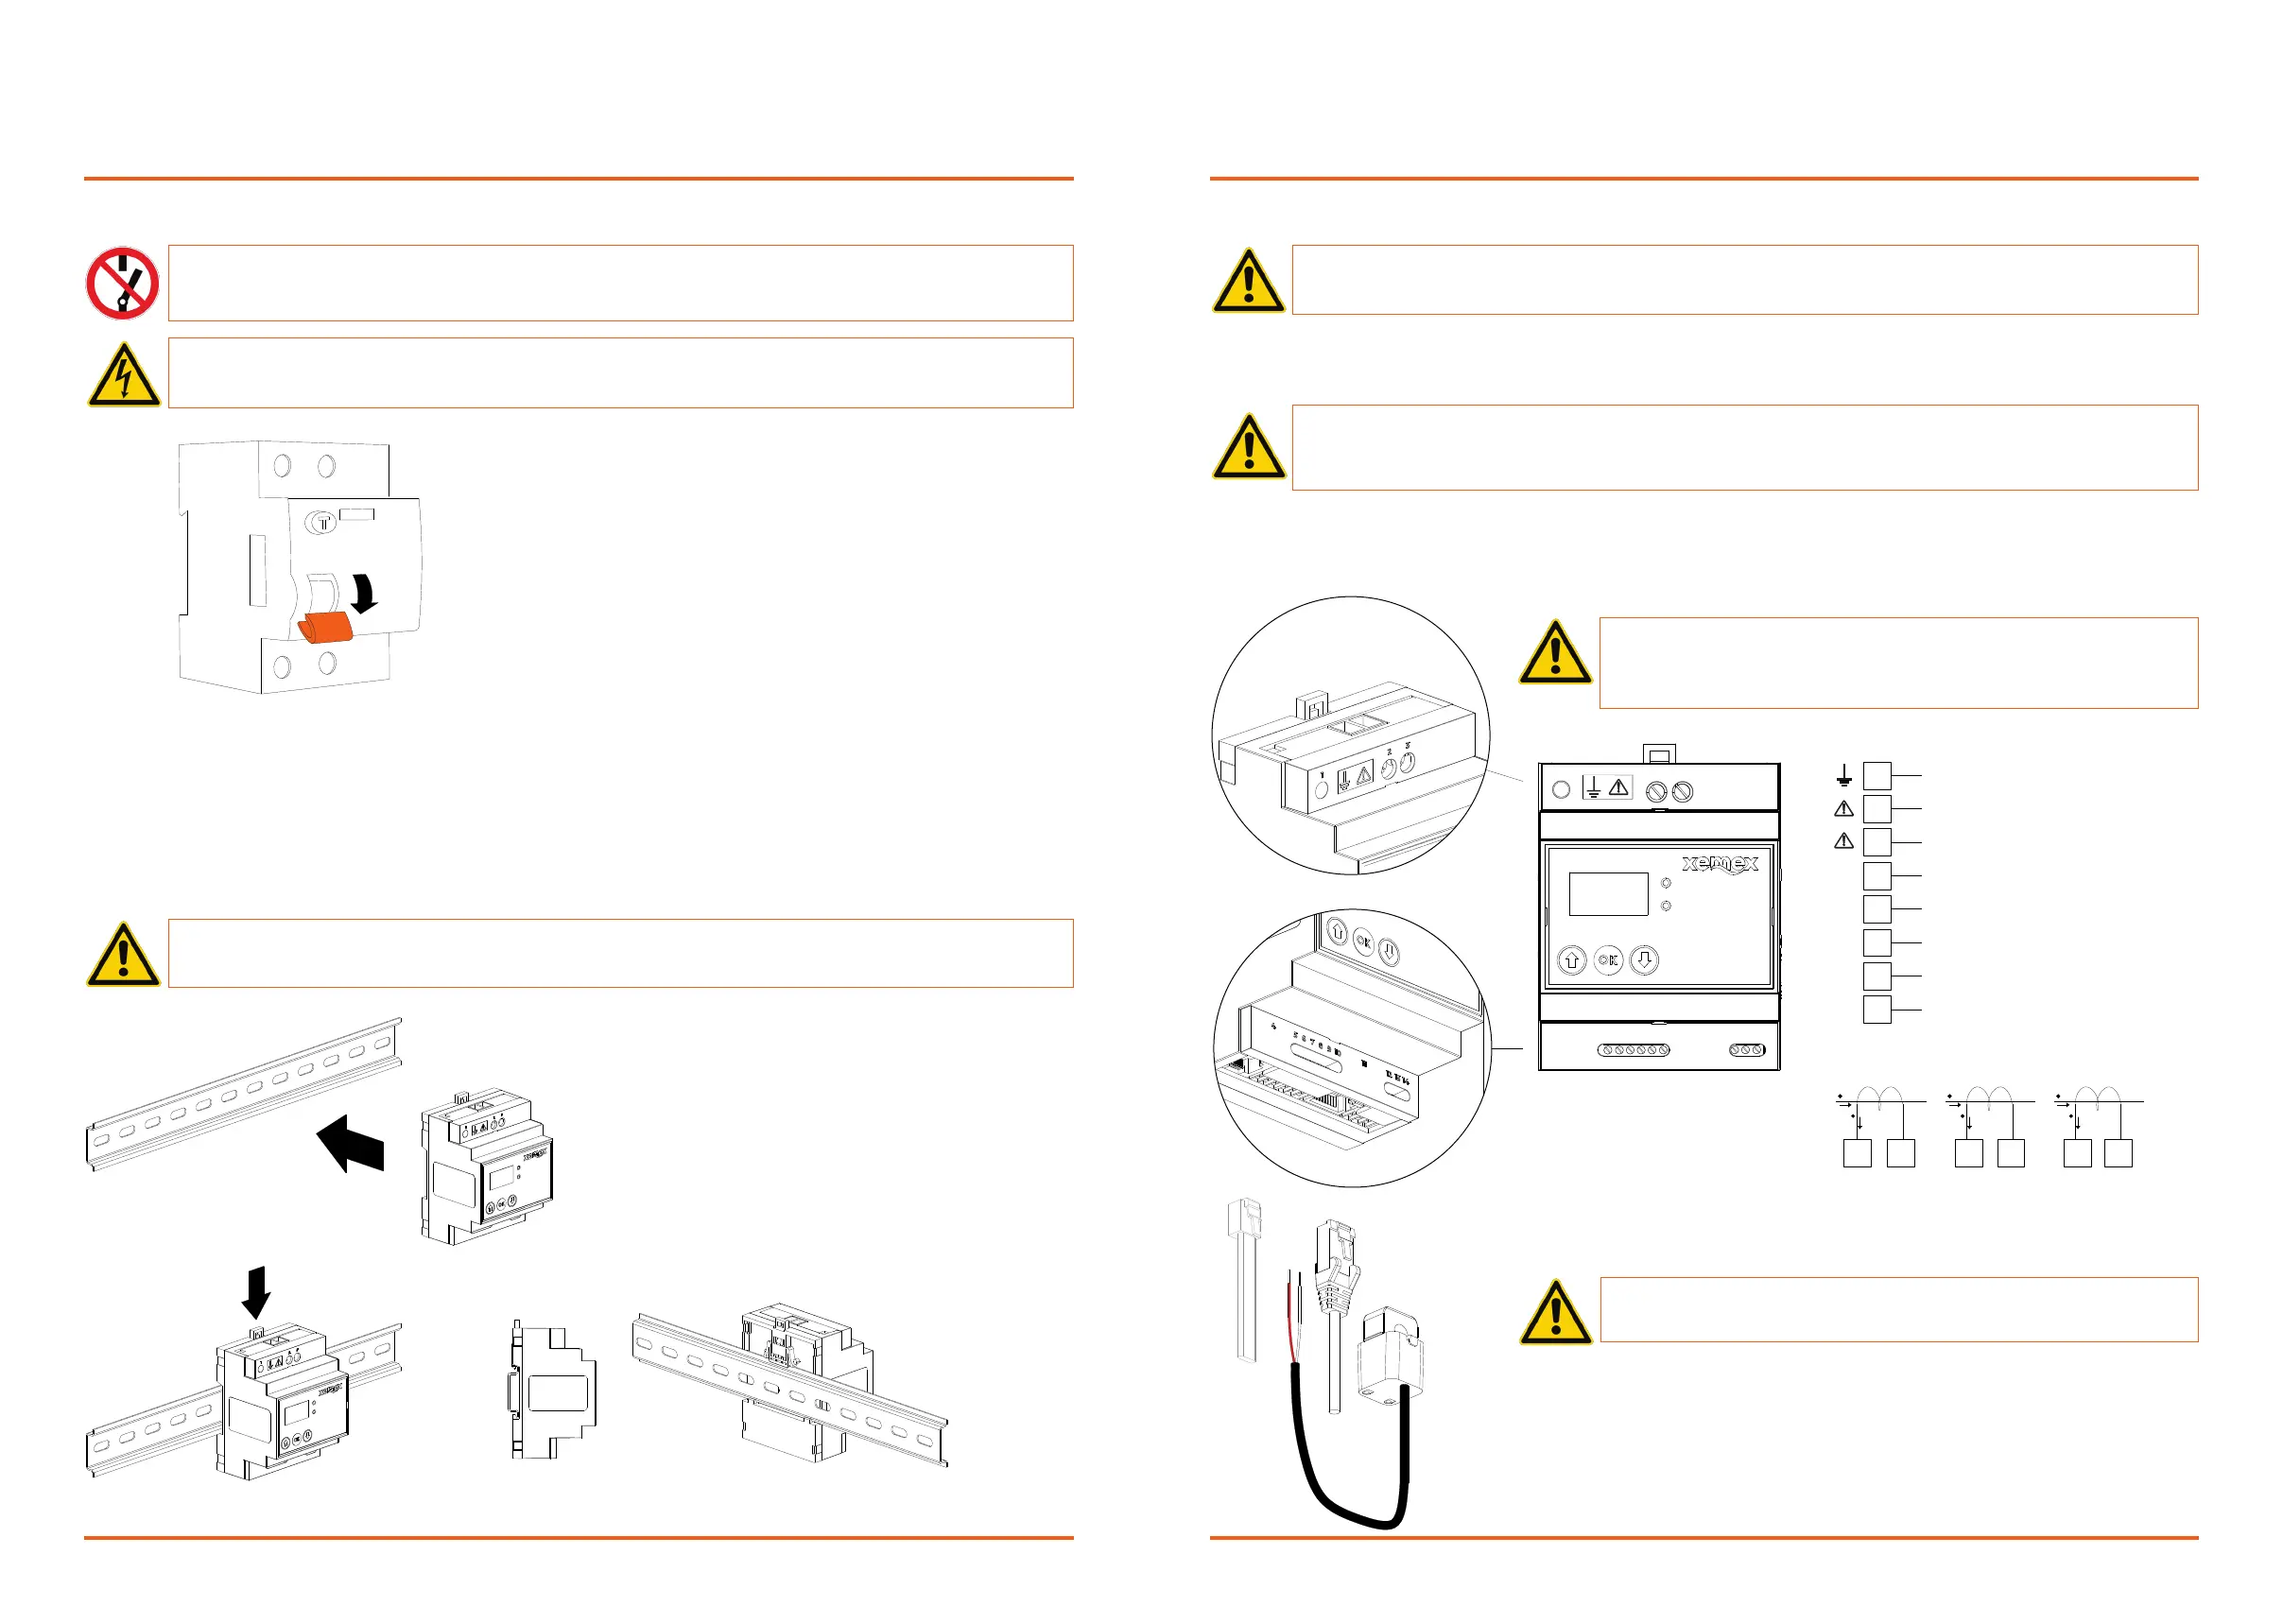
6.3 Electrical connecons to the Smart Charge Controller
1.ConnectthepowersupplycablebyaachingPE(1)funconalearth,N(2)andL1(3)usingscrewterminalconnectors.
2.Connectupto3currenttransformers(CTs)toCT1on(5and6),CT2on(7and8)andCT3on(9and10)usingscrewterminal
connectors.
3.OroponallyconnecttheP1cablewithRJ11connectortoP1output(4)andtothesmartmeter.
4.ConnectLANcablewithRJ45ConnectortoEthernet/LANport(11)andtoEVcharger.
5.OrconnecttheModbusRTUwithRS485cablebymounngB(-)(12),A(+)(13)andGND(14)viascrewterminalconnectors
andtotheEVcharger.
TheelectricalconneconsandtheposionsoftheconnectorsontheSmartChargeControllerareshownbelow.
www.xemex.eu InstallaonManualSmartChargeController pg08
6. Installaon
6.1 Switch o the main switch in the meter cupboard
6.2 Install the Smart Charge Controller on the DIN rail
Installthedeviceinasuitablemetercupboard.
MountthedeviceinaDINrailcabinetandclickitontoaDINrail.
PLEASE NOTE!Donotdrillanymounngholesinthedevice.
Risk of fatal injury from improper installaon!
Failuretoobservetheinstallaoninstruconsandthesurroundingcondionsmayresultindangeroussitua-
onswhenworkingwithelectricity.
Theelectricalsystemmustbecompletelydisconnectedfromallpowersources/mainsbeforecarryingoutany
installaonwork!
www.xemex.eu InstallaonManualSmartChargeController pg09
1
2
3
4
11
12
13
14
230V AC, N
230V AC, L1
P1 kabel naar Slimme meter
LAN kabel naar EV Oplader
RS485 kabel naar EV Oplader, B(-)
PE
RS485 kabel naar EV Oplader, A(+)
RS485 kabel naar EV Oplader, GND
6 5
8
7
10
9
CT1
ls
lp
CT2
ls
lp
CT3
ls
lp
1
2
3
4
5 6
7
8 9 10
11 12
13
14
Click!
P1(opon)
LAN
CT
PLEASE NOTE! Alwayscheckthespecicaonsandinstallaoncondionsfor
theelectricalconneconsinthemanualofthesupplierofyourEVcharger
andintheintegraondocumentoftheSmartChargeControllerandtheEV
charger.Intheeventofdoubt,alwayscontactyoursupplierandXemexNV.
PLEASE NOTE! Usecurrenttransformers(CTs)withbuilt-inTVS(=transientvoltagesuppressor)withadielectric
strengthof3.5KV50Hz1minandanoperangvoltageof660V.Donotusecurrentoutput(rao)CTs
suchas1ampor5ampCTs:theymayirreversiblydamagetheSmartChargeController.Ensurethat
thecurrenttransformersareplacedbehindfusesorcircuitbreakers.
PLEASE NOTE!Thevoltageconnecon(NandL)mustALWAYSbemadeonphaseL1,otherwisethecurrentdireconwillbe
indicatedincorrectly!
PLEASE NOTE! Seechapter6.4forImportantnotesonelectricalconnec-
ons!