6.4 Important notes concerning the electrical connecons
6.4.1 ACconnecons
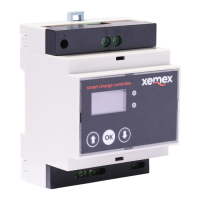
6.4.2 CTconnecons
CTtransformersmustbeinstalledasfollows:
6.4.3 RequirementsforModbusRTUconnecon
www.xemex.eu InstallaonManualSmartChargeController pg11
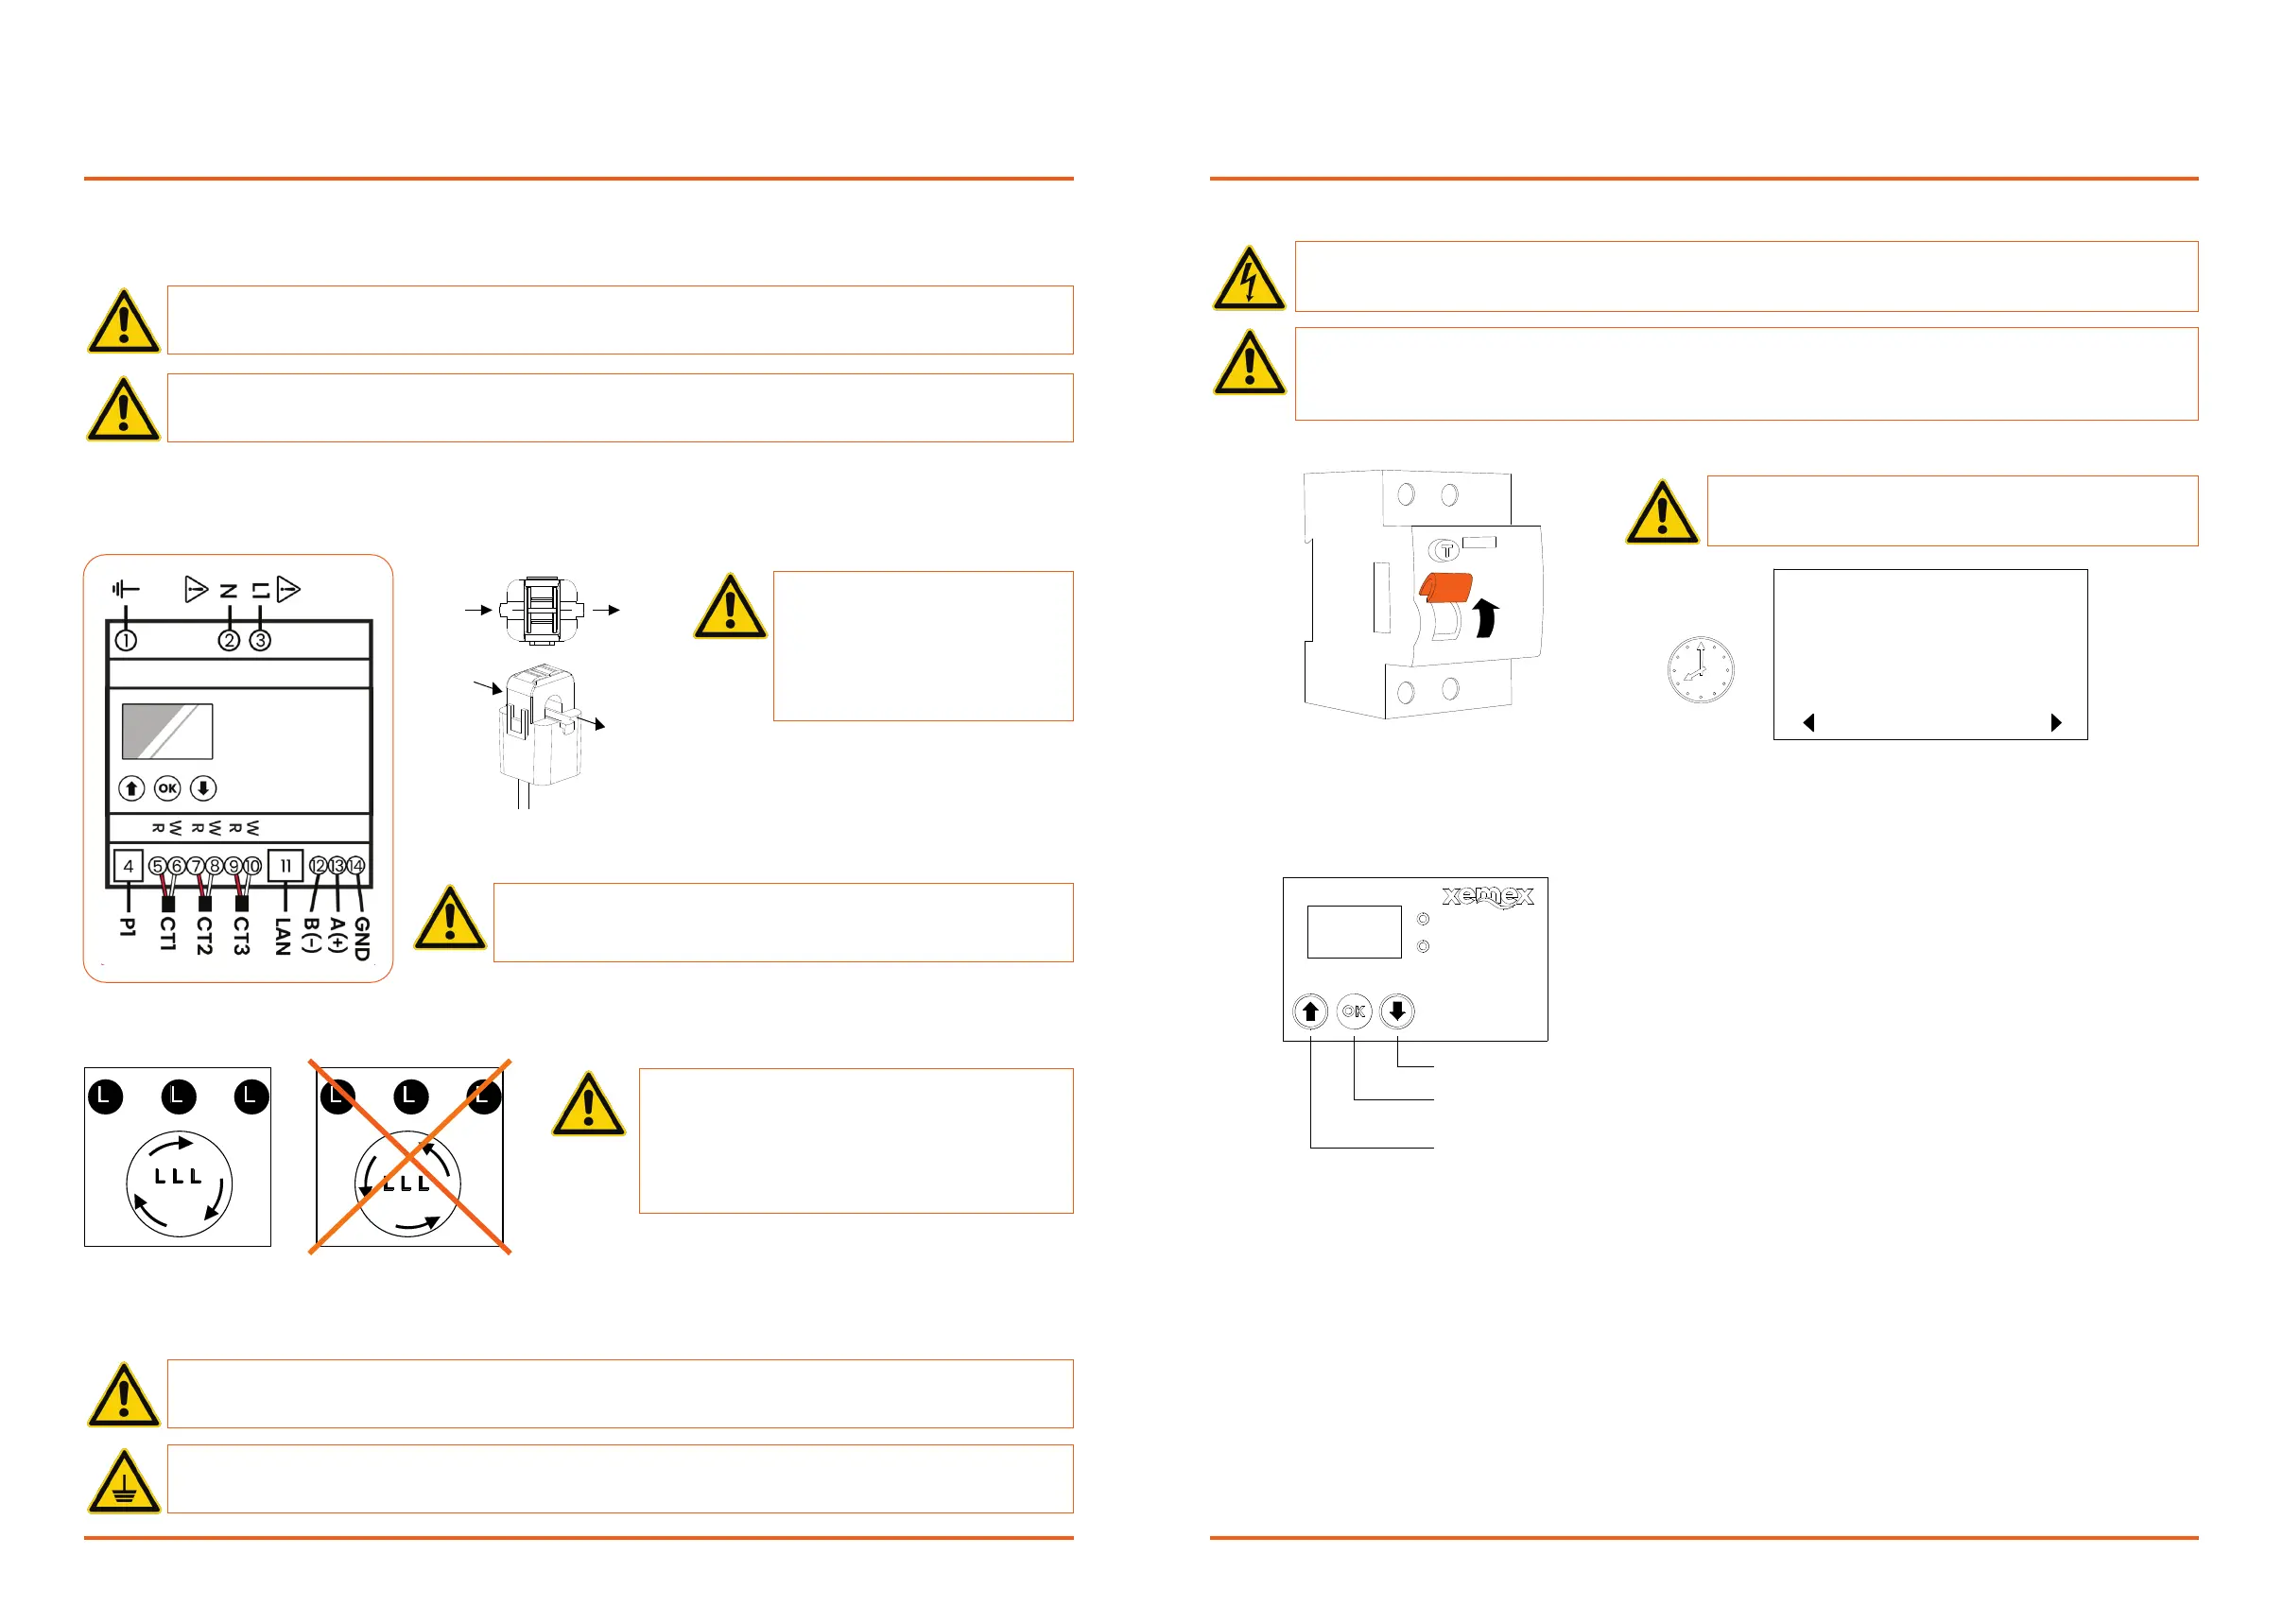
7. Commissioning
7.1 Switch on the main switch in the meter cupboard
7.2 Overview of the controls / buons
Pressingwillnavigateyoudowntothenextscreen.
PressingOKselects/conrmsanitemandreturnstothehomescreen.
Pressingwillnavigateyouupwardstothepreviousscreen.
WARNING:Beforeturningonthecurrent/mainspower,checkthatthecircuitvoltagesandcurrentsarewithin
thecorrectrangefortheSmartChargeController.
Beforeturningonthepower,checkthatallwiresareconnectedaccordingtotheelectricaldiagram.
IftheSmartChargeControllerisnotinstalledcorrectly,thesafetyfeaturesmaybecompromised.
Beforeswitchingonthepower,checkthatallwiresaresecurelyfastenedbypullingoneachwire.
Aerswitchingonthecurrent,theSmartChargeController's
startscreen
willappearautomacallyaerapprox.30sec.
SCC-1 HOME
CHANGE
mode:
ECO
> 30 sec.
www.xemex.eu InstallaonManualSmartChargeController pg10
Thislabelislocatedonthesideof
theSmartChargeController.
PLEASE NOTE! DonotinterchangeN(terminal2)withL(terminal3).Thecurrentdirecon(importvs.export)isderived
fromthe
ACconnecon.IftheACconneconisreversed,thedevicewillnotmeasurethecurrentdireconcorrectly.
PLEASE NOTE! DonotreversethepolarityoftheCTwires.IftheCTcon-
necons
arereversed,thedevicewillnotmeasurethecurrentdireconcorrectly.
PLEASE NOTE! TheCTconneconsequenceisshown
foraclockwisemainsconnecon.
Foranan-clockwisemainsconnecon,swapCT2and
CT3.
EnsurethatthephasesequencematchestheEVcharg-
erconnecons.
PLEASE NOTE!Thevoltageconnecon(NandL)mustALWAYSbemadeonphaseL1,otherwisethecurrentdireconwillbe
indicatedincorrectly!
PLEASE NOTE! TheshieldingoftheModbuswiringmustonlybeconnectedtotheSmartChargeControllersideand
nottotheModbusmasterside.
PLEASE NOTE! TheshieldingoftheModbuswiringmustalsobeconnectedtothebuilding'sprotecveearth.
21 3
R
L
1 23
1 32 1 32
3phasesituaon
clockwiseL1L2L3
3phasesituaonan-
-clockwiseL1L3L2
GRID
LOAD
GRID
LOAD
PLEASE NOTE! MounttheCTtermi-
nals
correctlyonthemainsconnecon.
IftheCTterminalsare
reversed,thedevicewillnotmeasure
thecurrentdireconcorrectly.