Installation
14 DocuMate 252 Scanner User’s Guide
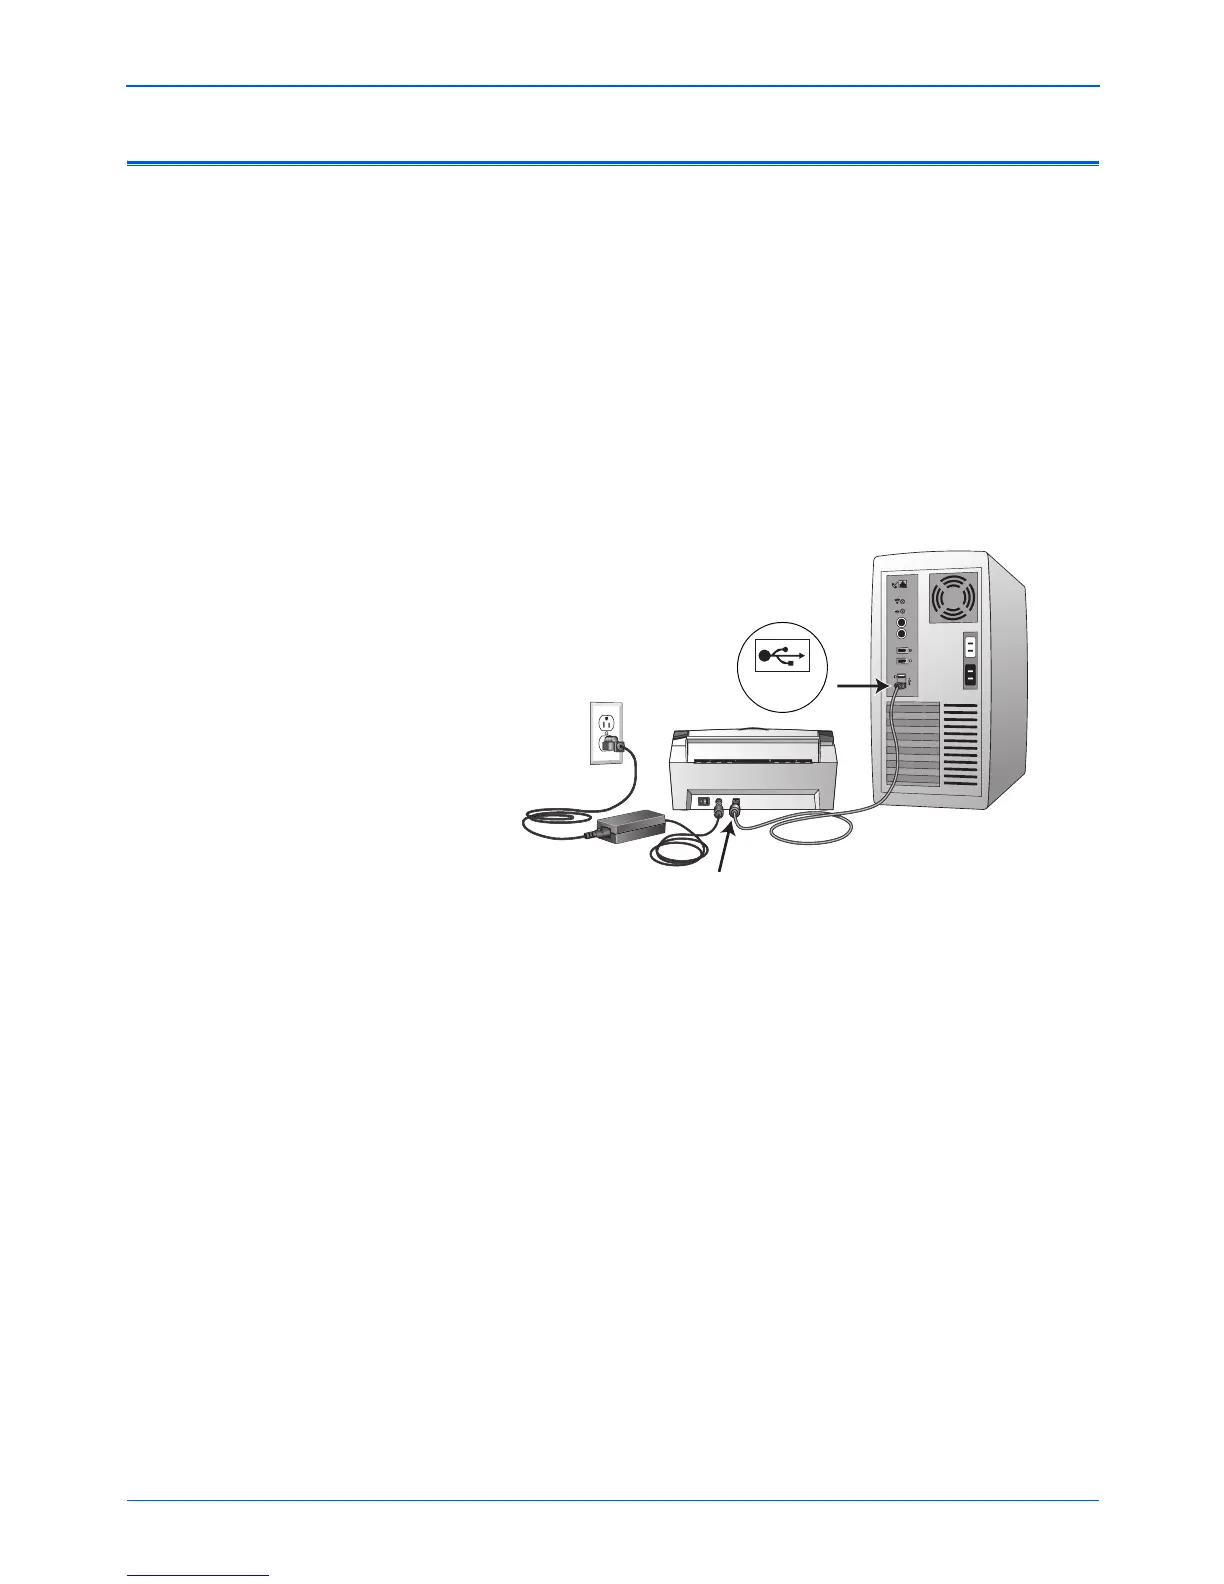
Step 4: Connect the USB Cable and Turn on the Power
The DocuMate 252 scanner connects to any available USB port.
Check your computer’s manual for USB port locations.
1. Remove any protective tape from the USB cable.
2. Plug the USB cable into the USB port on the scanner then into
a USB port on the computer. Connection to a USB 2.0 High
Speed port provides optimum performance, however your
scanner will also connect to a USB 1.1 port.
The USB symbol, as seen in the above diagram, identifies the
location of the USB port on your computer. If the plug does not
attach easily, make sure that you are plugging it in correctly. Do
not force the plug into the connection.
You can also connect the scanner to a USB port on the
computer’s keyboard if it has one, or to a USB hub. If you use a
USB hub, it must have its own power supply already plugged
into an electrical outlet.
NOTE: You can connect the scanner to your computer while the
computer is running. You do not have to shut down your
computer.
USB