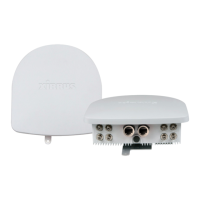
Wireless Access Point
Configuring the Wireless AP 167
5. Admin Settings: This section allows you to change the default admin
username, password, and privileges for the AP. You may change the
password and leave the user name as is, but we suggest that you change
both to improve AP security.
a. New Admin User (Replaces user “admin”): Enter the name of a new
administrator user account. Be sure to record the new account name
and password, because the default admin user will be deleted! Note
that the AP also offers the option of authenticating administrators
using a RADIUS server (see “Admin Management” on page 230).
b. New Admin Privilege Level: By default, the new administrator will
have read/write privileges on the AP (i.e., the new user will be able
to change the configuration of the AP). If you wish the new account
to have different privileges, select the desired level from the drop-
down list. For more information about user privileges, please see
“Admin Privileges” on page 232. Take care to make sure to leave
yourself enough read/write privileges on at least one account to be
able to administer the AP.
c. New Admin Password: Enter a new administration password for
managing this AP. If you forget this password, you must reset the AP
to its factory defaults so that the password is reset to admin (its
default setting).
d. Confirm Admin Password: If you have entered a new administration
password, confirm the new password here.
e. Click Apply Admin Settings when done.
6. Time and Date Settings: System time is synchronized using NTP
(Network Time Protocol) by default. Use the drop-down list to select the
Time Zone.
7. Quick Configuration: This offers predefined configuration options such
as Classroom and High-Density that capture best practices from years of
field experience. If one of the options in the drop-down list is appropriate
 Loading...