12
Rev. 1.0 30.01.2020
• Replacement of batteries
The instrument works with 3 AA 1.5V batteries.
To proceed with the replacement:
1. Turn off the instrument.
Turn the instrument over with the display facing down and place it on a stable surface.
It is advisable to put a cloth to avoid any scratching on display.
2. Using the screwdriver supplied, completely unscrew the screw close to the battery symbol.
3. Remove the battery stopper cap with the help of the lanyard.
4. Remove the 3 exhausted batteries (one in the left compartment and two in the right compartment)
and insert the new ones. Pay attention to the correct polarity. Follow the diagram above the battery
symbol in the rear compartment of the instrument.
5. Reinsert the battery holder and tighten the screw.
• Instrument
transportation
The instrument is always supplied with the appropriate carrying case. Use the original case only, to transport
the instrument. If you need to buy it again, contact your local distributor.
The interior of the case is shaped to be able to house the instrument and the sensors still connected.
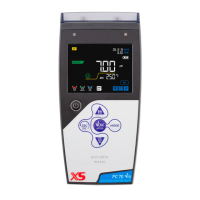
• Key functions
Short
Press to turn the device on or off
Short
• In calibration mode and press to return to measure mode
• In measure mode, press to start the calibration
Short
In measure mode, press to enter the setup
In the setup menus, press to select the desired program and / or value
During calibration, press to confirm the value
Short
In the setup and sub-setup menus press to scroll
In the setup submenus, press to change the value
In MTC and customer calibration mode, press to change the value
Long-Press
(3s)
In measure mode, keep one of the two keys pressed to change the temperature
in MTC mode (manual compensation, without probe). When the value starts to
flash, the user can change the temperature value by entering the correct one and
confirming with .
Short
In measure mode, press to scroll through the different parameters
• pH 7 Vio: pH mV ORP
• COND 7 Vio: Cond TDS
• PC 7 Vio: pH mV ORP Cond TDS