34
9.4.3.2 Addressing
When using the cascade serial/synchronous mode in a multi-pump-application (where more
than one MASTER Inverter or even BASIC Inverters are used), the right address must be set
to ensure a proper communication within the system.
MASTER Inverter – The desired address of the MASTER Inverter has to be set via the
HYDROVAR-software. In this case for all MASTER Inverters the below shown dip-switch on
the power unit must be set to address 1 (default setting).
BASIC Inverter (not standard use for HV 4.150-4.220) – when using a BASIC Inverter in a
multi-pump-system it is necessary to set the dip-switches on the power unit in order to get
a separate address for each Inverter within your pump group (Pls. consider reserved
addresses for the MASTER Inverters).
Example:
Multi-pump-system with 3 MASTER and 4 BASIC Inverters
• Set address 1-3 for the MASTER Inverters via appropriate software parameters
(See submenu CONF INVERTER [0200] or submenu RS485-INTERFACE [1200])
• Address 4-7 for the BASIC Inverters via dip-switch
The pre-selected address is also responsible for the pump sequence.
Setting of the correct address:
o The HYDROVAR must be disconnected from power supply at least for 5 minutes
before removing the top-cover (open four fastening screws)!
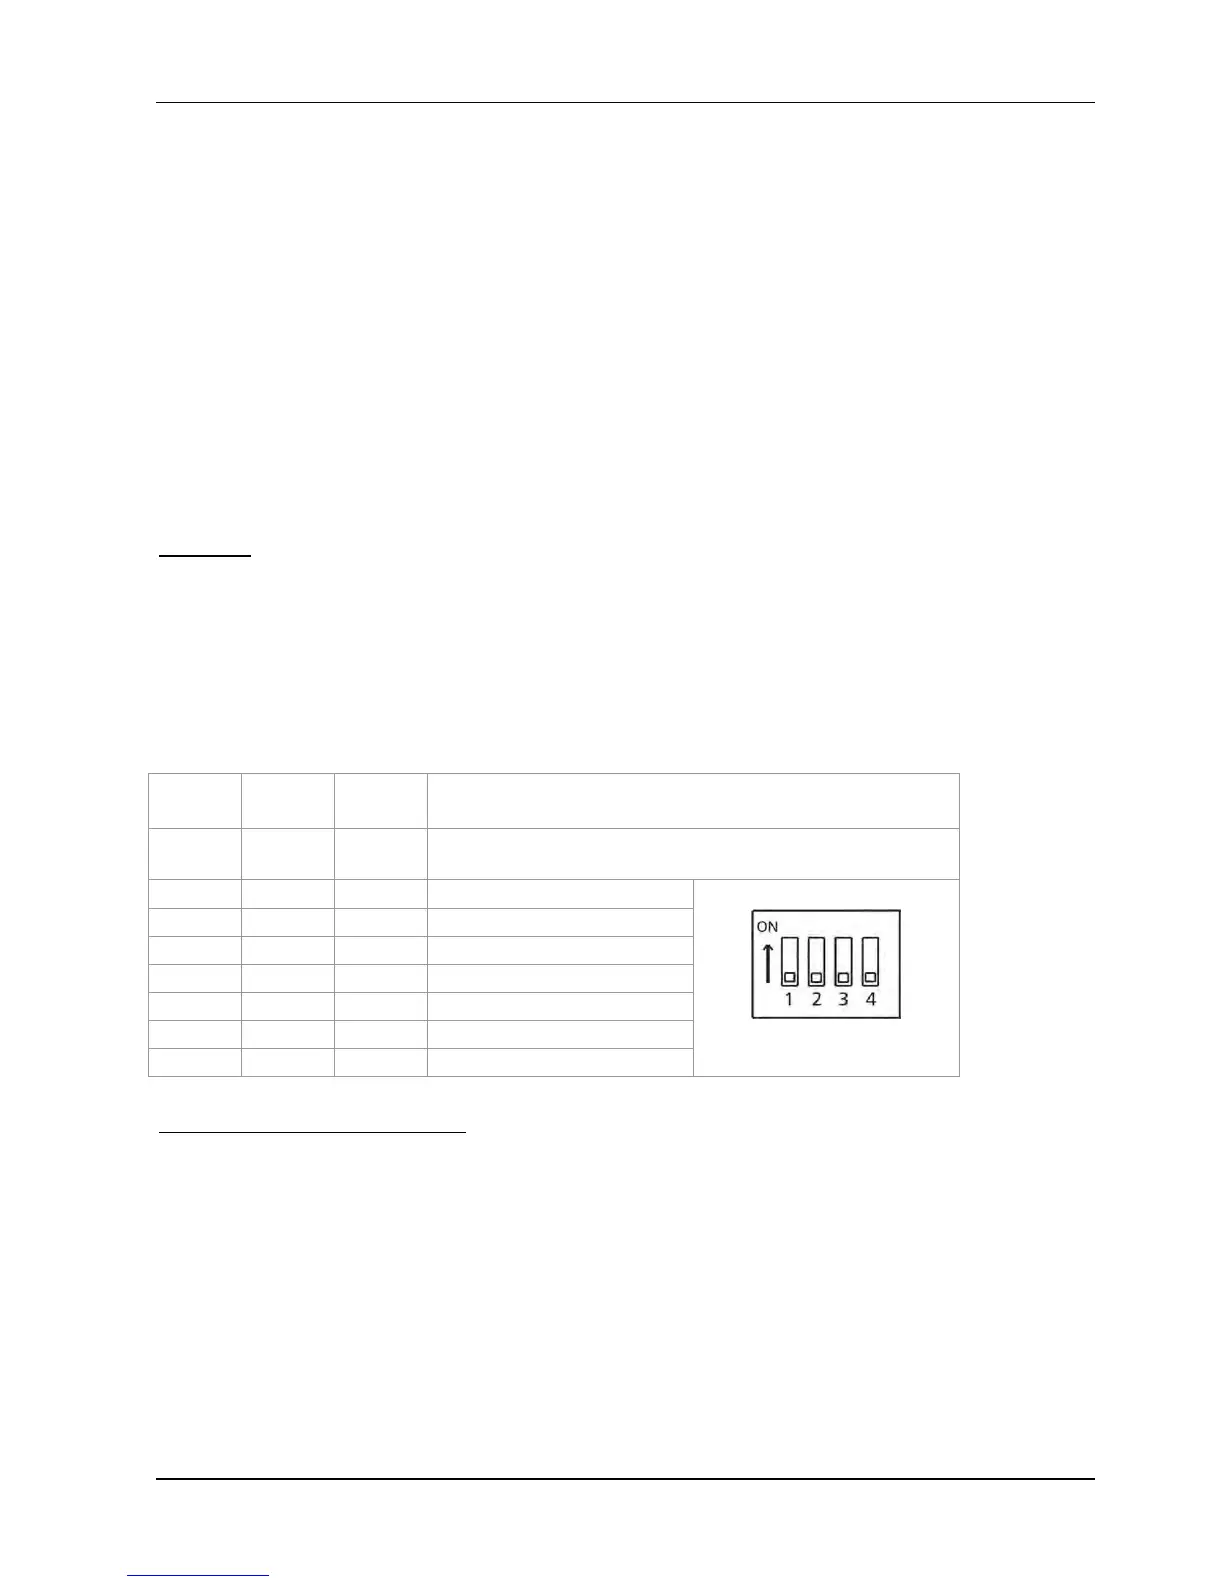
o Use the dip-switch which is on the power unit (see picture next page!)
o Set the desired address for each HYDROVAR
E.g. Address 4 -> switch 1 is set to OFF
switch 2 and 3 are set to ON
o Mount the cover on the HYDROVAR and tighten the four fastening screws
o Reconnect HYDROVAR to power supply
Switch
1
Switch
2
Switch
3
Address
OFF OFF OFF
Address 1 (default setting)
(Required setting for the use with control card)
OFF OFF ON Address 2
OFF ON OFF Address 3
OFF ON ON Address 4
ON OFF OFF Address 5
ON OFF ON Address 6
ON ON OFF Address 7
ON ON ON Address 8
switch 4 not used!
 Loading...