EasyManua.ls Logo

Yakima EXO LitKit User Manual

Yakima EXO LitKit
10 pages
To Next Page IconTo Next Page
Page #1 background imageLoading...
Page #1 background image
Instruction #1036058B - page 1 of 10
EXO LitKit™
CONTENTS • CONTENU • CONTENIDO
Para español ir a la página 7.Pour le français, aller à la page 7.
®
left light tube (1X)
support de feu gauche (x 1)
tubo para luz izquierda (1x)
left light (1X)
feu gauche (x 1)
luz izquierda (1x)
right light tube (1X)
support de feu droit (x 1)
tubo para luz derecha (1x)
right light (1X)
feu droit (x 1)
luz derecha (1x)
knob (4X)
bouton (x 4)
perilla (4x)
10 mm wrench (1X)
clé de 10 mm (x 1)
llave de 10 mm (1x)
nut (4X)
écrou (x 4)
tuerca (4X)
bolt (4X)
boulon (x 4)
tornillo (4X)
screw (2X)
vis (x 2)
tornillo (2X)
clip (6X)
collier (x 6)
clip (6X)
thumbscrew (2X)
molette (x 2)
tuerca moleteada (2X)
washer (4X)
rondelle (x 4)
arandela (4X)
main wiring harness (1X)
faisceau électrique (x 1)
arnés principal de cables (1X)
vehicle wiring harness (1X)
faisceau de branchement au véhicule (x 1)
arnés de cables del vehículo (1X)
Question and Answer IconNeed help?

Do you have a question about the Yakima EXO LitKit and is the answer not in the manual?

Yakima EXO LitKit Specifications

General IconGeneral
Product TypeLighting Kit
CompatibilityYakima EXO System
Light TypeLED
Water ResistanceYes
CategoryAutomobile Accessories
TypeLighting Kit
Weather ResistanceYes
Mounting TypeEXO Mount
FunctionIllumination

Summary

Assembly Steps

Attach Light Tubes to Lights

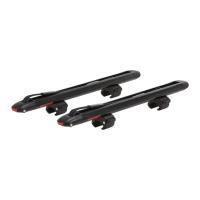
Connect the light tubes to the left and right side lights using bolts, washers, and nuts.

Extend Exo Swingbase Arms

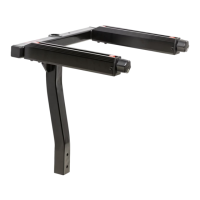
Pull pins and swing out the driver and passenger side arms until they lock into place.

Attach Lights to Exo Swingbase

Align light tube holes with arm holes and tighten firmly with knobs to 1.5 Nm.

Install License Plate

Mount license plate using provided screws and thumbscrews if the system obstructs it.

Install Cable Clips

Press 6 cable clips into the designated holes to secure wiring.

Plug in Main Wiring Harness

Open the plug cover on the Exo Swingbase and connect the main wiring harness.

Plug Main Harness into Lights

Connect the main wiring harness to the left and right side lights as shown.

Route Main Harness Through Clips

Thread the wiring harness through installed cable clips and press to secure.

Connect Exo Litkit to Vehicle

Connect vehicle harness to Exo Swingbase and then to the vehicle's wiring.

Loading Accessories

Lower Lights for Loading

Remove knobs, swing lights down, load accessory, swing lights up, and retighten knobs.

Removal and Maintenance

Removal Instructions

Unplug harnesses, remove clips, knobs, and detach light assemblies for storage.

Care and Maintenance

Clean with mild detergents, remove before car wash, lubricate locks with dry lubricant.

Important Warnings

Rack Installation Safety

Ensure secure mounting, check hardware before journeys, and use authorized racks.

Rack Loading and Driving

Adhere to load limits, distribute weight evenly, and drive according to conditions.

Maintenance and Parts

Clean regularly, remove when not in use, replace parts with original spares.

Related product manuals