Install
NOTE: If installing the entire control panel assembly
to include the electrical panel plate, it will be neces-
sary to perform Step 1. If only installing the controller,
contactor, horn, fuses, or wires, it is not necessary to
perform Step 1.
1. Install control panel assembly to lift truck by align-
ing four holes of electrical panel plate with four
holes in frame and inserting countersunk cap-
screws into holes from the battery box side. Install
washer, lockwasher, and nut on countersunk cap-
screws. Replace battery. See the section Peri-
odic Maintenance 8000YRM1048, Periodic
Maintenance 8000YRM1009, or Periodic Main-
tenance 8000YRM1379 for your lift truck, for in-
structions on how to install the battery.
2. Install replacement controller on electrical panel
plate by aligning four holes of controller with four
holes in electrical panel plate. Install four cap-
screws and lockwashers.
3. Connect wires and cables to the same terminals
as identified during the removal procedure.
4. Connect the jumper assembly to the "E" terminal,
located on the bottom of the controller. See Spe-
cial Precautions for location. Use procedure that
applies to your lift truck:
a. To use a maintenance free battery, disconnect
the wire terminals on the battery selector
jumper.
b. To use a flooded cell battery, connect the wire
terminals on the battery selector jumper.
5. Reconnect battery connectors.
6. Turn the key switch to the ON position.
7. If available, install customer parameters and set-
tings.
8. Test lift truck in a safe area away from other per-
sonnel and equipment.
9. Install the lower drive unit compartment cover.
10. Install the upper drive unit compartment cover.
CONTACTOR COIL, CHECK
1. Move lift truck to a safe, level area.
2. Turn the key switch to the OFF position and dis-
connect battery connectors.
3. Block drive tire to prevent movement. See the
section Periodic Maintenance 8000YRM1048,
Periodic Maintenance 8000YRM1009, or Peri-
odic Maintenance 8000YRM1379 for your lift
truck.
4. Remove the upper drive unit compartment cover.
5. Discharge the capacitor. See Special Precau-
tions.
6. Tag, identify, and disconnect the contactor coil
wires.
7. Test contactor coil using an ohmmeter.
8. Touch the probes of the ohmmeter to the coil ter-
minals and measure the resistance between the
terminals.
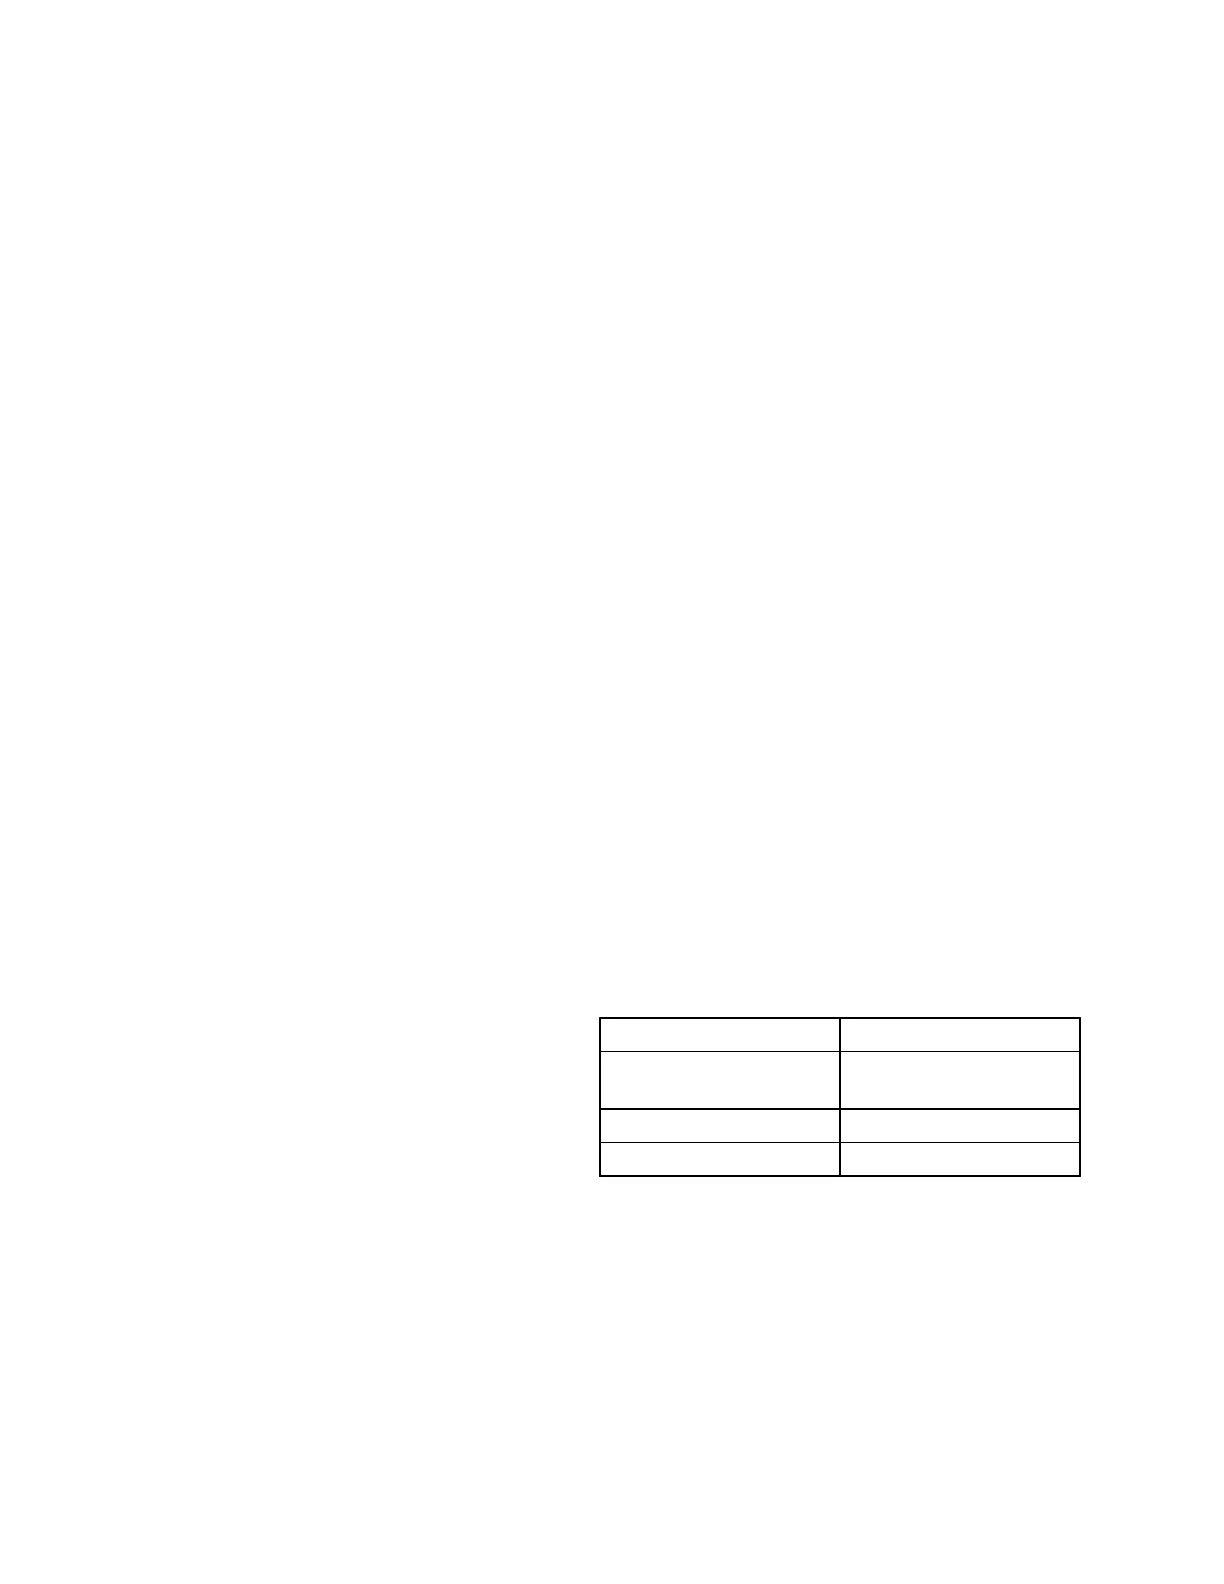
9. Replace contactor if coil resistance readings
measure outside of specifications. For contactor
coil resistance values, refer to Table 1.
10. Connect contactor wires to the correct terminals.
Table 1. Contactor Coil Resistance Values
Model Resistance
MSW020/025-E and
MSW025/030-F
21 ±2.1 ?
MPB040-E 52 ±5.2 ?
MPW045/050-E 21 ±2.1 ?
Repairs 2200 YRM 1007
12
 Loading...