EasyManua.ls Logo

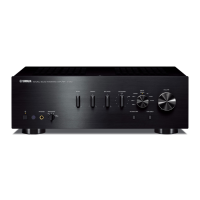
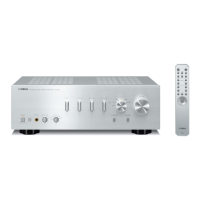
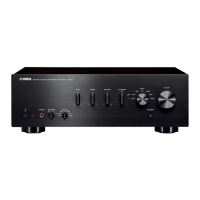
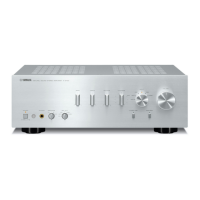
Yamaha A-S700 Service Manual

Yamaha A-S700
61 pages
To Next Page IconTo Next Page
Page #1 background imageLoading...
Page #1 background image
A-S700
101117
SERVICE MANUAL
IMPORTANT NOTICE
This manual has been provided for the use of authorized YAMAHA Retailers and their service personnel.
It has been assumed that basic service procedures inherent to the industry, and more speci cally YAMAHA Products, are already known
and understood by the users, and have therefore not been restated.
WARNING:
Failure to follow appropriate service and safety procedures when servicing this product may result in personal injury,
destruction of expensive components, and failure of the product to perform as speci ed. For these reasons, we advise
all YAMAHA product owners that any service required should be performed by an authorized YAMAHA Retailer or
the appointed service representative.
IMPORTANT:
The presentation or sale of this manual to any individual or rm does not constitute authorization, certi cation or
recognition of any applicable technical capabilities, or establish a principle-agent relationship of any form.
The data provided is believed to be accurate and applicable to the unit(s) indicated on the cover. The research, engineering, and service
departments of YAMAHA are continually striving to improve YAMAHA products. Modifications are, therefore, inevitable and
speci cations are subject to change without notice or obligation to retro t. Should any discrepancy appear to exist, please contact the
distributor's Service Division.
WARNING:
Static discharges can destroy expensive components. Discharge any static electricity your body may have
accumulated by grounding yourself to the ground buss in the unit (heavy gauge black wires connect to this buss).
IMPORTANT:
Turn the unit OFF during disassembly and part replacement. Recheck all work before you apply power to the unit.
CONTENTS
TO SERVICE PERSONNEL ............................................2
IMPEDANCE SELECTOR ...............................................3
FRONT PANEL ...............................................................3
REAR PANELS ...........................................................4–6
REMOTE CONTROL PANEL ..........................................7
SPECIFICATIONS /
参考仕様
.....................................7–8
INTERNAL VIEW ............................................................9
SERVICE PRECAUTIONS /
サービス時の注意事項
..... 10
DISASSEMBLY PROCEDURES /
分解手順
........... 10–16
AMP ADJUSTMENT /
アンプ部調整
....................... 17–18
SELF-DIAGNOSTIC FUNCTION /
ダイアグ(自己診断機能)
....................................... 19–25
IC DATA ...................................................................26–28
BLOCK DIAGRAM ........................................................29
PRINTED CIRCUIT BOARDS .................................30–43
PIN CONNECTION DIAGRAMS ...................................44
SCHEMATIC DIAGRAMS .......................................45–47
REPLACEMENT PARTS LIST ................................49–59
REMOTE CONTROL .....................................................60
INTEGRATED AMPLIFIER
animate '08.10
P.O.Box 1, Hamamatsu, Japan
Copyright © 2008 All rights reserved.
This manual is copyrighted by YAMAHA and may not be copied or
redistributed either in print or electronically without permission.
A-S700
Other manuals for Yamaha A-S700

Questions and Answers:

Yamaha A-S700 Specifications

General IconGeneral
Impedance4 Ω
Frequency range10 - 100000 Hz
Maximum input power320 W
Total Harmonic Distortion (THD)0.012 %
Radio Data System (RDS)Yes
Connectivity technologyWired
Headphone connectivity3.5 mm
Product colorSilver
Weight and Dimensions IconWeight and Dimensions
Weight10900 g

Summary

TO SERVICE PERSONNEL

Critical Components Information

Details on special components requiring exact replacement for safety and performance.

Leakage Current Measurement

Procedure to verify insulation of exposed surfaces from supply circuits after service.

IMPEDANCE SELECTOR

Warning

Caution against changing the impedance selector setting while the unit is powered on.

FRONT PANEL

REAR PANELS

REMOTE CONTROL PANEL

SPECIFICATIONS / 参考仕様

Audio Section / オーディオ部

Detailed technical specifications for the amplifier's audio performance and features.

Control Section / コントロール部

Technical specifications related to input sensitivity, output levels, and tone controls.

General / 総合

Power Supply and Consumption

Details on power voltage, consumption, standby, and maximum power usage.

AC Outlets and Dimensions

Information on AC outlet specifications and the unit's physical dimensions and weight.

Finish, Accessories, and Model Variants

Details on available finishes, included accessories, and model variations.

SERVICE PRECAUTIONS / サービス時の注意事項

Safety measures

Guidelines for safe servicing, including high voltage warnings and discharge procedures.

DISASSEMBLY PROCEDURES / 分解手順

Removal of Top Cover

Step-by-step instructions for removing the top cover of the unit.

Removal of Front Panel

Instructions for safely removing the front panel, including knob removal.

Removal of Sub-chassis Unit

Steps to remove the sub-chassis unit, including specific screws and connectors.

Checking the P.C.B.s

Procedures for checking Printed Circuit Boards, including placement and grounding.

AMP ADJUSTMENT / アンプ部調整

Confirmation of Idling Current

Procedure to measure and confirm the idling current of the amplifier section.

SELF-DIAGNOSTIC FUNCTION / ダイアグ(自己診断機能)

Indication of Protection Information

How to display protection information when the power indicator flashes.

Operation procedures

Steps to follow to initiate the self-diagnostic or protection information display mode.

List of Protection Information

Table correlating POWER indicator flashing patterns with specific protection functions.

Details of Protection Information

Explains causes, normal values, and detection points for PS and Amplifier DC voltage protection.

Protection Information: Current and Temperature

Details causes for overcurrent and temperature protection, and normal values.

Starting in Protection Cancel Mode

Procedure to cancel protection mode for diagnostics, allowing power-on.

Indication of Firmware Version

Operation procedures

Steps to display the firmware version using input indicators and button presses.

Factory Reset

Operation procedures

Steps to restore the unit to its factory default settings.

IC DATA

IC602: M30302MAP-A95FP

Details and pin assignments for the single-chip microprocessor IC602.

BLOCK DIAGRAM

PRINTED CIRCUIT BOARDS

FUNCTION (1) P.C.B. (Side A)

Component layout and connections for the Function (1) PCB, Side A.

FUNCTION (1) P.C.B. (Side B)

Component layout and connections for the Function (1) PCB, Side B.

FUNCTION (2) P.C.B. (Side A)

Component layout and connections for the Function (2) PCB, Side A.

FUNCTION (2) P.C.B. (Side B)

Component layout and connections for the Function (2) PCB, Side B.

OPERATION (1) P.C.B. (Side A)

Component layout and connections for the Operation (1) PCB, Side A.

OPERATION (1) P.C.B. (Side B)

Component layout and connections for the Operation (1) PCB, Side B.

OPERATION (2) P.C.B. (Side A)

Component layout and connections for the Operation (2) PCB, Side A.

OPERATION (3) P.C.B. (Side A)

Component layout and connections for the Operation (3) PCB, Side A.

OPERATION (4) P.C.B. (Side A)

Component layout and connections for the Operation (4) PCB, Side A.

OPERATION (2) P.C.B. (Side B)

Component layout and connections for the Operation (2) PCB, Side B.

OPERATION (3) P.C.B. (Side B)

Component layout and connections for the Operation (3) PCB, Side B.

OPERATION (4) P.C.B. (Side B)

Component layout and connections for the Operation (4) PCB, Side B.

OPERATION (5) P.C.B. (Side A)

Component layout and connections for the Operation (5) PCB, Side A.

OPERATION (6) P.C.B. (Side A)

Component layout and connections for the Operation (6) PCB, Side A.

OPERATION (7) P.C.B. (Side A)

Component layout and connections for the Operation (7) PCB, Side A.

OPERATION (8) P.C.B. (Side A)

Component layout and connections for the Operation (8) PCB, Side A.

OPERATION (9) P.C.B. (Side A)

Component layout and connections for the Operation (9) PCB, Side A.

OPERATION (5) P.C.B. (Side B)

Component layout and connections for the Operation (5) PCB, Side B.

OPERATION (6) P.C.B. (Side B)

Component layout and connections for the Operation (6) PCB, Side B.

OPERATION (7) P.C.B. (Side B)

Component layout and connections for the Operation (7) PCB, Side B.

OPERATION (8) P.C.B. (Side B)

Component layout and connections for the Operation (8) PCB, Side B.

OPERATION (9) P.C.B. (Side B)

Component layout and connections for the Operation (9) PCB, Side B.

OPERATION (10) P.C.B. (Side A)

Component layout and connections for the Operation (10) PCB, Side A.

OPERATION (11) P.C.B. (Side A)

Component layout and connections for the Operation (11) PCB, Side A.

OPERATION (10) P.C.B. (Side B)

Component layout and connections for the Operation (10) PCB, Side B.

OPERATION (11) P.C.B. (Side B)

Component layout and connections for the Operation (11) PCB, Side B.

MAIN (1) P.C.B. (Side A)

Component layout and connections for the Main (1) PCB, Side A.

MAIN (6) P.C.B. (Side A)

Component layout and connections for the Main (6) PCB, Side A.

MAIN (7) P.C.B. (Side A)

Component layout and connections for the Main (7) PCB, Side A.

MAIN (2) P.C.B. (Side A)

Component layout and connections for the Main (2) PCB, Side A.

MAIN (3) P.C.B. (Side A)

Component layout and connections for the Main (3) PCB, Side A.

MAIN (4) P.C.B. (Side A)

Component layout and connections for the Main (4) PCB, Side A.

MAIN (5) P.C.B. (Side A)

Component layout and connections for the Main (5) PCB, Side A.

MAIN (8) P.C.B. (Side A)

Component layout and connections for the Main (8) PCB, Side A.

PIN CONNECTION DIAGRAMS

ICs and Diodes

Pin connection diagrams for integrated circuits and diodes used in the unit.

Transistors

Pin connection diagrams for various transistors used in the unit.

SCHEMATIC DIAGRAMS

FUNCTION Schematics

Schematic diagrams for the FUNCTION blocks, including IC details and connections.

Operation Schematics

Schematic diagrams for various OPERATION blocks, detailing component connections and functions.

Main Schematics

Schematic diagrams for the MAIN blocks (1-8), covering power supply and amplifier circuitry.

REPLACEMENT PARTS LIST

Electrical Component Parts

List of electrical components with part numbers, descriptions, and abbreviations.

P.C.B. FUNCTION Parts

Replacement parts list for the P.C.B. FUNCTION section, including connector and capacitor details.

P.C.B. FUNCTION/OPERATION Parts

Replacement parts list for P.C.B. FUNCTION and OPERATION sections, listing various components.

P.C.B. OPERATION/MAIN Parts

Replacement parts list for P.C.B. OPERATION and MAIN sections, including transistors and relays.

P.C.B. MAIN Parts (1)

Replacement parts list for P.C.B. MAIN, detailing connectors, fuses, and capacitors.

P.C.B. MAIN Parts (2)

Replacement parts list for P.C.B. MAIN, detailing diodes, fuses, ICs, and transistors.

P.C.B. MAIN Parts (3) / Carbon Resistors

Replacement parts list for P.C.B. MAIN and carbon resistors, with detailed specifications.

OVERALL ASS'Y

Accessories

List of included accessories such as remote control, batteries, and power cables.

Front Panel and Sub Panel Unit

Exploded view and part list for the front panel and sub panel assembly.

Amp Unit

Exploded view and part list for the amplifier unit assembly.

REMOTE CONTROL

Schematic Diagram, Panel Layout, and Key Codes

Schematic, panel layout, and key code mapping for the remote control unit.

MEMO

Related product manuals