–59–
EAA01039
O. BLEEDING THE HYDRAULIC
CLUTCH SYSTEM
WARNING
Bleed the hydraulic clutch system
whenever:
●
the system was disassembled,
●
a clutch hose was loosened or
removed,
●
the clutch fluid level is very low,
●
clutch operation is faulty.
NOTE:
_
●
Be careful not to spill any clutch fluid or
allow the clutch fluid reservoir to over-
flow.
●
When bleeding the hydraulic clutch
system, make sure that there is always
enough clutch fluid before applying the
clutch lever. Ignoring this precaution
could allow air to enter the hydraulic
clutch system, considerably lengthen-
ing the bleeding procedure.
●
If bleeding is difficult, it may be neces-
sary to let the clutch fluid settle for a
few hours. Repeat the bleeding proce-
dure when the tiny bubbles in the hose
have disappeared.
1. Bleed:
●
hydraulic clutch system
a. Add the recommended clutch fluid to
the proper level.
b. Install the clutch fluid reservoir dia-
phragm.
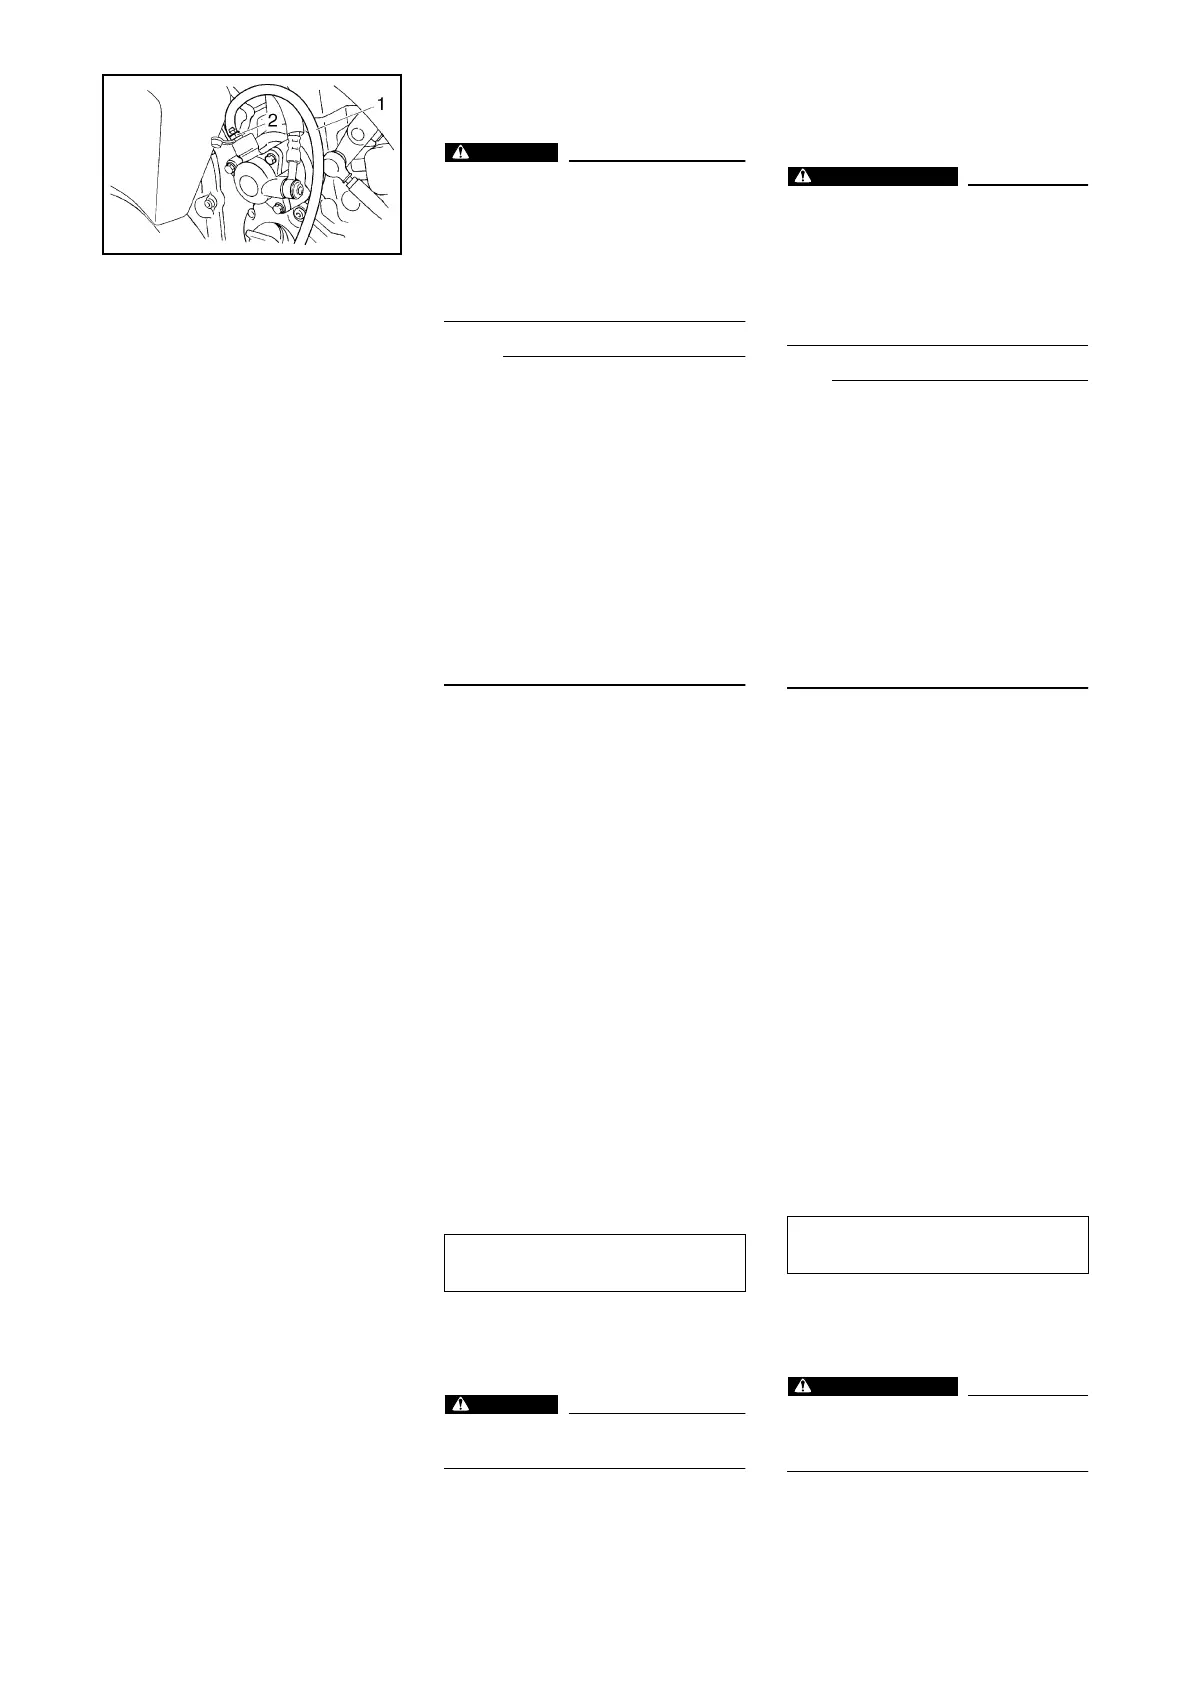
c. Connect a clear plastic hose (1) tightly
to the bleed screw (2).
d. Place the other end of the hose into a
container.
e. Slowly squeeze the clutch lever several
times and release it.
f. Fully squeeze the clutch lever and do
not release it.
g. Loosen the bleed screw. This will
release the tension and cause the
clutch lever to contact the handlebar
grip.
h. Tighten the bleed screw and then
release the clutch lever.
i. Repeat steps (e) to (h) until all of the air
bubbles have disappeared from the
clutch fluid in the plastic hose.
j. Tighten the bleed screw to specifica-
tion.
k. Add the recommended clutch fluid to
the proper level.
Refer to “CHECKING THE CLUTCH
FLUID LEVEL”.
WARNING
After bleeding the hydraulic clutch sys-
tem, check the clutch operation.
Bleed screw
6 Nm (0.6 m · kg, 4.3 ft · lb)
FAA01039
O. PURGE DU CIRCUIT
D’EMBRAYAGE
HYDRAULIQUE
Purger l’air du circuit d’embrayage si:
●
le circuit a été démonté,
●
une durite d’embrayage a été desserrée
ou déposée,
●
le niveau de liquide d’embrayage est des-
cendu très bas,
●
l’embrayage fonctionne mal.
_
●
Veiller à ne pas renverser de liquide ni à
faire déborder le réservoir d’embrayage.
●
Avant d’actionner le levier d’embrayage
pour purger l’air, toujours s’assurer qu’il y
a assez de liquide d’embrayage dans le
réservoir. Sans cette précaution, de l’air
pourrait entrer dans le circuit d’embrayage
hydraulique et allonger considérablement
la durée de la purge.
●
S’il est difficile de purger, il faut alors lais-
ser décanter le liquide d’embrayage pen-
dant quelques heures. Répéter les
démarches de la purge quand les petites
bulles d’air ont disparu du circuit.
1. Purger:
●
circuit d’embrayage hydraulique
a. Ajouter du liquide d’embrayage du type
recommandé jusqu’au niveau correct.
b. Mettre la membrane du réservoir du liquide
d’embrayage en place.
c. Connecter fermement un tuyau en plastique
transparent (1) à la vis de purge (2).
d. Placer l’autre extrémité du tuyau dans un
récipient.
e. Actionner lentement et à plusieurs reprises
le levier d’embrayage, puis le relâcher.
f. Serrer au maximum le levier d’embrayage
et le maintenir à cette position.
g. Desserrer la vis de purge. La pression est
ainsi libérée et le levier d’embrayage vien-
dra toucher la poignée du guidon.
h. Serrer la vis de purge, puis relâcher le
levier d’embrayage.
i. Répéter les étapes (e) à (h) jusqu’à ce que
toutes les bulles d’air aient disparu du
liquide se trouvant dans le tuyau en plasti-
que.
j. Serrer la vis de purge comme spécifié.
k. Ajouter du liquide d’embrayage du type
recommandé jusqu’au niveau correct.
Se reporter à “CONTRÔLE DU NIVEAU
DU LIQUIDE D’EMBRAYAGE”.
Contrôler le fonctionnement de
l’embrayage après avoir purgé le circuit
d’embrayage hydraulique.
Vis de purge
6 Nm (0,6 m · kg, 4,3 ft · lb)