EasyManua.ls Logo

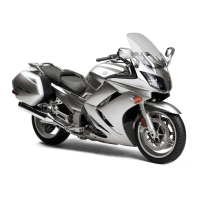
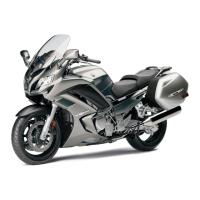
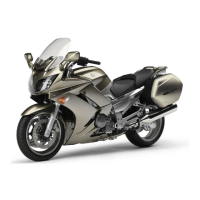
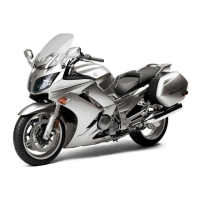
Yamaha FJR1300A(V) User Manual

Yamaha FJR1300A(V)
96 pages
To Next Page IconTo Next Page
Page #1 background imageLoading...
Page #1 background image
2006
FJR1300A(V)
ASSEMBLY MANUAL
MANUEL DE MONTAGE
MONTAGEANLEITUNG
MANUALE DI ASSEMBLAGGIO
MANUAL DE MONTAJE
3P6-28107-50
Question and Answer IconNeed help?

Do you have a question about the Yamaha FJR1300A(V) and is the answer not in the manual?

Yamaha FJR1300A(V) Specifications

General IconGeneral
Bore x Stroke79.0mm x 66.2mm
Compression Ratio10.8:1
Final DriveShaft
Displacement1298cc
Fuel SystemFuel injection
IgnitionTCI
Transmission5-speed
Front BrakesDual 320mm discs
Rear Brakes282mm disc
Front Tire120/70ZR17
Rear Tire180/55ZR17
Wheelbase60.8 in
Seat Height31.7 in
Fuel Capacity6.6 gal
Wet Weight637 lb
Torque102 lb-ft @ 7, 000 rpm

Summary

Foreword

Notice

Important information and warnings for assembly and vehicle operation.

Safety Warnings

Information regarding severe injury or death.

Symbols Used in the Assembly Manual

Preparation

Workshop Requirements

Conditions for the assembly workshop.

Self-Protection Measures

Safety precautions for personal protection during assembly.

Unpacking

Remove Frame Cover

Remove the frame cover (1).

Remove Handlebar Holder Bolts

Remove the handlebar holder bolts (2).

Remove Packing Frames

Remove the packing frames (3).

Parts Location

(1) Carton box 1

Windshield

The windshield component.

Front Fender

The front fender component.

Front Cowling Panels

Inner panels for the front cowling.

(2) Carton box 2

Front Wheel Sensor Housing

Housing for the front wheel sensor.

(3) Bubble wrap pack

Steering Stem Nut

Nut for the steering stem.

Hexagon Socket Bolts

Bolts for grip ends and sensor.

Washers and Collars

Washers and collars for assembly.

Setup and Predelivery Checklist

Installation of Parts from Crate

List of parts to be installed from the crate.

Tightening Torque Specifications

Specified tightening torques for various parts.

Adjustments

Various adjustments to be made to the vehicle.

3. Front Wheel

Front Wheel Axle Installation

Install the front wheel axle.

Tighten Front Wheel Axle Bolt

Tighten front wheel axle bolt.

Tighten Axle Pinch Bolts

Tighten axle pinch bolts.

4. Front Fender

Fender Installation and Tightening

Install fender and tighten bolts.

5. Front Brake Hose Holders

Install and Route Brake Hose Holders

Install and route brake hose holders.

Tighten Flange Bolts

Tighten flange bolts.

6. Rearview Mirrors

Mirror Damper and Nut Tightening

Install dampers and tighten nuts.

8. Battery

Battery Installation

Procedure for installing the battery.

Connect Battery Leads

Connect positive and negative battery leads.

Tighten Battery Bolt

Tighten hexagon socket bolt.

9. Front Cowling Left Inner Panel 2

Install Adjusting Knob Shaft

Install adjusting knob shaft for left headlight.

Position Panel

Position left inner panel 2.

Fit Panel to Cowling Assembly

Fit inner panel 2 to cowling assembly.

10. Front Cowling Right Inner Panel 2

Install Adjusting Knob Shaft

Install adjusting knob shaft for right headlight.

Install Headlight Beam Adjuster

Install headlight beam adjuster.

11. Front Cowling Left Inner Panel 1

12. Front Cowling Right Inner Panel 1

Cable Routing

Adjustments and Predelivery Service

A. Checking and Charging the Battery

B. Measuring the Tire Pressure

C. Checking the Engine Oil Level

D. Checking the Final Gear Oil Level

E. Checking the Coolant Level

F. Adjusting the Engine Idling Speed

G. Adjusting the Throttle Cable Free Play

H. Adjusting the Front Brake

Brake Lever Position Adjustment

Adjust brake lever position.

I. Adjusting the Rear Brake

Brake Pedal Position Measurement

Measure rear brake pedal position.

Brake Pedal Position Adjustment

Adjust rear brake pedal position.

J. Adjusting the Rear Brake Light Switch

Check Brake Light Timing

Check rear brake light timing.

Adjust Brake Light Timing

Adjust rear brake light timing.

K. Checking the Brake Fluid Level

L. Bleeding the Hydraulic Brake System

M. Adjusting the Clutch Lever

Clutch Lever Position Adjustment

Adjust clutch lever position.

N. Checking the Clutch Fluid Level

O. Bleeding the Hydraulic Clutch System

P. Adjusting the Front Fork Legs

Spring Preload Adjustment

Adjust spring preload.

Rebound Damping Adjustment

Adjust rebound damping.

Compression damping

Q. Adjusting the Rear Shock Absorber Assembly

Spring Preload Adjustment

Adjust spring preload.

R. Adjusting the Headlight Beams

Vertical Headlight Beam Adjustment

Adjust headlight beam vertically.

Horizontal Headlight Beam Adjustment

Adjust headlight beam horizontally.

S. Adjusting the Digital Clock

Digital Clock Adjustment

Adjust the digital clock.

Appendices

Service Data

Technical specifications for service.

Tire Pressure

Tire pressure specifications.

Owner's Tool Kit

Tightening Torques

Engine

Tightening torque specifications for engine components.

Chassis

Tightening torque specifications for chassis components.

Related product manuals