K
Kara MartinSep 5, 2025
Why is my Yamaha HTR-5750 humming?
- PPatricia HessSep 5, 2025
If you're hearing a humming sound from your Yamaha Receiver, firmly connect the audio plugs. If the problem persists, the cables may be defective.
Why is my Yamaha HTR-5750 humming?
If you're hearing a humming sound from your Yamaha Receiver, firmly connect the audio plugs. If the problem persists, the cables may be defective.
What to do if Yamaha Receiver does not operate properly?
If your Yamaha Receiver isn't operating properly, disconnect the AC power cord from the outlet and then plug it in again after about 30 seconds. The internal microcomputer may have been frozen by an external electric shock or a power supply with low voltage.
Why is FM stereo reception noisy on my Yamaha HTR-5750?
If FM stereo reception is noisy on your Yamaha Receiver, check the antenna connections. Try using a high-quality directional FM antenna, as the characteristics of FM stereo broadcasts may cause this problem when the transmitter is too far away or the antenna input is poor.
Why can't I change sound settings on my Yamaha Receiver?
If the sound field parameters and other settings on your Yamaha Receiver cannot be changed, check if “MEMORY GUARD” in SET MENU is set to ON. If it is, select OFF.
What does 'CHECK SP WIRES' mean on my Yamaha HTR-5750 Receiver?
If “CHECK SP WIRES” appears on the front panel display of your Yamaha Receiver, make sure all speaker cables are connected correctly, as this indicates that the speaker cables are short-circuited.
How to fix source that cannot be recorded by a digital recording component connected to DIGITAL OUTPUT jack on Yamaha Receiver?
If a source cannot be recorded by a digital recording component connected to the DIGITAL OUTPUT jack on your Yamaha Receiver, connect the source component to the DIGITAL INPUT jacks.
Read and keep all safety and operating instructions for future reference.
Adhere to all warnings on the product and follow all operating instructions.
Do not use the apparatus near water to prevent electric shock or fire.
Ensure adequate ventilation and keep away from heat sources to prevent damage.
Unplug during thunderstorms and keep antenna systems away from power lines.
Do not overload outlets or expose the unit to objects/liquids to prevent hazards.
Refer all servicing to qualified personnel for any damage or malfunction.
Modifications not approved by Yamaha may void FCC authority to use the product.
Use high-quality shielded cables and follow instructions to maintain FCC authorization.
This equipment complies with FCC Part 15 for Class B digital devices.
Install in a cool, dry place, ensure ventilation, and avoid interference.
Avoid temperature changes, humidity, and liquids to prevent damage.
Ensure correct voltage, handle power cords properly, and use dry cloths for cleaning.
Avoid excessive volume for hearing safety and disconnect during storms.
Do not modify; contact service personnel; disconnect for long periods.
Details on minimum RMS output power for different channels (HTR-5750/5740).
Lists YAMAHA DSP technologies and Dolby/DTS decoders supported.
Describes tuner capabilities like random access and automatic tuning.
Lists D/A converter, SET MENU, input jacks, sleep timer, and remote control features.
Highlights S-Video input/output and video conversion capabilities.
Lists all included parts: remote control, batteries, antennas, and adapter.
Step-by-step guide on how to insert batteries into the remote control.
Important notes regarding battery replacement, usage, and handling leaked batteries.
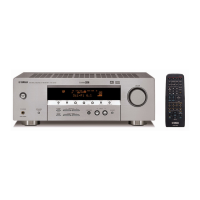
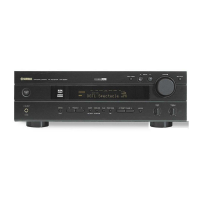
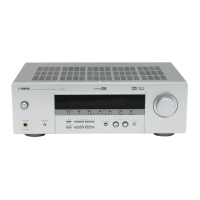
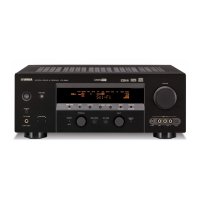
Identifies and describes controls on the front panel of the unit.
Explains various indicators on the front panel display.
Describes functions of buttons on the remote control.
Instructions on aiming the remote control and handling it.
Caution not to connect to mains power until all connections are complete.
Detailed instructions and cautions for connecting speakers.
Instructions for connecting AM and FM antennas.
Instructions for connecting the AC power cord and using AC outlets.
Guide to setting the impedance selector based on speaker impedance.
Recommended placement for front, surround, center, and subwoofer speakers.
Detailed instructions and cautions for connecting speakers and banana plugs.
Identifies FRONT, CENTER, SURROUND, SUBWOOFER, and SURROUND BACK terminals.
Press STANDBY/ON or SYSTEM POWER to turn the unit on.
Guide to quickly setting up the system using the BASIC SETUP menu.
Select room size (Small, Medium, Large) for optimal sound settings.
Set YES if a subwoofer is present, NO otherwise.
Select the number of speakers connected (2spk to 6spk).
Confirm test tone results (CHECK OK? YES/NO) for speaker setup.
Adjust balance between speakers using test tone.
Use the TEST button for speaker level adjustment.
Step-by-step guide to basic playback operations.
Choose desired input using INPUT button or selector buttons.
Start playback or select a station on the source component.
Control the output level using the VOLUME controls.
Select desired sound field program using PROGRAM buttons.
Enjoy DSP sound effects on headphones; indicator lights up.
Adjust bass/treble balance for speakers or headphones.
Use MUTE button to silence audio; indicator blinks.
How to select the MULTI CH INPUT source.
Combine video from one source with audio from another.
Using the remote control for sound field programs.
Enjoy 6.1-channel playback with surround back speaker.
Select decoders like PLIIxMusic, EX/ES, EX, or OFF.
Enjoy 2-channel stereo from multi-channel sources.
STRAIGHT mode outputs stereo sources without effect processing.
Enjoy DSP surround effects without surround speakers using virtual speakers.
Designate input mode for digital jacks (AUTO, LAST).
Auto-switching to DTS mode, manual release, and potential issues with processed digital output.
How to display input signal type, format, and frequency.
Avoid DTS CDs, check input mode, no subwoofer output, settings not effective.
Select NIGHT:CINEMA or NIGHT:MUSIC for films or music.
Adjust compression level for night listening modes using </ >.
Modes not effective with Direct Stereo or MULTI CH INPUT.
Two tuning methods: automatic for strong signals, manual for weak signals.
Procedure to perform automatic tuning of FM/AM stations.
Manually tune FM/AM stations for weak signals.
How to store FM stations using automatic or manual preset tuning.
Step-by-step guide to manually storing stations.
Tune to desired station by selecting its preset number.
Swap assignments of two preset stations.
Adjustments and operations are performed from recording components.
Details on standby mode, component connections, and recording limitations.
Handling DTS signals for digital recording to avoid noise.
Select sound fields for movie/video sources (MULTI for multi-channel, 2-CH for stereo).
Details of various sound field programs for Dolby Digital, DTS, and Pro Logic sources.
Select sound fields for music sources like CDs, FM/AM, tapes.
Automatically sets the unit to standby mode after a specified time.
Step-by-step guide to setting the sleep timer.
How to cancel the sleep timer function.
Adjust output level of each speaker for balance.
Use test tone to manually balance speaker levels.
Quickly setup basic system parameters.
Adjust speaker and system settings.
Manually adjust speaker settings, tone, and compensate for video delays.
Reassign digital inputs/outputs and select input modes.
Adjust optional system parameters.
Access and adjust SET MENU parameters using the remote control.
Initialize sound field program group parameters to their original settings.
Specify the location of speakers connected to the SPEAKERS B terminals.
Manually adjust speaker settings.
Set center speaker size (LRG, SML, NONE).
Set front speaker size (LARGE, SMALL).
Set surround speaker size (LRG, SML, NONE).
Set surround back speaker size (LRG, SML, NONE).
Route low-frequency signals to subwoofer or front speakers (SWFR, FRONT, BOTH).
Select cross-over frequency for subwoofer signals.
Switch subwoofer phase (NRM, REV) for better bass sound.
Manually balance speaker levels between front/surround left and other speakers.
Input speaker distances to adjust channel delay for sound arrival time.
Adjust center channel equalizer to match front speaker tonal quality.
Adjust LFE channel output level for subwoofer/headphones.
Select dynamic range compression for speakers/headphones.
Customize overall audio settings.
Reassign digital inputs/outputs and select input modes.
Reassign jacks to connect more components.
Designate input mode for digital jacks (AUTO, LAST).
Adjust optional system parameters.
Protect DSP parameters and settings from accidental changes.
Explains how reflections and reverberations create the sound field.
Describes direct sound, early reflections, and reverberations.
How to change factory preset parameters for better sound.
Select a parameter and press buttons to revert to factory preset.
Use PARAM. INI function to reset all parameters.
Adjusts the level of DSP effect sounds relative to direct sound.
Changes apparent distance by adjusting delay between direct sound and first reflection.
Adjusts volume level for each channel in 6-channel stereo mode.
Parameters like PANORAMA, DIMENSION, CT WIDTH for Pro Logic II/IIx.
PLII/PLIIx selection for Pro Logic II/IIx decoding.
C. IMAGE parameter for adjusting center image.
Common issues like unit not turning on, no sound, or no picture.
Troubleshooting steps for when the unit won't power on.
Troubleshooting steps for when no sound is produced.
Troubleshooting steps for when there is no picture output.
Addresses sound issues like sudden loss, one-sided sound, or no sound from specific speakers.
Diagnoses and resolves no sound issues for effect, center, surround speakers.
Troubleshooting steps when the subwoofer produces no sound.
Troubleshooting Dolby Digital/DTS playback and digital recording problems.
Address humming sounds, noise interference, and picture disturbance.
Troubleshooting for unit not operating properly or entering standby due to overheating.
Troubleshooting FM stereo noise, distortion, and tuning problems.
Troubleshooting problems with the remote control not functioning.
Steps to reset all parameters to factory presets.
Explains Dolby Digital, Dolby Pro Logic, DTS, and Neo:6 audio formats.
Explains CINEMA DSP, SILENT CINEMA, and Virtual CINEMA DSP.
Defines ITU-R, LFE, PCM, sampling frequency, and quantized bits.
Explains Component, Composite, and S-Video signals.
Technical specs for audio output power, THD, damping factor, and frequency response.
Technical specs for video signal type, S/N ratio, and frequency response.
Technical specs for FM tuner range, sensitivity, and S/N ratio.
Technical specs for AM tuner range and sensitivity.
Specs for power supply, consumption, AC outlets, dimensions, and weight.