EasyManua.ls Logo

Yamaha HTR-5990 - User Manual

Yamaha HTR-5990
128 pages
Print Icon
To Next Page IconTo Next Page
Loading...
YAMAHA ELECTRONICS CORPORATION, USA
6660 ORANGETHORPE AVE., BUENA PARK, CALIF. 90620, U.S.A.
YAMAHA CANADA MUSIC LTD.
135 MILNER AVE., SCARBOROUGH, ONTARIO M1S 3R1, CANADA
YAMAHA ELECTRONIK EUROPA G.m.b.H.
SIEMENSSTR. 22-34, 25462 RELLINGEN BEI HAMBURG, GERMANY
YAMAHA ELECTRONIQUE FRANCE S.A.
RUE AMBROISE CROIZAT BP70 CROISSY-BEAUBOURG 77312 MARNE-LA-VALLEE CEDEX02, FRANCE
YAMAHA ELECTRONICS (UK) LTD.
YAMAHA HOUSE, 200 RICKMANSWORTH ROAD WATFORD, HERTS WD18 7GQ, ENGLAND
YAMAHA SCANDINAVIA A.B.
J A WETTERGRENS GATA 1, BOX 30053, 400 43 VÄSTRA FRÖLUNDA, SWEDEN
YAMAHA MUSIC AUSTRALIA PTY, LTD.
17-33 MARKET ST., SOUTH MELBOURNE, 3205 VIC., AUSTRALIA
©
2005 All rights reserved.
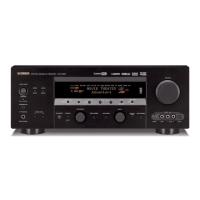
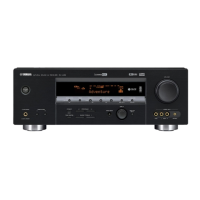
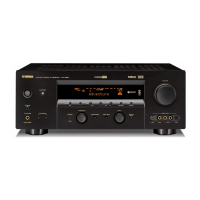
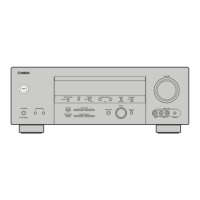
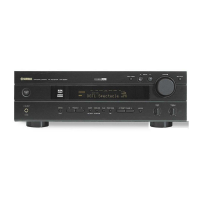
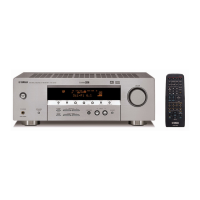
HTR-5990
Printed in Malaysia WF99950
HTR-5990
AV Receiver
OWNER’S MANUAL
U
PIONEER 0069, 0094, 0108
POLK AUDIO 0108
PROFITRONIC 0267
PROLINE 0027
PROSCAN 0087, 1087
PROTEC 0099
PULSAR 0066
PYE 0108
QUASAR 0062, 1062
QUELLE 0108
RCA 0062, 0069, 0087,
0267, 0834, 1062,
1087
RADIOSHACK 0027
RADIOLA 0108
RADIX 0064
RANDEX 0064
REALISTIC 0027, 0062, 0064,
0074, 0075, 0131
REOC 0375
REPLAYTV 0641, 0643
REX 0068
ROADSTAR 0064, 0099, 0267,
0305
RUNCO 0066
SBR 0108
SEG 0267
SEI 0108
STS 0069
SABA 0068, 0347
SALORA 0070
SAMPO 0064, 0075
SAMSUNG 0072, 0267, 0459
SANKY 0066, 0075
SANSUI 0027, 0068, 0094,
1506
SANYO 0074, 0131, 0267
SAVILLE 0379
SCHAUB LORENZ 0027, 0068,
0131
SCHNEIDER 0027, 0099, 0108
SCOTT 0070, 0072, 0211
SEARS 0027, 0062, 0064,
0069, 0074, 0131,
1264
SELECO 0068
SEMP 0072
SHARP 0075, 0834
SHINTOM 0099, 0131
SIEMENS 0064, 0108, 0131
SILVA 0064
SINGER 0072, 0099
SINUDYNE 0108
SONIC BLUE 0641, 0643
SONTEC 0064
SONY 0027, 0059, 0060,
0062, 0663, 1259
SUNKAI 0375
SUNSTAR 0027
SUNTRONIC 0027
SYLVANIA 0027, 0062, 0108,
0070, 1808
SYMPHONIC 0027
TMK 0267
TANDY 0027, 0131
TASHIKO 0027, 0064
TATUNG 0027, 0068, 0072,
0094, 0108
TEAC 0027, 0068, 0305,
0334, 0669
TECHNICS 0062, 0253
TECO 0062, 0064, 0068,
0075
TEKNIKA 0027, 0062, 0064
TELEAVIA 0068
TELEFUNKEN 0068, 0347
TENOSAL 0099
TENSAI 0027
THOMAS 0027
THOMSON 0068, 0087, 0094,
0347
THORN 0068, 0131
TIVO 0645, 0663
TOSHIBA 0068, 0070, 0072,
0094, 0108, 0872
TOTEVISION 0064, 0267
UHER 0267
UNITECH 0267
UNIVERSUM 0027, 0064, 0108,
0267
VECTOR 0072
VICTOR 0068, 0094
VIDEO CONCEPTS 0072
VIDEOMAGIC 0064
VIDEOSONIC 0267
VILLAIN 0027
WARDS 0027, 0062, 0069,
0074, 0075, 0087,
0099, 0108, 0267
WHITE WESTINGHOUSE
0099
XR-1000 0027, 0062, 0099
YAMAHA 0068
YAMISHI 0 0 9 9
YOKAN 0099
YOKO 0267
ZENITH 0027, 0060, 0066,
1506
HTR-5990_U-cv.fm Page 1 Tuesday, August 2, 2005 11:14 AM

Table of Contents

Questions and Answers

Summary

IMPORTANT SAFETY INSTRUCTIONS

FEATURES

Built-in 7-channel power amplifier

Details the amplifier specifications and output power.

Sound field features

Lists YAMAHA's proprietary sound field technologies.

HDMI (High-Definition Multimedia Interface)

Explains HDMI interface for high-definition video and audio.

GETTING STARTED

Supplied accessories

Lists all the parts included in the package.

Preparing the remote control

Instructions on installing batteries and using the remote.

CONTROLS AND FUNCTIONS

Front panel

Describes the controls located on the front panel of the unit.

Front panel display

Explains the information shown on the front panel display.

Remote control (continued)

Continues the description of remote control functions (A-R).

Front panel display (continued)

Explains more indicators and display elements (21-29).

Rear panel

Describes the connectors and ports on the rear panel.

CONNECTIONS

Before connecting speakers

Explains speaker layout according to ITU-R standards for DSP.

Connecting to the speaker terminals (continued)

Provides step-by-step instructions for connecting speaker cables.

Audio jacks

Details types of audio jacks (analog, digital coaxial, optical, HDMI).

Video jacks

Describes video jacks (composite, component, S-video, HDMI) and signal flow.

Connecting HDMI components

Guides on connecting HDMI devices to the unit.

Connecting a DVD player

Shows how to connect a DVD player for audio and video.

Connecting other video components

Explains connecting other video sources like TV tuners or VCRs.

Connecting audio components

Guides on connecting audio sources like CD recorders and turntables.

Turning on and off this unit (continued)

Continues the power on/off procedure for main unit and zones.

Connecting to the speaker terminals

Details how to connect speakers to the front, center, and surround terminals.

Turning on and off this unit

Explains the procedure to power the unit on and off.

Setting the speaker impedance

Guides on setting the speaker impedance (6 or 8 ohms).

AUTO SETUP

Introduction

Explains YAMAHA's YPAO technology for automatic speaker setup.

Using AUTO SETUP

Step-by-step guide to performing the automatic setup procedure.

Using AUTO SETUP (continued)

Guides on saving or canceling AUTO SETUP results.

Optimizer microphone setup

Details how to connect and position the optimizer microphone.

PLAYBACK

Basic operations

Covers fundamental operations like powering on, selecting speakers, and input sources.

Basic operations (continued)

Details adjusting volume and selecting sound field programs.

RECORDING

EDITING SOUND FIELD PARAMETERS

SOUND FIELD PROGRAM DESCRIPTIONS

MANUAL SETUP

1 BASIC MENU

Use to manually adjust basic system parameters.

Using MANUAL SETUP

Guides on accessing and adjusting parameters using the remote control.

Using BASIC MENU

Details how to manually adjust speaker settings (SPEAKER SET).

Using BASIC MENU (continued)

Explains LFE/BASS OUT, FRONT SP, CENTER SP, SUR. L/R SP settings.

Speaker level B)SP LEVEL

Manually balances speaker levels for optimal sound output.

Input;output assignment A)I;O ASSIGNMENT

Reassigns jacks for digital input/outputs and selects input modes.

2 SOUND MENU

Adjust speaker settings or compensate for video signal processing delays.

Speaker distance C)SP DISTANCE

Manually inputs speaker distance and adjusts channel delay.

3 INPUT MENU

Reassign digital inputs/outputs, select input mode, rename inputs, or specify settings.

Using SOUND MENU

Adjusts speaker settings or video signal delays.

HDMI set E)HDMI SET

Adjusts HDMI support audio settings for playback.

ADVANCED OPERATIONS

Adjusting speaker levels

Manually adjusts the output level of each speaker while listening.

ADVANCED SETUP

Using ADVANCED SETUP

Guides on accessing and adjusting advanced settings via front panel.

Speaker impedance SP IMP.

Sets speaker impedance (6 or 8 ohms) to match speakers.

REMOTE CONTROL FEATURES

Controlling this unit

Explains how to use the remote control to operate the main unit.

Controlling each component

Details how to set remote control codes for different components.

Setting remote control codes

Explains how to set remote control codes for AMP, Tuner, and XM.

Setting remote control AMP codes

Details setting AMP codes for different components.

Setting remote control codes (continued)

Continues setting remote control codes.

Using LEARN (continued)

Provides steps for programming functions via the LEARN feature.

Controlling other components

Guides on using the remote to control other audio/video components.

Setting remote control tuner codes

Details setting tuner codes for different components.

Using LEARN

Explains how to program functions from other remote controls.

Setting remote control XM codes

Details setting XM codes for different components.

HDMI

Assigning HDMI components

Guides on assigning HDMI components to input jacks.

Setting the HDMI support audio

Details how to set HDMI audio support for the unit or other components.

Basic HDMI operations

Steps for listening to playback from an HDMI component.

TROUBLESHOOTING

Remote control

Troubleshoots issues related to the remote control not working or learning.

General

Lists common problems and their solutions for general operation.

General (continued)

Addresses issues like humming, low volume, and recording problems.

AUTO SETUP

Lists error messages that may appear during AUTO SETUP.

After AUTO SETUP

Explains warning messages that may appear after AUTO SETUP.

HDMI

Lists error messages related to HDMI connectivity and HDCP.

Yamaha HTR-5990 Specifications

General IconGeneral
BrandYamaha
ModelHTR-5990
CategoryReceiver
LanguageEnglish

Related product manuals