Maintenance
77
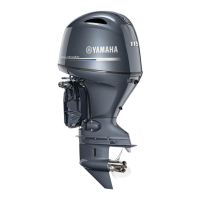
Checkpoints
●
Check each of the propeller blades for ero-
sion from cavitation or ventilation, or other
damage.
●
Check the propeller shaft for damage.
● Check the splines for wear or damage.
●
Check for fish line tangled around the pro-
peller shaft.
●
Check the propeller shaft oil seal for dam-
age.
EMU42631
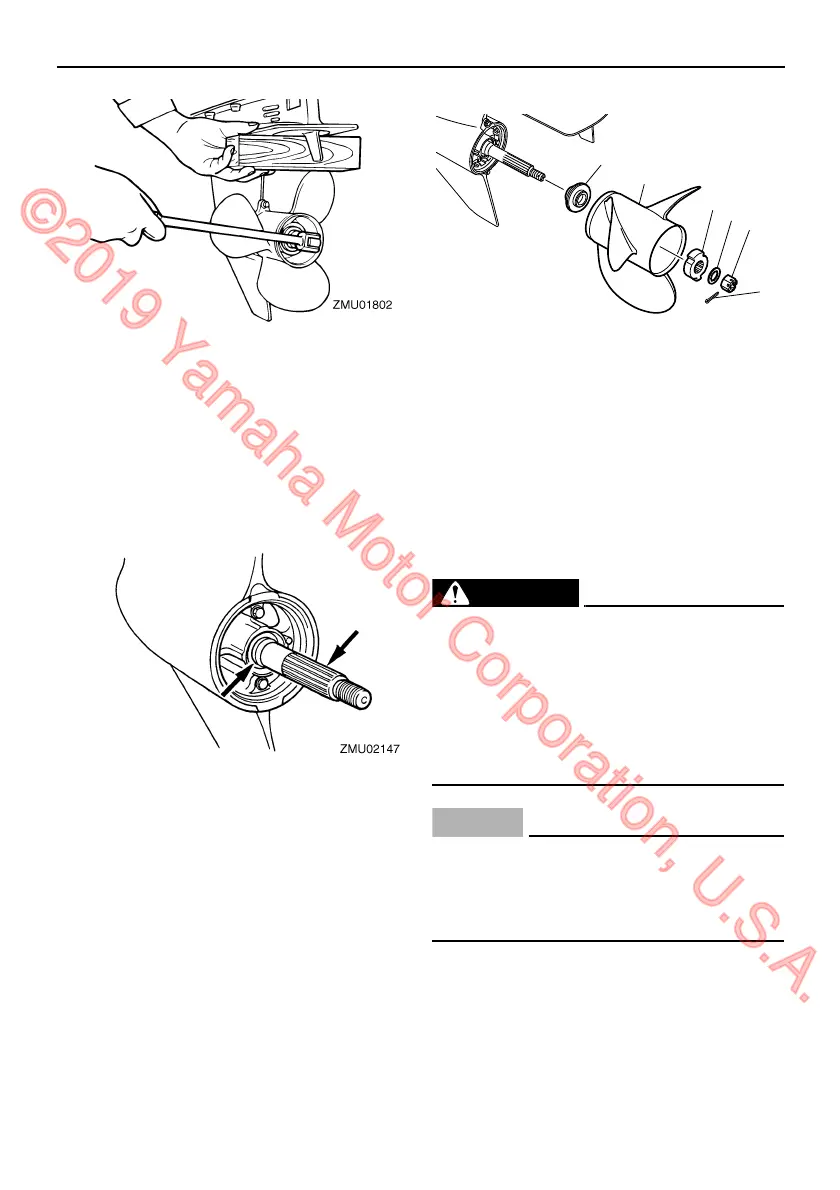
Removing propeller
1. Straighten the cotter pin and pull it out us-
ing a pair of pliers.
2. Remove the propeller nut, washer, and
spacer. WARNING! Do not use your
hand to hold the propeller when loos-
ening the propeller nut.
[EWM01890]
3. Remove the propeller, spacer (if
equipped), and thrust washer.
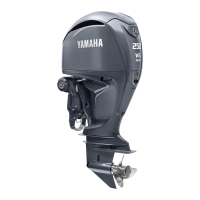
EMU41980
Installing propeller
EWM00770
On counter rotation models, be sure to
use a propeller intended for counterclock-
wise rotation. These propellers are identi-
fied with the letter “L” after the size
indication on the propeller. Otherwise the
boat could move in the opposite direction
from that expected.
ECM00501
Make sure to use a new cotter pin and
bend the ends over securely. Otherwise,
the propeller could come off during opera-
tion and be lost.
1. Apply Yamalube Marine Grease to the
propeller shaft.
2. Install the thrust washer and propeller on
the propeller shaft. NOTICE: Make sure
to install the thrust washer before in-
1. Cotter pin
2. Propeller nut
3. Washer
4. Spacer
5. Propeller
6. Thrust washer
U6AL32E0.book Page 77 Monday, April 9, 2012 11:55 AM
©2019 Yamaha Motor Corporation, U.S.A.