11
PSR-E343/PSR-E344/YPT-340
■
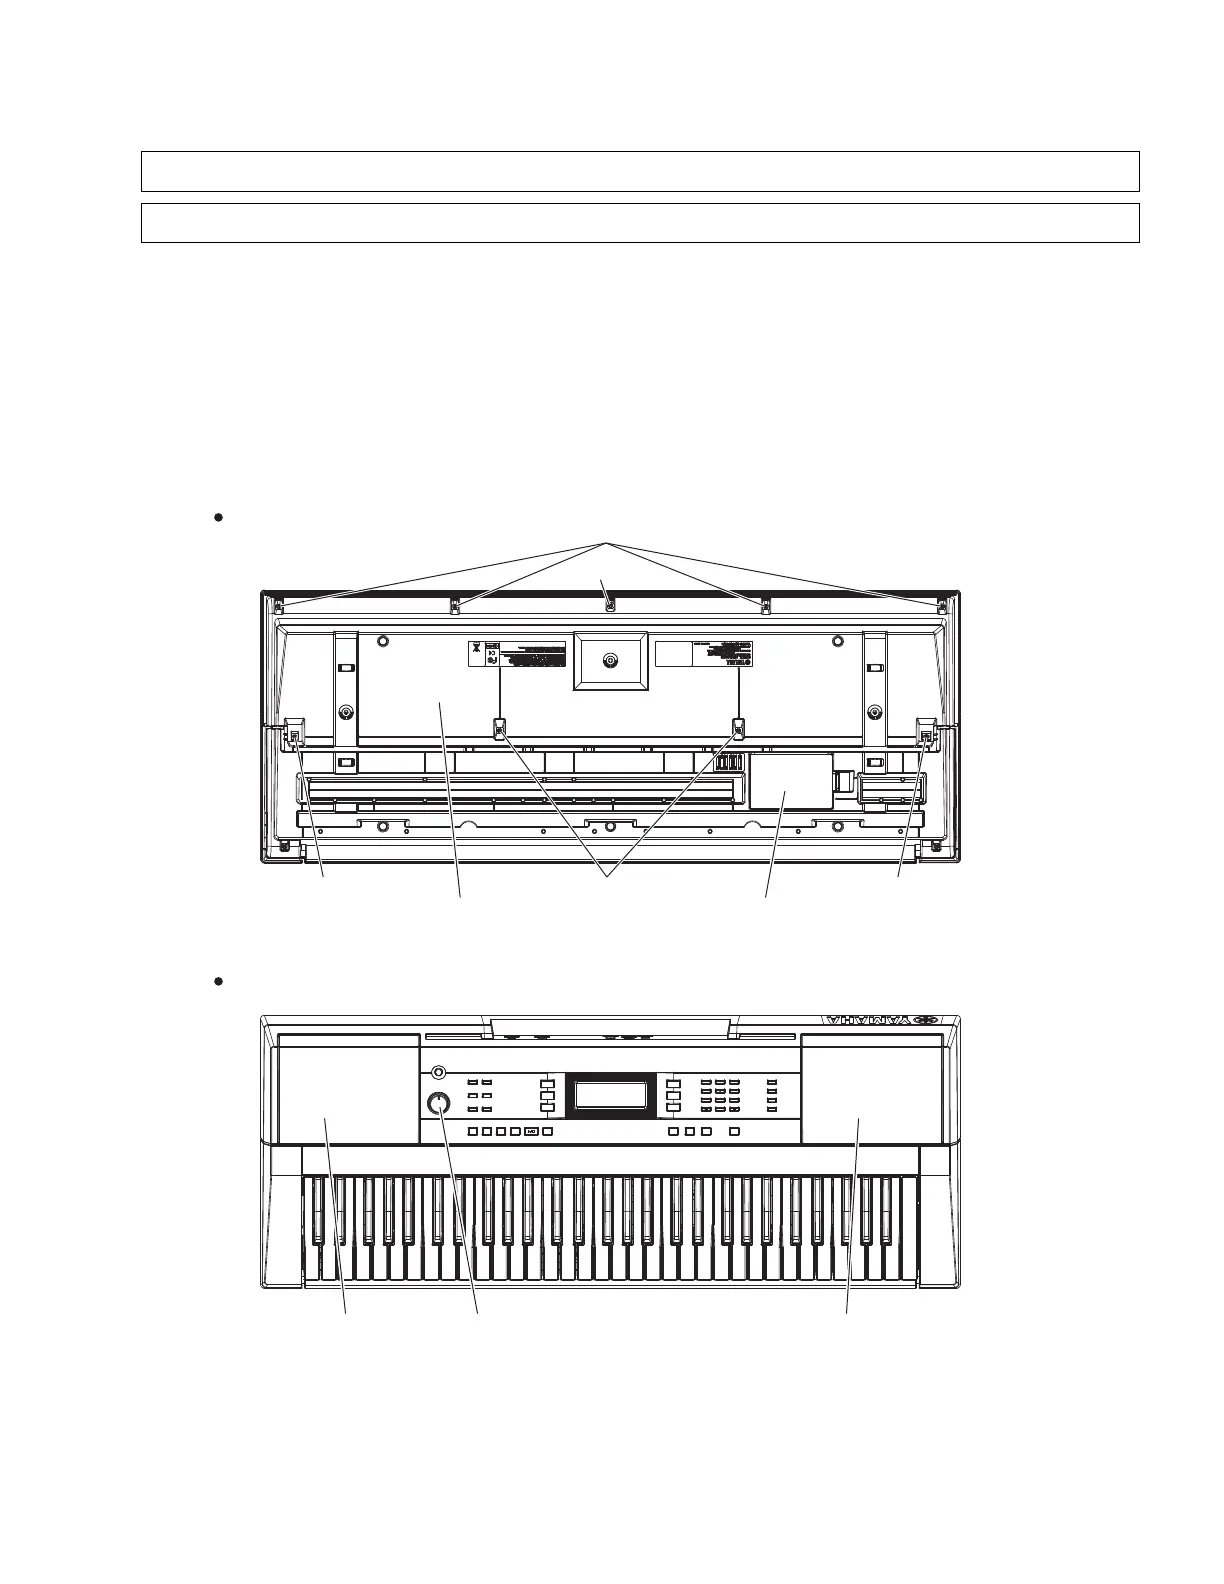
DISASSEMBLY PROCEDURE(分解手順)
Fig.1(図 1)
Caution: Be sure to attach the removed fi lament tape just as it was before removal.
注意 :分解時に取り外したフィラメントテープは、必ず元通りに取り付けてください。
1. 下ケース Ass'y(所要時間 :約2分)
1-1 [80A] のネジ 1 本、[80B] のネジ 4 本と [100] のネジ
4 本を外して、下ケース Ass'y を外します。(図 1)
※ 下ケース Ass'y を取り付けるときは、[80A] のネジ
を締めてから他のネジを締めてください。(図 1)
1. Lower Case Assembly
(Time required: About 2 minutes)
1-1 Remove the screw marked [80A], four (4) screws
marked [80B] and four (4) screws marked [100].
The lower case assembly can then be removed. (Fig.1)
* When installing the lower case assembly, fi rst
tighten the screw marked [80A] and then the
remaining screws. (Fig.1)
/2:(5&$6($66(0%/<
(下ケースAss'y)
63*5,//($66(0%/<
(SPグリルAss'y)
.12%9
(Vツマミ)
63*5,//($66(0%/<
(SPグリルAss'y)
%$77(5<&29(5$66(0%/<
(電池蓋Ass'y)
>%@
>$@
>@ >@>@
%RWWRPYLHZ(下から見た図)
7RSYLHZ(上から見た図)