26
PSR-E343/PSR-E344/YPT-340
* If the test number 60 “Factory Set” is executed, the data already set will be lost.
1 Preparations
1) Use an AC adaptor PA-3C, PA-130 or PA-130A.
2) Measuring device: Frequency counter, which can detect thousandth value or more, Level meter (with JIS-C fi lter), Oscilloscope
*
Input impedance of the measuring device should be 1 MΩ or more.
3) Jig: Foot switch (FC-4 or FC-5), USB cable, Stereo mini jack cable
4) Terminal condition:
・
Use a stereo plug and connect a load resistor of 33 Ω to the [PHONES/OUTPUT] jack for measurement unless
otherwise specifi ed.
・
Before power switch ON, connect the foot switch to [SUSTAIN] jack.
5) Controller settings
MASTER VOLUME : MAX
PEDAL : OFF
Others
: Initial setting when the power is turned on
2 Starting up the Test Program
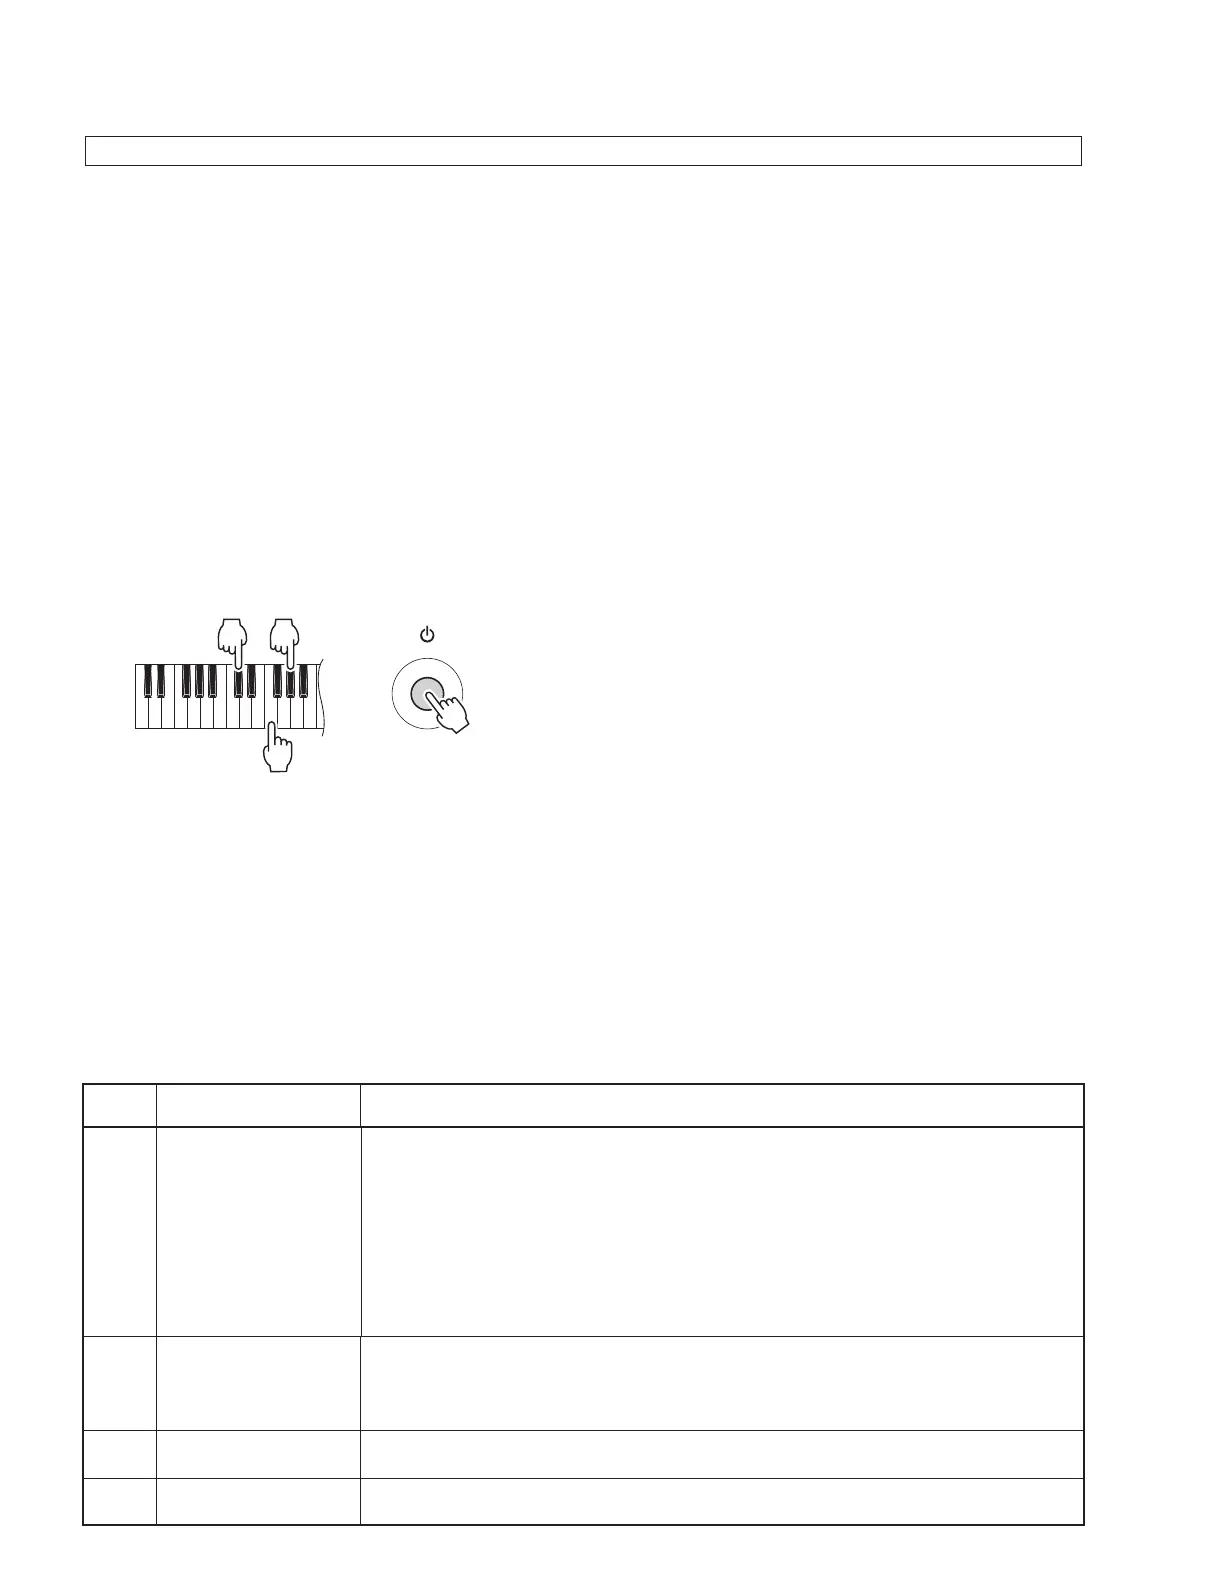
While holding down the keys [C#2], [F2] and [G#2] simultaneously, press the [STANDBY / ON] switch.
3 Test procedure
1) When the test program is started, “TEST” will be displayed on the LCD.
2) Press the [Tenkey –] or [Tenkey +] button to select a test program item.
3) Press the [START/STOP] button to execute the test.
If the result is OK or test item is completed,
press the [START/STOP] button again to return to the item selection display.
Press the [Tenkey –] or [Tenkey +] button to select the next test item.
A cursor (“_”) is shown below the fi rst character of the item for which the test results are OK.
If the result is NG,
press the [DEMO] button or the lowest key (white key C1) to return to the item selection display.
4 Test Program List
■
TEST PROGRAM
F2
C#2 G#2
(dBu=dBm)
TEST
No.
LCD display
Test descriptions, judging conditions, etc.
1
001: Version
Displays version of the ROM.
Using the tenkeys, each data version can be displayed as follows.
[Tenkey 1] Main Program Version “∗∗∗ Main”
[Tenkey 2] Boot Program Version “∗∗∗ Boot”
[Tenkey 3] Style Data Version “∗∗∗ Style”
[Tenkey 4] Song Data Version “∗∗∗ Song”
[Tenkey 5] Voice Parameter Version “∗∗∗ Param”
[Tenkey 6] Wave Data Version “∗∗∗ Wave” ∗∗∗ : Version
2
002: Mem1 All
Checks the ROM, RAM and FROM connected to the CPU bus (simplifi ed check).
Make sure that “Mem1 OK” is displayed on the LCD.
* If the test result is OK, the tests “003: Rom Chk1”, “004: Ram Chk1” and “005:
FRom Chk1” can be skipped.
3
003: Rom Chk1
Checks the ROM connected to the CPU bus (simplifi ed check).
Make sure that “Rom OK” is displayed on the LCD.
4
004: Ram Chk1
Checks the RAM connected to the CPU bus (simplifi ed check).
Make sure that “Ram OK” is displayed on the LCD.