PSR-E463/PSR-EW410 Owner’s Manual
30
Quick Guide
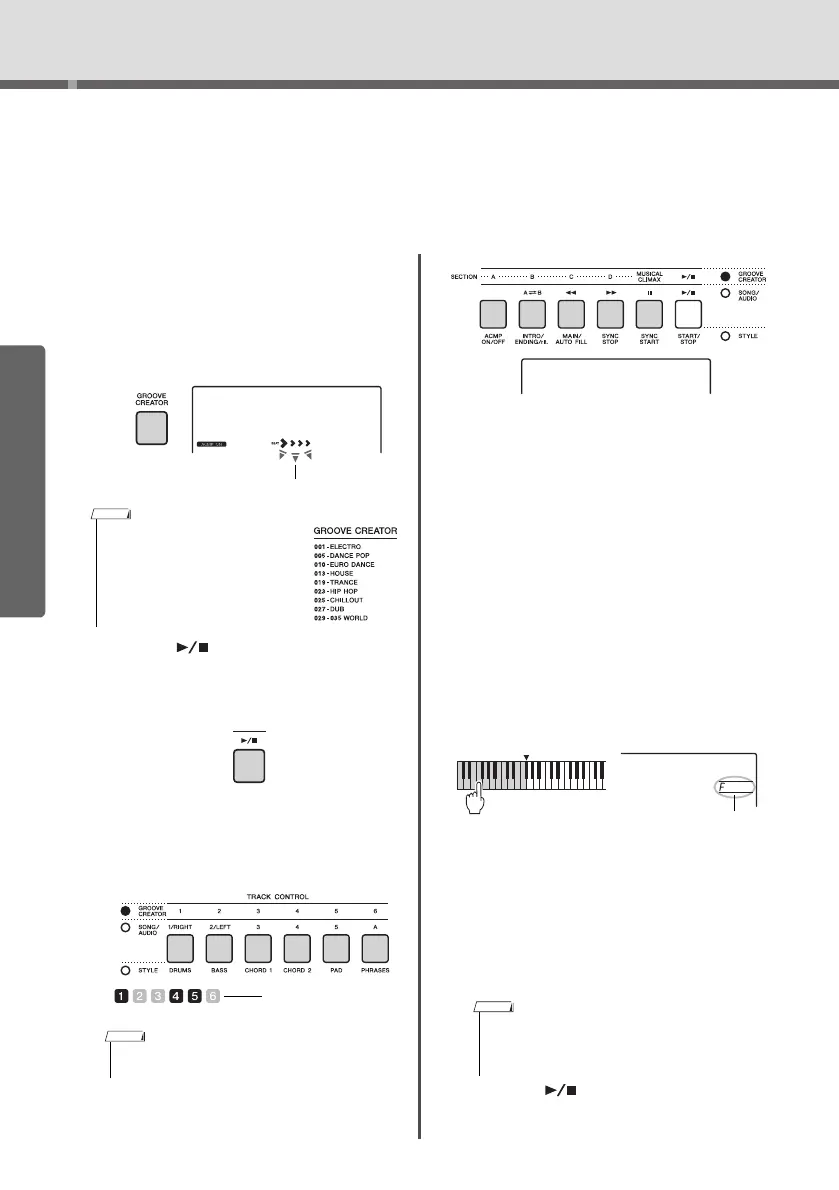
Playing with Groove Creator
The Groove Creator function lets you repeatedly play back various rhythm patterns and
phrases (each called a Groove) in various genres, including Hip Hop, House, etc.—for
dynamic, powerful performances. Try out the expressive performance features, such as
changing keys in the left-hand area of the keyboard and rotating the knobs for dynamic
sound variations.
1
Press the [GROOVE CREATOR] button,
and use the dial to select the desired
Groove.
ACMP is automatically turned on, and the key-
board is divided into the Auto Accompaniment
area (page 26) and melody area.
2
Press the [ ] (Start/Stop) button to
start Groove playback.
Yo u can also start playback by pressing any note
in the Auto Accompaniment area (page 26).
During Groove playback, enjoy creating sound
variations via the following operations.
Turni ng on/off individual tracks via the
[TRACK CONTROL] buttons
Changing the Section via the [A]–[D] but-
tons
Using the [MUSICAL CLIMAX] button
When you press the button, a negative count (indi-
cating a lead-in) appears on the display. As the lead-
in approaches 0, the Groove builds in intensity and
variation. When the count reaches 0, it comes to a
musical climax. You can use this as professional
sounding build-up, switching to another section or
another Groove when the count reaches 0 (or even
before, if you want). Moreover, this can also be used
as an Ending; the Groove stops after the count
reaches 0 and an Ending phrase is played.
Using the Retrigger function
Groove Retrigger is a function which repeats
the first part of the current Groove, for a rhyth-
mic break effect. For details, refer to page 61.
Transposing playback by pressing any note
in the Auto Accompaniment area (page 26).
Changing the sound via the Knobs
Press the [KNOB ASSIGN] button several times
to select the function. Press [TARGET] button and
BACKING icon appears on the display, then
rotate knobs A and B. Refer to page 25.
Playing Arpeggios in the right-hand area
Press the [ARPEGGIO] button to turn it on, and then
play the notes in the right-hand area of the keyboard.
3
Press the [ ] (Start/Stop) button to
stop playback.
• To select a genre, use the CATEGORY
[<<][>>] buttons. Refer to the right
side at the top of the panel.
• Refer to online material Data List.
• Up to two track buttons can be pressed simultane-
ously for turning on or off.
Elec Dnc
001
On/off status is shown in
the display (page 19)
• When you select a Voice between 292 and 301,
Arpeggio is applied only to the Split Voice. Playing a
key to the left of the Split Point turns Arpeggio on as
well as specifies the key for Groove playback.