Chapter
2
Basic Engine
6. Connecting Rod
t4LHA Series
6-2
Crank
pin
bushing
6-2.1
Checking
crank pin bushing
Check
for flaking, melting or seizure on the contact
surface.
6-2.2 Measuring crank pin oil clearance
Use
a plastic gauge.
Cylinder
gauge
Procedure
(1) Use the press gauge (Plastigage) for measuring oil
clearance
in the crank pin.
(2) Mount the connecting rod on the crank pin
(tighten
to
specified
torque).
N'm(kgf-m)
Connecting
rod tightening torque
113.1 ~ 122.9
(11.5-12.5)
Apply
engine oil to the thread and seat surface
(3) Remove the connecting rod and measure the broken
plastigauge
with
measuring
scale.
(Plastigauge)
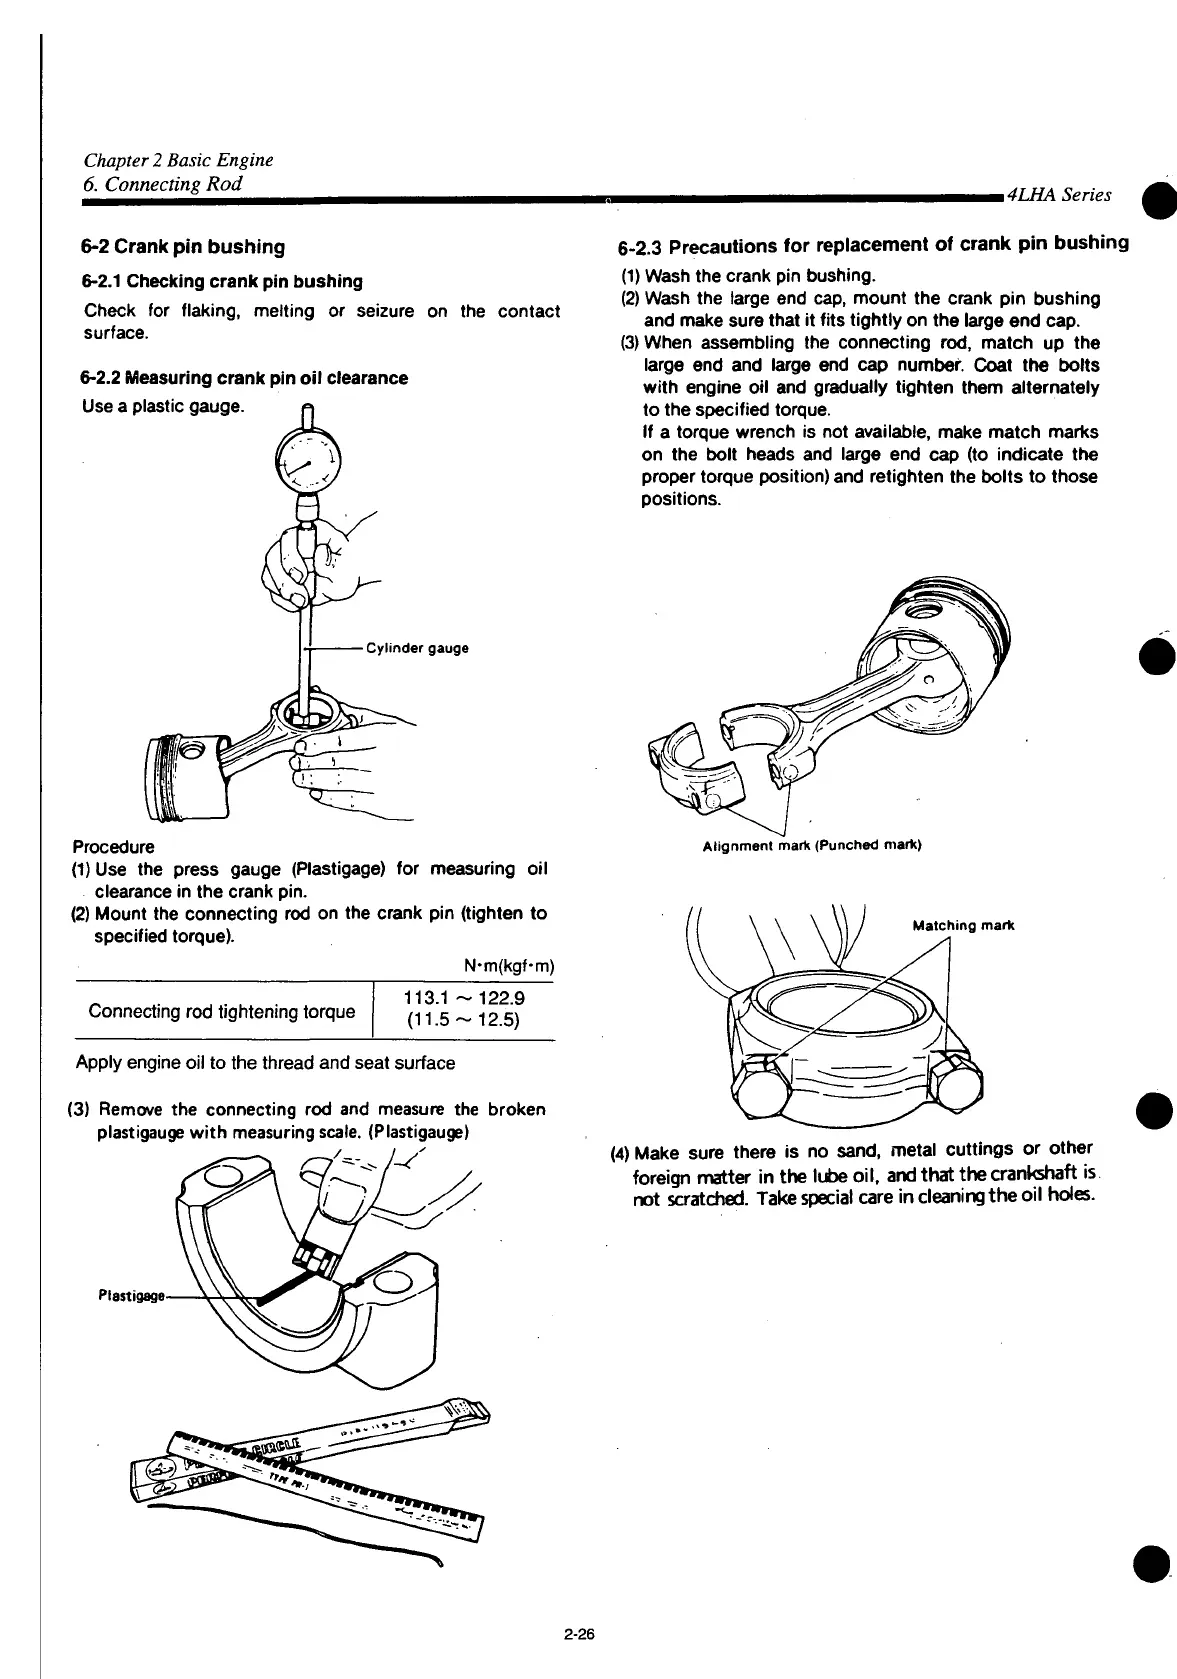
6-2.3 Precautions for replacement of crank pin bushing
(1) Wash the crank pin bushing.
(2) Wash the large end cap, mount the crank pin bushing
and
make sure
that
it
fits
tightly
on the large end cap.
(3) When assembling the connecting rod, match up the
large end and large end cap number. Coat the bolts
with
engine oil and gradually
tighten
them alternately
to the specified torque.
If a torque wrench is not available, make match marks
on the
bolt
heads and large end cap (to indicate the
proper torque position) and retighten the bolts to those
positions.
Alignment mark (Punched mark)
Matching
mark
Plastigage
(4) Make sure there is no
sand,
metal cuttings or other
foreign matter in the lube oil. and
that
the crankshaft is
not scratched. Take
special
care in
cleaning
the oil holes.
2-26
 Loading...