16 support@yardistrystructures.com
5/16”
T-nut
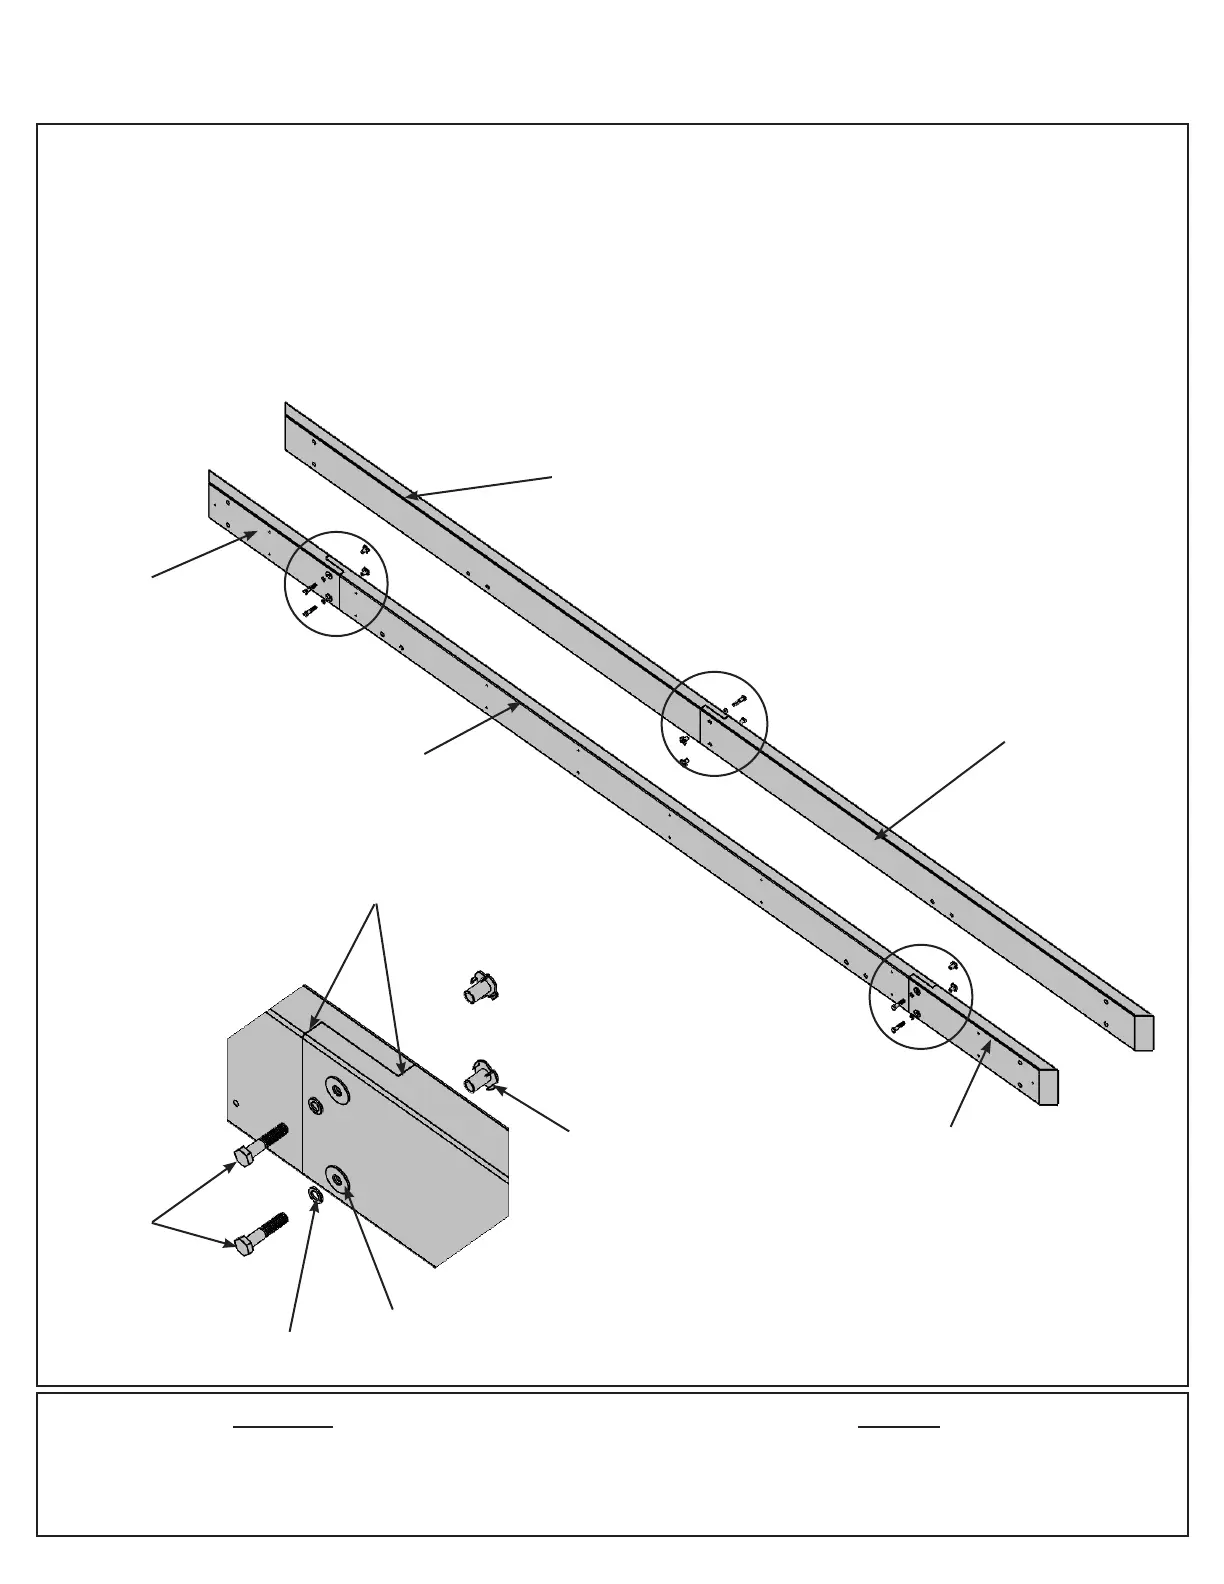
Step 3: Short Beam Assembly
Part 1
HardwareWood Parts
A: Connect one (451) Beam Short Left and one (452) Beam Short Right using two 5/16 x 1-1/2” Hex Bolts (with
5/16” lock washer, 1/4-5/16” large washer and 5/16” t-nut) as shown in g. 3.1 and 3.2.
B: Connect one (449) Beam Short End to each end of one (450) Beam Short Centre using two 5/16 x 1-1/2” Hex
Bolts (with 5/16” lock washer, 1/4-5/16” large washer and 5/16” t-nut) per end as shown in g. 3.1 and 3.2.
C: Repeat Steps A and B one more time to make two Short Beam L-R Assemblies and two Short Beam End
Assemblies.
(451) Beam
Short Left
4 x (449) Beam Short End
2 x (450) Beam Short Centre
2 x (451) Beam Short Left
2 x (452) Beam Short Right
Fig. 3.1
12 x 5/16 x 1-1/2” Hex Bolt
(5/16” lock washer, 1/4-5/16” large washer, 5/16” t-nut)
Fig. 3.2
1/4-5/16”
Large Washer
5/16 x 1-1/2”
Hex Bolt
Tight
(452) Beam
Short Right
(450) Beam
Short Centre
(449) Beam
Short End
5/16” Lock
Washer
(449) Beam
Short End
Make sure bolt heads
are on the outside of
each Beam Assembly