Barracuda Phone System
Yealink W52P Wireless DECT IP Telephone Quick Reference Guide
3 / 5
Select Enabled, then enter the destination number in the Target field.
Press the Save soft key to accept the changes.
To cancel call forwarding, follow the same steps and select Disabled in the Status field.
Volume Control
When your phone is idle, press the left/right arrow keys to decrease or increase volume, then press
the Save soft key.
During an active call, left/right arrow keys will change the volume of the handset, speakerphone or
headset, whichever is active.
Base Station Setup and Handset Registration
Follow these steps to configure the base station and to register handsets.
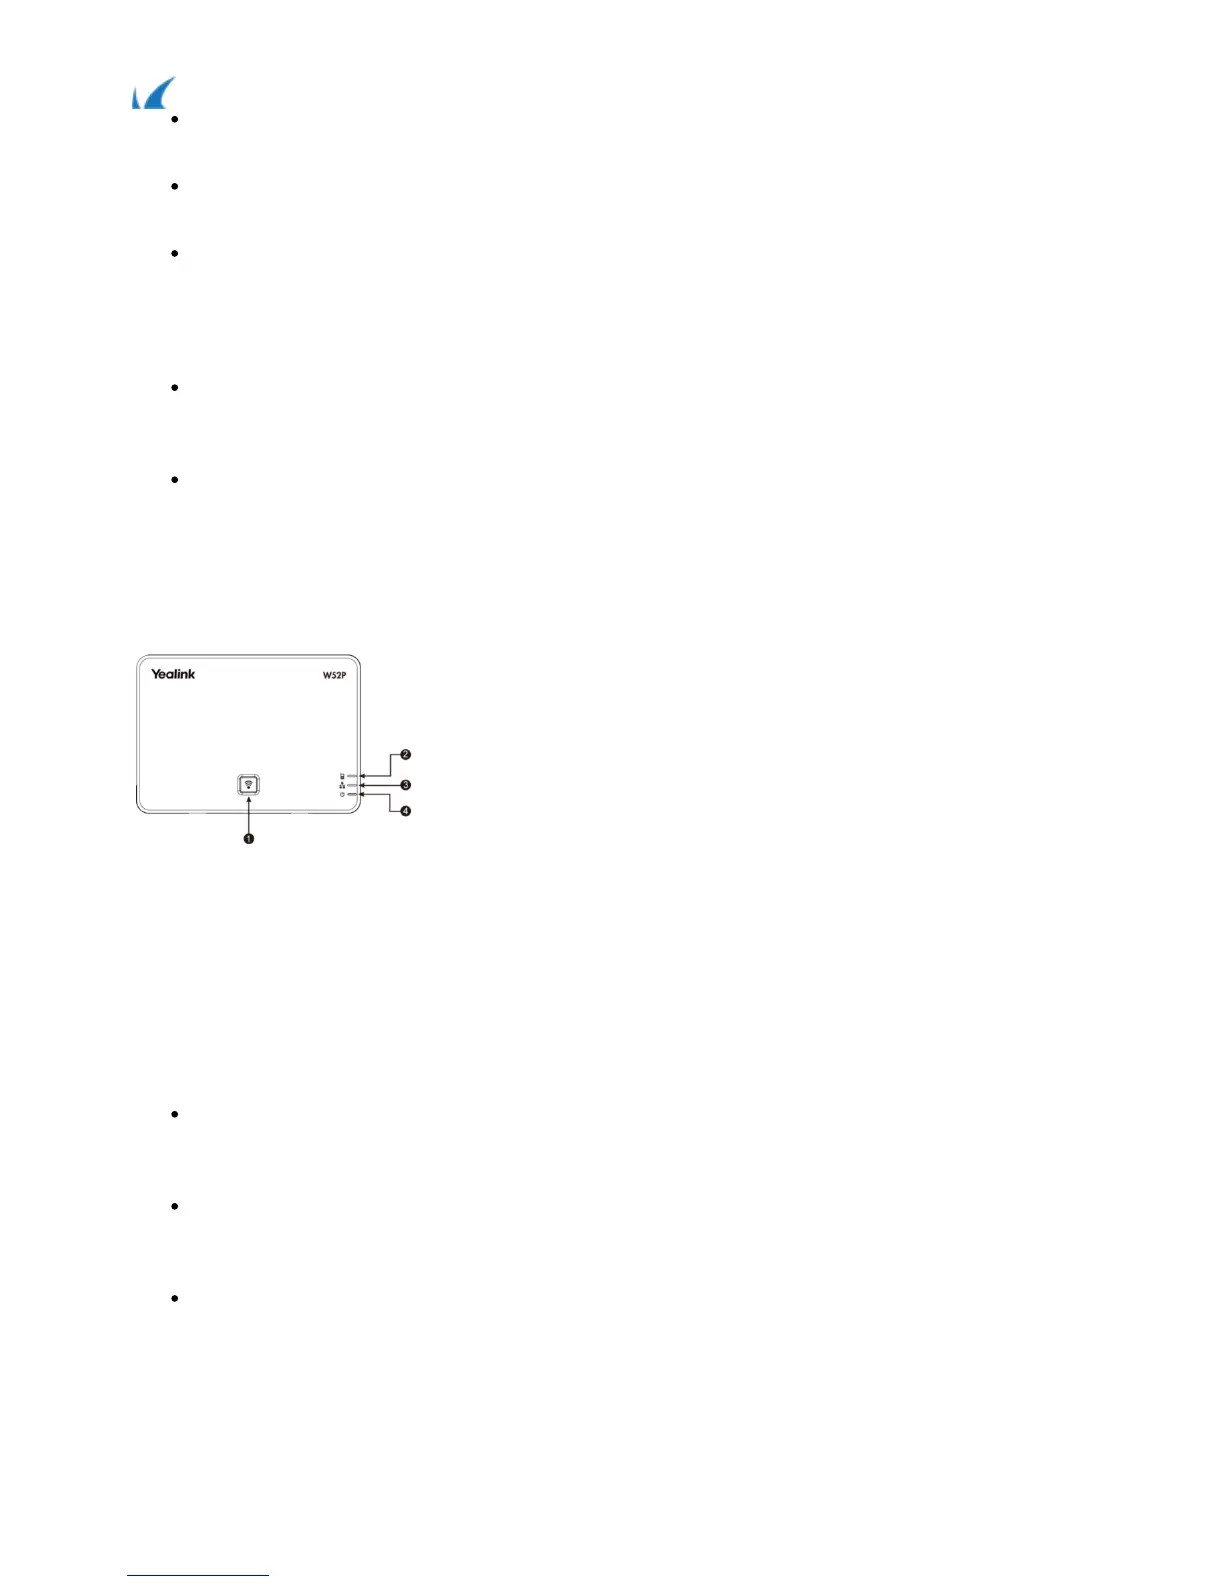
Base Station Diagram
Page key1.
Registration LED2.
Network Status LED3.
Power Indication LED 4.
Base Station Installation
Choose a suitable location for the base station. The base station will need to be near the center of the
wireless coverage area.
Connect the base station to the local area network (LAN) with an Ethernet cable. The unit can be powered
with the supplied A/C adapter or with a power over Ethernet (PoE) port.
If you have automatic provisioning enabled on the Barracuda Phone System and the base station is on
the same subnet as the Barracuda Phone System, then the base station will be updated and five new
unassigned phones will now be available.
NOTE: Some W52P base stations ship with a firmware that does not support automatic provisioning. If this is
the case, you will need to manually provision the device. (Instructions below.)

 Loading...