INSTALLATION
STICK WELDING
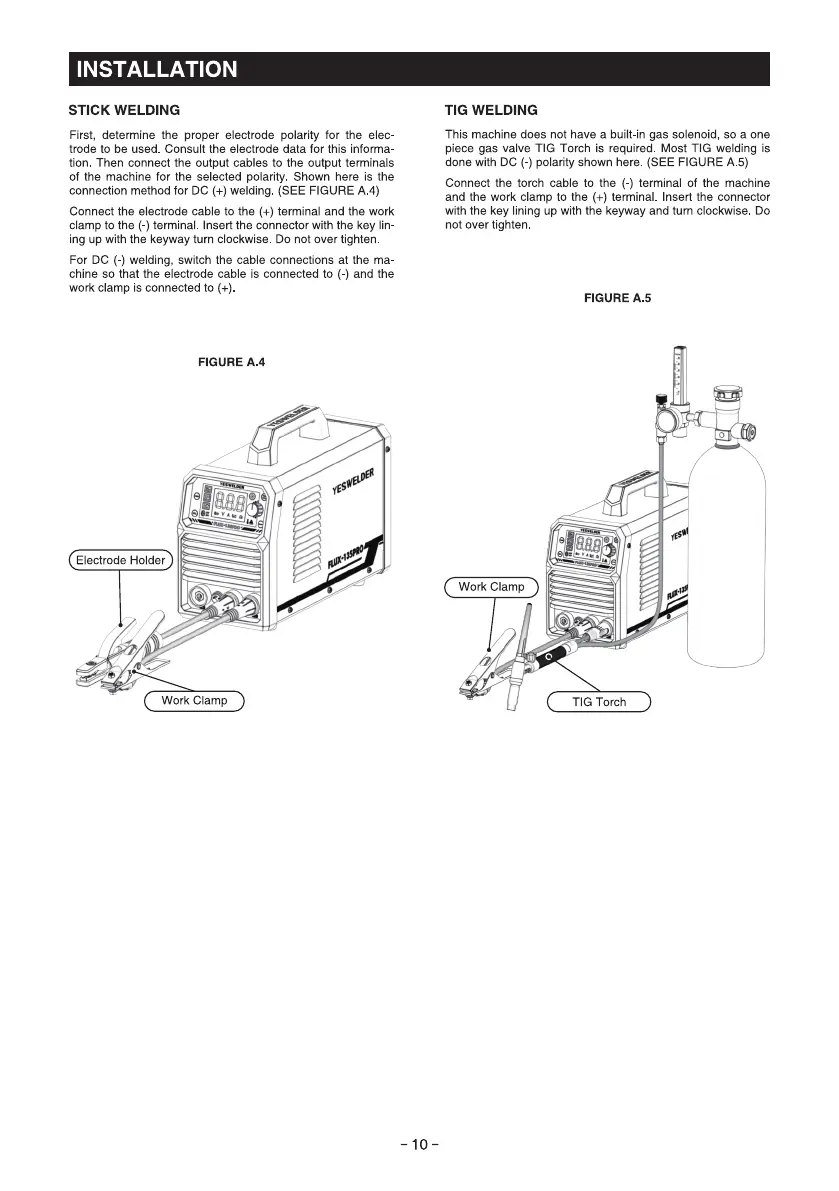
First, determine the proper electrode polarity for the elec-
trode to be used. Consult the electrode data for this informa
tion Then connect the Output cables to the Output terminals
of the machine for the selected polarity Shown here is the
connection method for DC (+) welding (SEE FIGURE A 4)
Connect the electrode cable to the (+) terminal and the work
clamp to the (-) terminal Insert the connector with the key lin-
ing up with the keyway turn clockwise. DO not over tighten
For DC (-) welding, switch the cable connections at the ma
chine so that the electrode cable is connected to (-) and the
work clamp is connected to (+)
FIGURE A.4
9
Electrode Holder
Work Clamp
TIG WELDING
This machine does not have a built-in gas solenoid, so a one
piece gas valve TIG Torch is required. Most TIG welding is
done with DC (-) polarity shown here (SEE FIGURE A 5)
Connect the torch cable to the (-) terminal Of the machine
and the work clamp to the (+) terminal. Insert the connector
with the key lining up with the keyway and turn clockwise. DO
not over tighten
FIGURE A.5
Work Clamp
TIG Torch
-10-