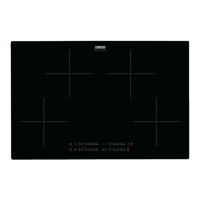
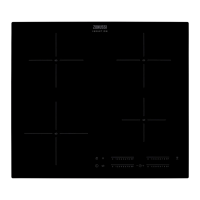
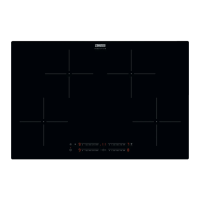
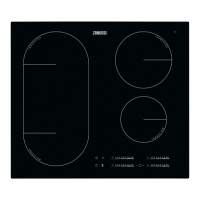
This document is a user manual for the Zanussi ZIFN644K induction hob. It provides comprehensive instructions on installation, daily use, maintenance, and troubleshooting, ensuring safe and efficient operation of the appliance.
The manual emphasizes safety throughout, starting with general safety guidelines and specific instructions for children and vulnerable people. It warns against unattended cooking with fat or oil, which can be dangerous and lead to fire. Users are advised never to extinguish a fire with water but to switch off the appliance and cover the flame. The appliance must not be supplied through an external switching device like a timer. Continuous supervision is required for the cooking process, especially for short-term cooking. Storing items on cooking surfaces is prohibited due to fire risk. Metallic objects like knives, forks, spoons, and lids should not be placed on the hob surface as they can become hot. The appliance must be installed in a built-in structure before use, and steam cleaners should not be used for cleaning. After use, the hob element should be switched off using its control, without relying on the pan detector.
In case of a cracked glass ceramic surface, the appliance must be immediately switched off and disconnected from the mains. If connected directly via a junction box, the fuse should be removed. Any damaged supply cord must be replaced by the manufacturer or an authorized service agent. Only hob guards designed or indicated by the manufacturer should be used.
Installation
Installation should only be performed by a qualified person. All packaging must be removed, and a damaged appliance should not be installed or used. Minimum distances from other appliances and units must be maintained. Care should be taken when moving the heavy appliance, using safety gloves and enclosed footwear. Cut surfaces should be sealed to prevent moisture-induced swelling, and the bottom of the appliance must be protected from steam and moisture. The hob should not be installed next to a door or under a window to prevent hot cookware from falling.
The appliance has cooling fans on the bottom. If installed above a drawer, small pieces of paper or other items that could obstruct the fans or impair the cooling system should not be stored. A minimum distance of 2 cm must be maintained between the appliance's bottom and items in the drawer. Any separator panels in the cabinet below the appliance should be removed.
All electrical connections must be made by a qualified electrician, and the appliance must be earthed. Before any operation, the appliance must be disconnected from the power supply. The parameters on the rating plate must be compatible with the mains power supply. The mains cable should be correctly installed, not tangled, and secured with a strain relief clamp. Multi-plug adapters and extension cables are not permitted. The mains plug or cable should not be damaged, and the shock protection of live and insulated parts must be securely fastened. The mains plug should only be connected at the end of installation, ensuring accessibility. If the mains socket is loose, the appliance should not be connected. The mains cable should not be pulled to disconnect the appliance; always pull the mains plug. Correct isolation devices, such as line protecting cut-outs, fuses, earth leakage trips, and contactors, must be used. The electrical installation must include an isolation device that disconnects the appliance from the mains at all poles, with a contact opening width of at least 3 mm.
Daily Use
Before first use, all packaging, labels, and protective film must be removed. The appliance is for household (indoor) use only. Specifications should not be changed, and ventilation openings must not be blocked. The appliance should not be left unattended during operation. After each use, the cooking zone should be set to "off." Cutlery or saucepan lids should not be placed on cooking zones. The appliance should not be operated with wet hands or when in contact with water. It should not be used as a work or storage surface. If the surface cracks, the appliance must be immediately disconnected from the power supply. Users with pacemakers should maintain a minimum distance of 30 cm from induction cooking zones during operation. When placing food into hot oil, be aware of splashing.
Fats and oils can release flammable vapors when heated; keep flames or heated objects away from them. Very hot oil vapors can cause spontaneous combustion. Used oil, especially with food remnants, can ignite at lower temperatures. Flammable products or items wet with flammable products should not be placed in, near, or on the appliance. Hot cookware should not be kept on the control panel, nor should hot pan covers be placed on the glass surface. Cookware should not be allowed to boil dry. Objects or cookware should not be dropped on the appliance to avoid surface damage. Cooking zones should not be activated with empty cookware or without cookware.
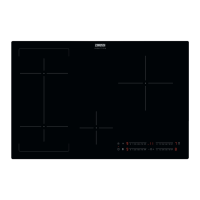
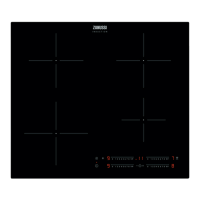
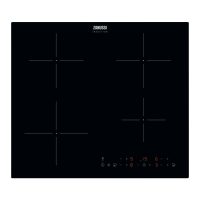
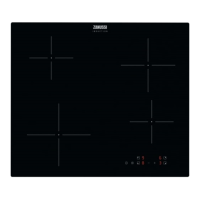
Control Panel and Functions
The hob is operated using sensor fields, with displays, indicators, and sounds providing feedback. The ON/OFF sensor activates and deactivates the hob. A Lock/Child Safety Device locks/unlocks the control panel. The Pause function activates/deactivates. The JoinZone function activates/deactivates. Heat setting displays show the current heat level. Timer indicators show which zone has a timer set, and the timer display shows the time in minutes. The Hob²Hood function activates/deactivates manual mode. A dedicated sensor selects the cooking zone. Plus/minus sensors increase/decrease time. PowerBoost activates the function, and a control bar sets the heat setting.
Heat setting displays include '0' for deactivated zones, '1' to '9' for operating zones, and 'U' for Pause. Other displays include 'A' for Automatic Heat Up, 'P' for PowerBoost, 'E + digit' for malfunction, 'H' for OptiHeat Control (3-step residual heat indicator), 'L' for Lock/Child Safety Device, 'F' for incorrect/too small cookware or no cookware, and 'U' for Automatic Switch Off.
OptiHeat Control
The 3-step residual heat indicator ('H') warns of residual heat, indicating a burn risk. Induction zones heat cookware directly, and the glass ceramic is heated by the cookware. The 'H' indicator appears when a cooking zone is hot, showing the residual heat level. It may also appear for neighboring zones, when hot cookware is placed on a cold zone, or when the hob is deactivated but still hot. The indicator disappears when the zone cools down.
Activating and Deactivating
The hob is activated or deactivated by touching the ON/OFF sensor for 1 second.
Automatic Switch Off
The hob deactivates automatically if:
- All cooking zones are deactivated.
- No heat setting is set after activation.
- Something is spilled or placed on the control panel for over 10 seconds (an acoustic signal sounds, and the hob deactivates; remove the object or clean the panel).
- The hob gets too hot (e.g., a saucepan boils dry); allow it to cool before reuse.
- Incorrect cookware is used ('F' appears, and the zone deactivates after 2 minutes).
The hob also deactivates after a certain period if a cooking zone is not deactivated or its heat setting is not changed. The duration depends on the heat setting: 6 hours for 1-2, 5 hours for 3-4, 4 hours for 5, and 1.5 hours for 6-9.
Heat Setting
To set or change the heat setting, touch the control bar at the desired setting or slide a finger along it.
Using Cooking Zones
Cookware should be placed on the cross/square on the cooking surface, covering it fully. Induction zones automatically adapt to cookware dimensions. Large cookware can be used on two zones simultaneously.
JoinZone
This function connects two left-side cooking zones to operate as one when the pot covers the centers of both zones. To activate, touch the JoinZone sensor. To set/change the heat setting, touch one of the control sensors. To deactivate, touch the JoinZone sensor again; zones will operate independently. When using only one zone of the pair, it is recommended to use the rear zone. For large cookware, place it near the rear zone.
Automatic Heat Up
This function provides a desired heat setting in a shorter time by operating at the highest setting initially, then adjusting to the desired level. The cooking zone must be cold to activate this function. To activate for a zone, touch 'P' (PowerBoost), then immediately touch a desired heat setting. 'A' appears after 3 seconds. To deactivate, change the heat setting.
PowerBoost
This function provides more power to induction zones for a limited time, after which the zone automatically reverts to the highest heat setting. To activate for a zone, touch 'P'. To deactivate, change the heat setting.
Timer
- Count Down Timer: Sets the duration of a single cooking session. First, set the heat setting for the zone, then set the timer. Touch the timer sensor repeatedly until the desired zone indicator appears. Touch '+' or '-' to set the time (0-99 minutes). The indicator flashes as time counts down. To view remaining time, touch the zone's timer indicator. To deactivate, touch the zone's timer indicator, then '-'; the time counts down to 00, and the indicator disappears. When the countdown ends, an acoustic signal sounds, '00' flashes, and the zone deactivates. Touch the timer sensor to stop the sound.
- Minute Minder: Used when the hob is active but cooking zones are not operating. The heat setting display shows 'U'. To activate, touch the timer sensor, then '+' or '-' to set the time. An acoustic signal sounds and '00' flashes when time finishes. Touch the timer sensor to stop the sound. This function does not affect cooking zone operation.
Pause
This function sets all operating cooking zones to the lowest heat setting. All other control panel symbols are locked, but timer functions continue. Press '||' to activate. 'U' appears, and the heat setting is lowered to 1. Press '||' again to deactivate; the previous heat setting returns.
Lock
This function locks the control panel while cooking zones operate, preventing accidental changes to the heat setting. Set the heat setting first. To activate, touch the lock sensor; 'L' appears for 4 seconds. The timer remains active. To deactivate, touch the lock sensor; the previous heat setting returns. Deactivating the hob also deactivates this function.
Child Safety Device
This function prevents accidental operation. To activate, activate the hob with the ON/OFF sensor, do not set a heat setting, then touch the lock sensor for 4 seconds; 'L' appears. Deactivate the hob with the ON/OFF sensor. To deactivate, activate the hob with the ON/OFF sensor, do not set a heat setting, then touch the lock sensor for 4 seconds; 'L' appears. Deactivate the hob with the ON/OFF sensor. To override for one cooking time, activate the hob, 'L' appears, touch the lock sensor for 4 seconds, set the heat setting within 10 seconds, then operate the hob. When the hob is deactivated, the function reactivates.
Power Management
If multiple zones are active and consumed power exceeds the supply limit, this function divides available power among all zones. The hob controls heat settings to protect house installation fuses. Cooking zones are grouped by location and phase number. Each phase has a maximum electricity loading (3700 W). If the hob reaches this limit, zone power is automatically reduced. The last selected zone's heat setting is prioritized, and remaining power is divided among previously activated zones in reverse order. The display of reduced zones alternates between initial and reduced heat settings. Wait for the display to stop flashing or reduce the last selected zone's heat setting. Zones will continue operating at the reduced setting; manual adjustment may be needed.
Hob²Hood
This advanced automatic function connects the hob to a special hood via infrared signals. Fan speed is automatically defined by mode setting and the hottest cookware's temperature. The fan can also be operated manually from the hob. For most hoods, the remote system is initially deactivated and must be activated before use (refer to the hood user manual).
Operating Hob²Hood Automatically
Set the automatic mode to H1-H6 (H5 is default). The hood reacts to hob operation, recognizing cookware temperature and adjusting fan speed.
- Mode H0: Automatic light, boiling, and frying are off.
- Mode H1: Automatic light is on; boiling and frying are off.
- Mode H2: Automatic light is on; fan speed 1 for boiling and frying.
- Mode H3: Automatic light is on; boiling is off; fan speed 1 for frying.
- Mode H4: Automatic light is on; fan speed 1 for boiling and frying.
- Mode H5: Automatic light is on; fan speed 1 for boiling, fan speed 2 for frying.
- Mode H6: Automatic light is on; fan speed 2 for boiling, fan speed 3 for frying.
The hob detects boiling and frying processes and activates fan speed accordingly. Mode H2 activates the fan and light without relying on temperature.
Changing Automatic Mode
- Deactivate the appliance.
- Touch the Hob²Hood sensor for 3 seconds; the display turns on and off.
- Touch the Hob²Hood sensor for 3 seconds.
- Touch the Hob²Hood sensor several times until 'H' appears.
Operating Fan Speed Manually
Touch the Hob²Hood sensor when the hob is active to deactivate automatic operation and manually change fan speed. Pressing the fan speed sensor increases speed by one. Reaching intensive level and pressing again sets fan speed to 0, deactivating the hood fan. To restart at speed 1, touch the fan speed sensor. To reactivate automatic operation, deactivate and reactivate the hob.
Activating the Light
The hob can be set to activate the light automatically when the hob is activated by setting the automatic mode to H1-H6. The hood light deactivates 2 minutes after the hob is deactivated.
Hints and Tips
For induction zones, a strong electromagnetic field quickly generates heat in cookware. Use suitable cookware with a thick, flat, clean, and dry base. Avoid sliding or rubbing pots to prevent scratches.
- Correct materials: cast iron, steel, enamelled steel, stainless steel, multi-layer bottom (with correct manufacturer marking).
- Incorrect materials: aluminium, copper, brass, glass, ceramic, porcelain.
Cookware is suitable if water boils quickly on the highest setting or a magnet sticks to its bottom.
Cookware Dimensions
Induction zones adapt to cookware bottom dimensions. Efficiency relates to diameter. Cookware smaller than the minimum receives partial power. Do not use cookware larger than specified in "Cooking zones specification." Avoid placing cookware near the control panel during cooking to prevent accidental activation.
Noises During Operation
Normal noises include:
- Crack noise: from cookware made of different materials (sandwich construction).
- Whistle sound: from high power levels with different cookware materials.
- Humming: from high power levels.
- Clicking: from electric switching.
- Hissing, buzzing: from the fan.
These noises are normal and do not indicate malfunction.
Examples of Cooking Applications
The manual provides a table with heat settings, usage, time, and hints for various cooking tasks, from keeping food warm to boiling water.
Hob²Hood Hints and Tips
When using Hob²Hood:
- Protect the hood panel from direct sunlight and halogen light.
- Do not cover the hob control panel.
- Do not interrupt the signal between the hob and hood (e.g., with a hand, cookware handle, or tall pot).
Other remotely controlled appliances may block the signal; avoid using them near the hob when Hob²Hood is on. For a full range of compatible cooker hoods, refer to the consumer website.
Care and Cleaning
Clean the hob after each use with clean-based cookware. Scratches or dark stains do not affect operation. Use a special cleaner and scraper for the glass surface.
- Immediate removal: Melted plastic, plastic foil, sugar, and sugary foods must be removed immediately to prevent damage. Use a special hob scraper at an acute angle.
- When sufficiently cool: Remove limescale rings, water rings, fat stains, and shiny metallic discoloration with a moist cloth and non-abrasive detergent, then wipe dry.
- Shiny metallic discoloration: Use a solution of water and vinegar to clean the glass surface.
Troubleshooting
The manual provides a troubleshooting guide for common issues:
- Hob not activating/operating: Check electrical connection. If the fuse is blown, contact a qualified electrician.
- Hob deactivates/acoustic signal: Set heat setting within 10 seconds. Touch only one sensor field. Clean control panel if water/fat stains are present. Remove objects from sensor fields.
- Residual heat indicator not on: Zone may not have operated long enough to be hot; contact service if damaged.
- Hob²Hood not working: Remove objects covering control panel. Use a smaller pot or change cooking zone if a tall pot blocks the signal, or operate manually.
- Automatic Heat Up not operating: Zone may be hot; let it cool. Highest heat setting may be set.
- Heat setting changes between levels: Power management is operating.
- Sensor fields become hot: Cookware may be too large or too close to controls; use rear zones if possible.
- 'L' appears: Child Safety Device or Lock operates.
- 'F' appears: No cookware on zone, cookware not covering cross/square, unsuitable cookware, or cookware diameter too small. Use suitable cookware with correct dimensions.
If a solution is not found, contact the dealer or an Authorized Service Centre, providing data from the rating plate, the three-digit letter code for the glass ceramic, and any error message. Incorrect operation resulting in a service call may be charged.
Energy Efficiency
The manual includes product information according to UK Ecodesign Regulation, detailing model identification, type, number of cooking zones, heating technology, diameter of circular cooking zones, and energy consumption per cooking zone and for the hob.
Energy Saving Hints
- Heat only the necessary amount of water.
- Always use lids on cookware if possible.
- Place cookware on the cooking zone before activating it.
- Use smaller cookware on smaller cooking zones.
- Place cookware directly in the center of the cooking zone.
- Use residual heat to keep food warm or melt it.
Environmental Concerns
The manual encourages recycling packaging materials and waste electrical and electronic appliances. Products marked with the symbol should not be disposed of with household waste but returned to a local recycling facility or municipal office.