5
Introduction
Battery Install &
Charging
Media Loading
Connect Printer/
Printer Controls
Cleaning and Trouble-
shooting
Accessories and
Contact Info
QLn Series Mobile Printers
Quick Start Guide
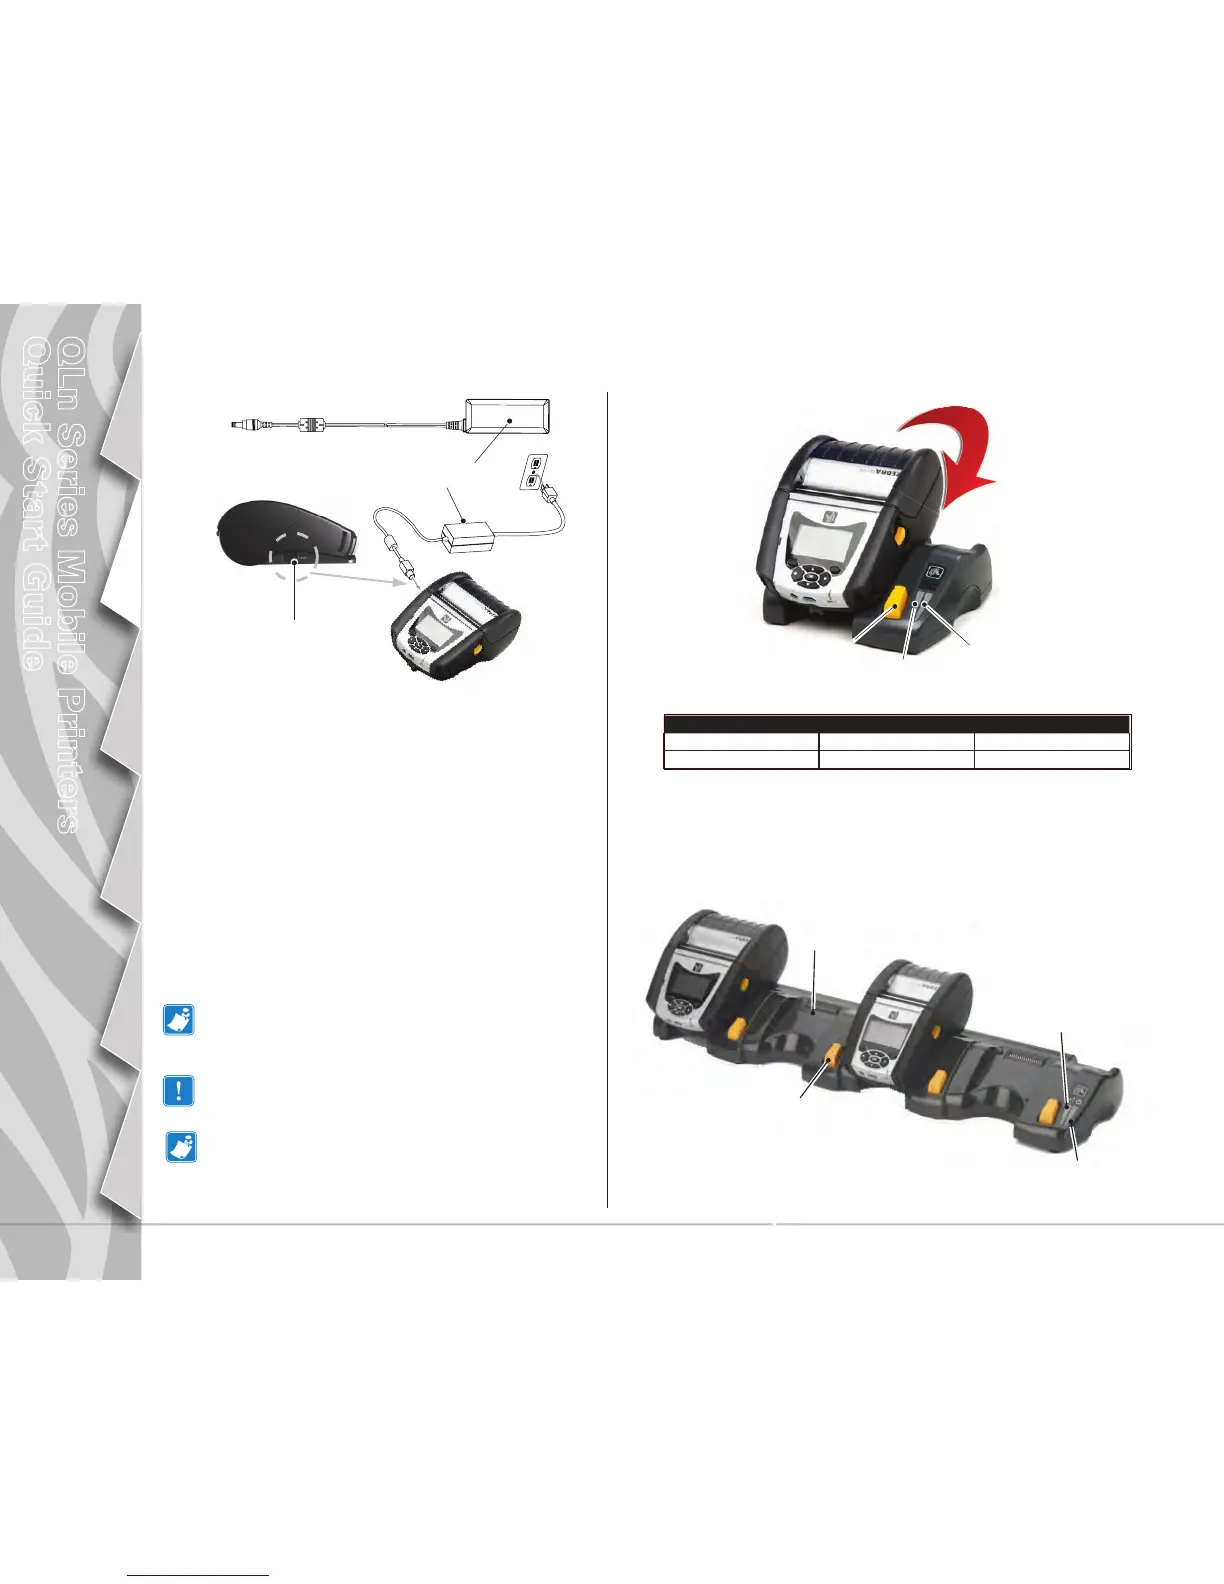
Ethernet Cradle (Single Bay & Four Bay for QLn220 and 320 Only)
Single Bay (QLn-EC)
Power Status
Indicator
Four Bay (QLn-EC4)
LED Function LED Status Indication
Power Solid Green Power On
Ethernet Blinking Green Ethernet Activity
Ethernet Status
Indicator
AC Power Adapter (included in kit p/n P1031365-024)
(All QLn Series Printers)
DC Input Jack
Qln320 AC
Adapter
AC Power Cord
(varies with
location)
• Open the protective cover on the QLn Series printer
to expose the DC input charger jack.
• Connect the appropriate AC power cord for your geography
to the adapter and then plug the power cord into an AC re-
ceptacle.
• Plug the barrel plug from the AC adapter into the
charger jack on the printer.
• The printer will power up and begin charging. The printer
can be left on or turned off at this point. Charging will con-
tinue in either state, the status of which will be monitored
by the LED charge indicator on the front of the printer.
Batteries are shipped uncharged. Remove protective shrink-
wrap and labels from new battery packs and allow them to
charge completely prior to initial use.
While it’s possible to charge the battery when using the
printer, charge times will increase under this condition.
The QLn220 and 320 extended capacity battery is not
compatible with the QLn-EC and EC4 Ethernet cradles.
Release Button
Docking Bay
Ethernet Status
Indicator
Power Status Indicator
Release
Button