Install the MXK
44 MXK Hardware Installation Guide
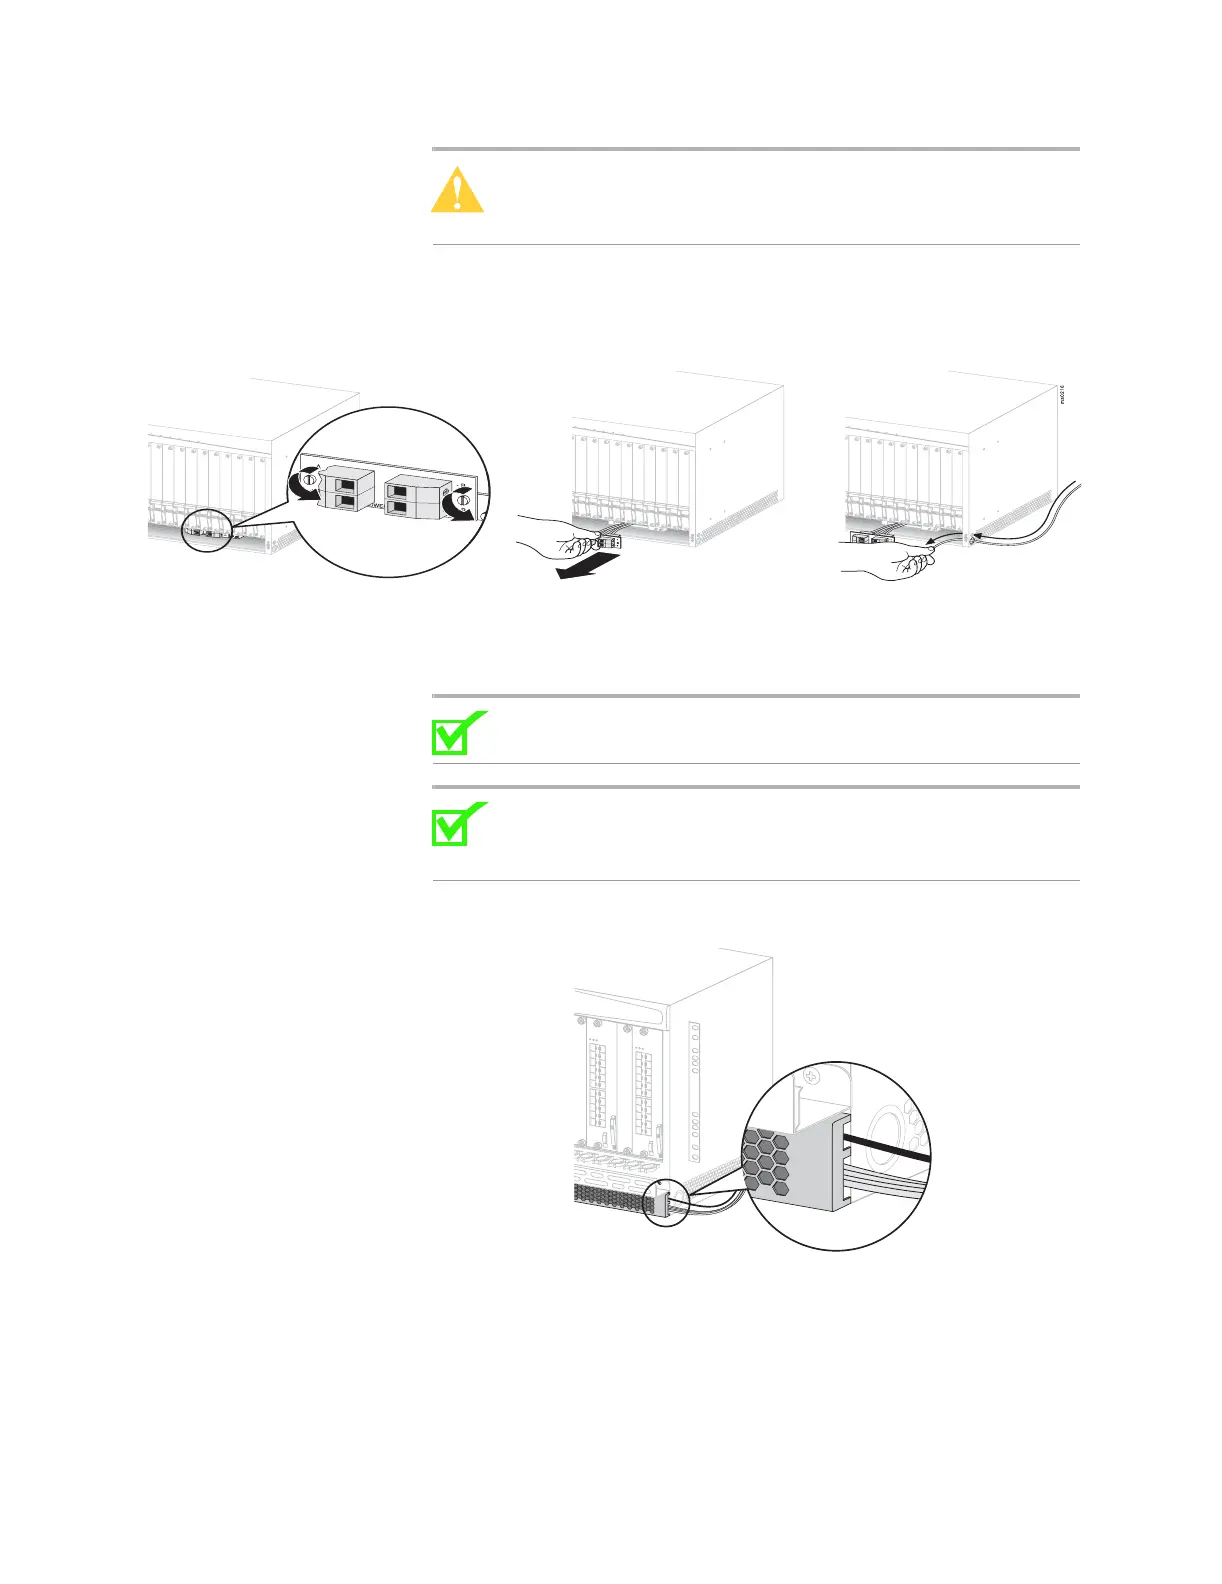
Caution: Use care when removing the terminal block from the
chassis so as not to detach the wires connecting the terminal
block to the chassis.
Figure 15: Removing terminal block
6 Thread the wires (minimum 10 AWG and maximum size # 6 wire)
through the hole on the right side of the chassis.
Note: Some MXK terminal blocks have a quarter-turn screw. For
these units, turn the screw 1/4 turn counterclockwise to loosen.
Note: If the MXK is installed so that the thread hole on the side
of the unit is inaccessible, thread the power supply and grounding
cables behind the front bezel as illustrated in Figure 16.
Figure 16: Threading the power and grounding cables behind the front bezel
7 Connect the negative wire from power supply A to the terminal marked
A.
8 Connect the positive wire from power supply A to the terminal marked
A+.
mx0708