2
© Copyright 2008 Zoeller Co. All rights reserved.
etc. in all pumping applications. The warranty set out in the paragraph above
is in lieu of all other warranties expressed or implied; and we do not authorize
any representative or other person to assume for us any other liability in con-
nection with our products.
Contact Manufacturer at, 3649 Cane Run Road, Lou is ville, Ken tucky 40211,
Attention: Cus tom er Ser vice De part ment to obtain any need ed repair or re-
place ment of part(s) or additional in for ma tion pertaining to our warranty.
MANUFACTURER EXPRESSLY DIS CLAIMS LI A BIL I TY FOR SPE CIAL,
CON SE QUEN TIAL OR IN CI DEN TAL DAM AG ES OR BREACH OF EX PRESSED
OR IMPLIED WARRANTY; AND ANY IMPLIED WAR RAN TY OF FIT NESS FOR
A PAR TIC U LAR PUR POSE AND OF MER CHANT ABIL I TY SHALL BE LIM IT ED
TO THE DU RA TION OF THE EX PRESSED WAR RAN TY.
Some states do not allow limitations on the duration of an implied warranty, so
the above limitation may not apply to you. Some states do not allow the exclusion
or limitation of incidental or con se quen tial dam ag es, so the above lim i ta tion or
exclusion may not apply to you.
This warranty gives you specifi c legal rights and you may also have other rights
which vary from state to state.
Limited Warranty
Manufacturer warrants, to the purchaser and subsequent owner during the
warranty period, every new product to be free from defects in material and
workmanship under normal use and service, when properly used and main-
tained, for a period of one year from date of purchase by the end user, or 18
months from date of original manufacture of the product, whichever comes fi rst.
Parts that fail within the warranty period, one year from date of purchase by the
end user, or 18 months from the date of original manufacture of the product,
whichever comes fi rst, that inspections determine to be defective in material or
workmanship, will be repaired, replaced or remanufactured at Manufacturer's
option, provided however, that by so doing we will not be obligated to replace
an entire assembly, the entire mechanism or the complete unit. No allowance
will be made for shipping charges, damages, labor or other charges that may
occur due to product failure, repair or replacement.
This warranty does not apply to and there shall be no warranty for any material
or product that has been disassembled without prior approval of Manufacturer,
subjected to misuse, misapplication, neglect, alteration, accident or act of
God; that has not been installed, operated or maintained in accordance with
Manufacturer's installation instructions; that has been exposed to outside sub-
stances including but not limited to the following: sand, gravel, cement, mud,
tar, hydrocarbons, hydrocarbon derivatives (oil, gasoline, solvents, etc.), or other
abrasive or corrosive substances, wash towels or feminine sanitary products,
ELECTRICAL PRECAUTIONS- Before servicing a pump, always shut off the main power breaker and then unplug the pump - mak-
ing sure you are wearing insulated protective sole shoes and not standing in water. Under fl ooded conditions, contact your local electric company or a
qualifi ed licensed electrician for disconnecting electrical service prior to pump removal.
Submersible pumps contain oils which becomes pressurized and hot under operating conditions - allow 2½ hours after disconnecting
before at tempt ing service.
If the above checklist does not uncover the problem, consult the factory - Do not attempt to service or otherwise disassemble pump. Service must
be by Zoeller Authorized Service Stations.
SERVICE CHECKLIST
COMMON CAUSES
Check fuse, low voltage, over load open, open or incorrect wiring, open switch, impeller or seal bound me chan i cal ly,
defective capacitor or relay when used, motor or wiring shorted. Float assembly held down. Switch defective,
dam aged, or out of adjustment.
Incorrect voltage, negative head (discharge open lower than normal) impeller or seal bound mechanically, defec-
tive capacitor or relay, motor shorted.
Float tight on rod, check valve stuck or none installed in long distance line, over load open, level switch(s) defec-
tive, sump pit too small.
Debris under fl oat assembly, fl oat or fl oat rod bound by pit sides or other, switch de fec tive, damaged or out of
adjustment.
Check strainer housing, discharge pipe, or if check valve is used vent hole must be clear. Dis charge head ex ceeds
pump capacity. Low or incorrect voltage. Incorrect motor rotation. Ca pac i tor defective. Incoming water con tain ing
air or causing air to enter pump ing chamber.
Increased pipe friction, clogged line or check valve. Abrasive material and ad verse chem i cals could possibly
deteriorate impeller and pump housing. Check line. Remove base and inspect.
CONDITION
A. Pump will not start or run.
B. Motor overheats and trips over load
or blows fuse.
C. Pump starts and stops too often.
D. Pump will not shut off.
E. Pump operates but delivers little
or no wa ter.
F. Drop in head and/or capacity after
a period of use.
EASY DO’S & DON'T’S FOR INSTALLING A SUMP PUMP
1. DO read thoroughly all installation material provided with the pump.
2. DO inspect pump for any visible damage caused by shipping. Contact
dealer if pump appears to be damaged.
3. DO clean all debris from the sump. Be sure that the pump will have a hard,
fl at surface beneath it. DO NOT install on sand, gravel or dirt.
4. DO be sure that the sump is large enough to allow proper clearance for the
level control switch(es) to operate properly.
5. DO Always Disconnect Pump From Power Source Before Handling.
DO always connect to a separately protected and properly grounded
circuit.
DO NOT ever cut, splice, or damage power cord (Only splice in a watertight
junction box).
DO NOT carry or lift pump by its power cord.
DO NOT use an extension cord with a sump pump.
6. DO install a check valve and a union in the discharge line.
DO NOT use a discharge pipe smaller than the pump discharge.
7. DO NOT use a sump pump as a trench or excavation pump, or for pumping
sewage, gasoline, or other hazardous liquids.
8. DO test pump immediately after installation to be sure that the system is
working properly.
9. DO cover sump with an adequate sump cover.
10. DO review all applicable local and national codes and verify that the instal-
lation conforms to each of them.
11. DO consult manufacturer for clarifi cations or questions.
12. DO
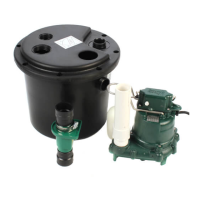
consider a Two Pump System with an alarm (Page 5) where an installation may
become overloaded or primary pump failure would result in property damages.
13. DO consider a D.C. Backup System (See the Basement Sentry page 5)
where a sump or de w a ter ing pump is necessary for the prevention of prop-
erty damages from fl ooding due to A.C. Power disruptions, mechanical or
electrical problems or system over load ing.
14. DO inspect and test system for proper operations at least every 3
months.
 Loading...