13
.
HEIGHT
OF
THE
FEED
DOG
(
Fig.
19)
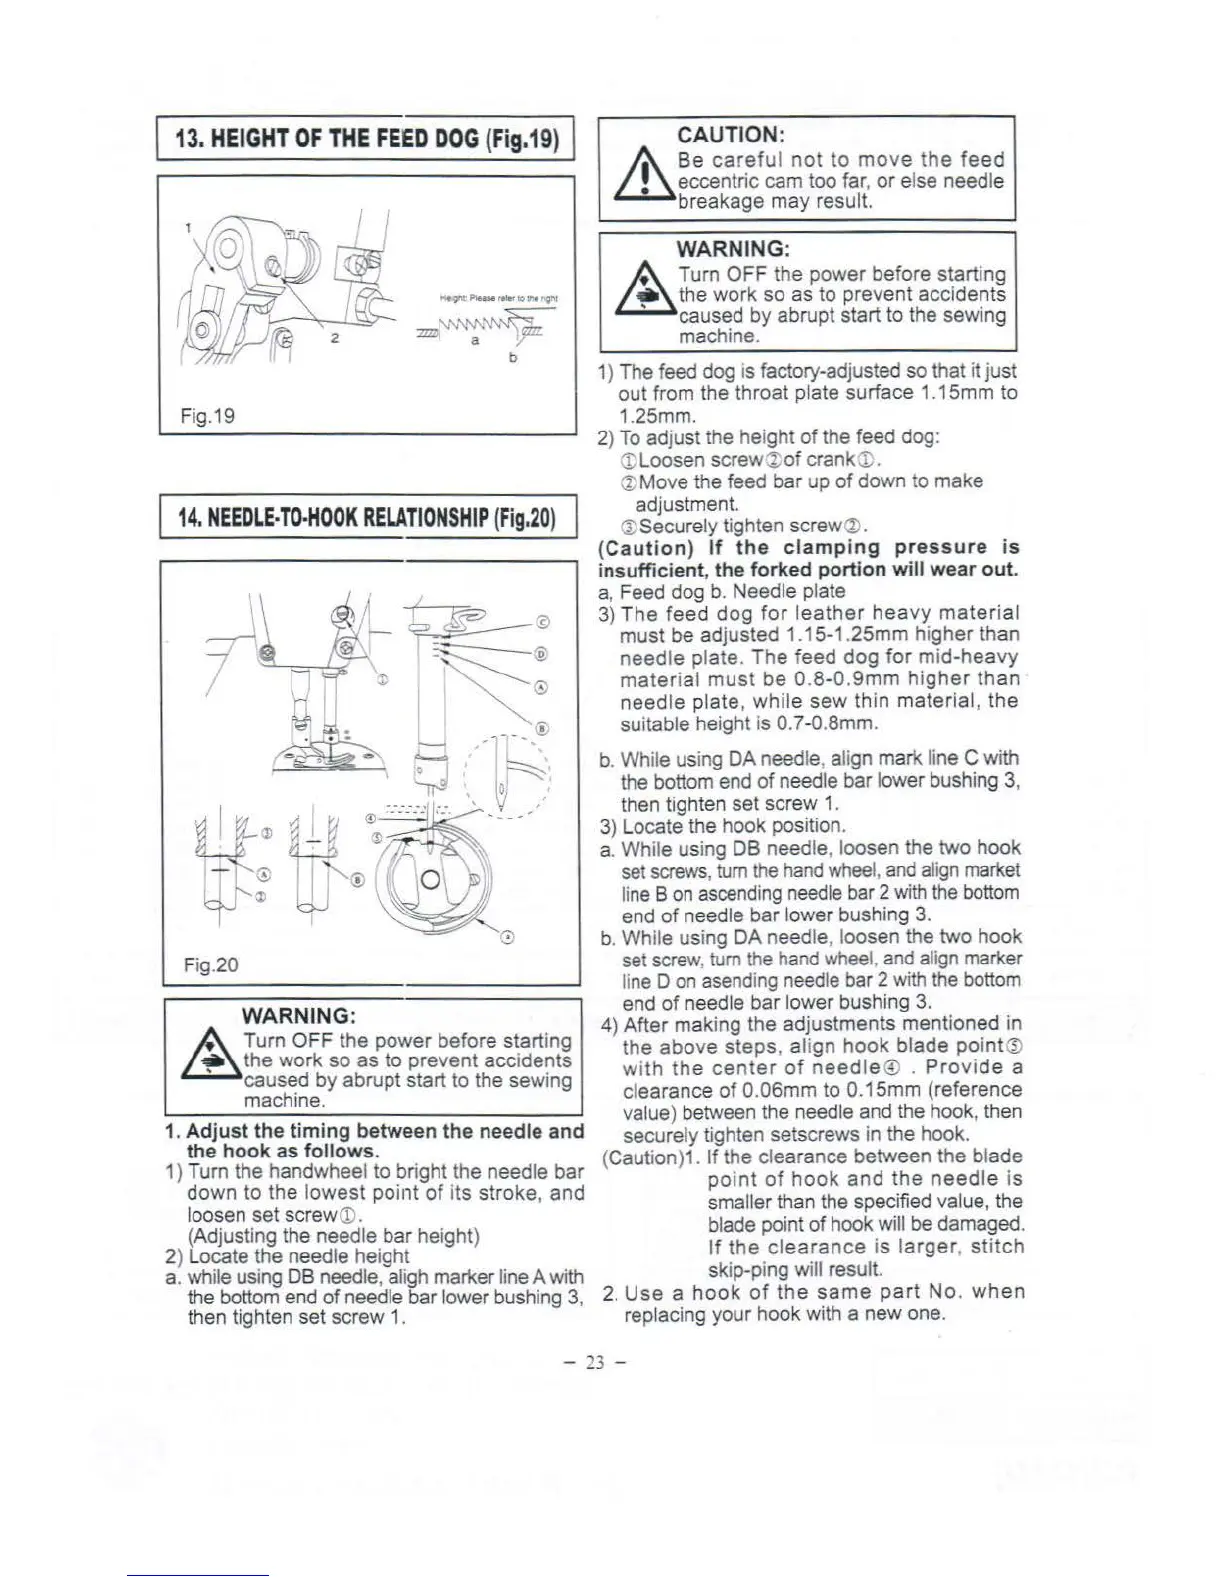
Fig.19
14
.
NEEDLE-TO
-
HOOK
RELATIONSHIP
(
Fig
.
20
)
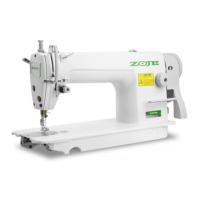
Fig.20
WARNING:
I
~
@
=s_---
'D'
-
"""
~
.;>
G
I I
-- - ®
....__.
, I -.
~
,'
~
'.
:
~
:
0 I
' '
·.·.
-
_-_
-_.
t.·. ' ; ,
...
-
..
-
A Turn OFF the power before starting
~
the
work
so
as to prevent accidents
caused by abrupt start to the sewing
machine.
1.
Adjust
the
timing
between
the
needle and
the
hook
as
follows
.
1) Tum the handwheel to bright the needle bar
down
to
the lowest point
of
its stroke, and
loosen set screw
CD
.
(Adjusting the needle bar height)
2) Locate the needle
he
i
gh~
. .
a. whi
le
using DB needle, ahgh
marl<er
hne
A
w1th
the bottom end of needle bar lower bushing 3,
then tighten set screw
1.
CAUTION:
& Be
carefu
l
not
to
move
t
he
feed
eccentric cam too far,
or
else needle
breakage may result.
WARNING:
~
Turn
OFF the power before starting
the work so as to prevent accidents
caused by abrupt start to the sewing
machine.
1) The feed dog is factory-adjusted so that it just
out from the throat plate surface 1 .15mm to
1.25mm.
2)
To
adjust the height
of
the feed dog:
CD
Loosen screw@
of
crank
eD
.
® Move
the feed bar up
of
down to make
adjustment.
~
Securely
tighten screw
(%)
.
(C
autio
n)
If
the
clamp
i
ng
pressure
is
i
nsufficient
,
the
forked
portio
n
will
wear
out
a Feed dog
b.
Needle plate
3)
The
feed dog
for
l
eather
heav~
material
must be adjusted
1.
15-1 .25mm h1gher than
needle plate.
The
feed dog
for
mi
d-heavy
mater
ial
must
be
0.8-0.
9mm
higher
than
needle
plate,
while
sew
thin material,
the
suitable height is
0.
7 -0.8mm.
b. Wh
il
e usi
ng
DA needle. a
li
gn
marl<
line C with
the bottom end
of
needle bar lower bushing 3,
then tighten set screw 1 .
3)
Locate the hook position.
a. While using DB needle, loosen the two hook
set
screws
,
tum
the
hand
whee
l,
and
a
li
gn
market
li
ne
B
on
ascending
needle
bar
2
with
the
bottom
end
of
needle bar lower bushing 3.
b. Wh
il
e using DA needle, loosen the two hook
set
screw,
tum
the hand
whee
l,
and
a
li
gn
marker
li
ne
D
on
asend
i
ng
needle bar 2
with
the
bottom
end
of
needle
ba
r lower bushing
3.
4) After making the adjustments mentioned
in
the above
steps
, align
hook
blade
po
int@
with
the
center
of
need
le ® .
Provide
a
clearance
of
0.06mm to 0.15mm (reference
value) between the needle and the hook, then
securely tighten setscrews in the hook.
(Cauti
on
)
1.
If the clearance between the
b
l
a~e
point
of
hook
and
the
needle
IS
smaller than the specified value, the
blade point of hook will
be
damaged.
If
the
clearance
is
l
arger
,
stitch
skip-ping will result.
2.
Use
a
hook
of
the
same
part
No.
when
replacing your hook with a new one.
-
23
-
From the library of: Superior Sewing Machine & Supply LLC