I
4.
ATTACHING
THE
NEEDLE
(Fig.10)
I
Fig.10
-o
I
c-
,
I
I
WARNING:
A Turn
OFF
the
power
before starting
L.:1!::::::.
the
work
so as
to
prevent
accidents
' caused
by
abrupt start to the sewing
machine.
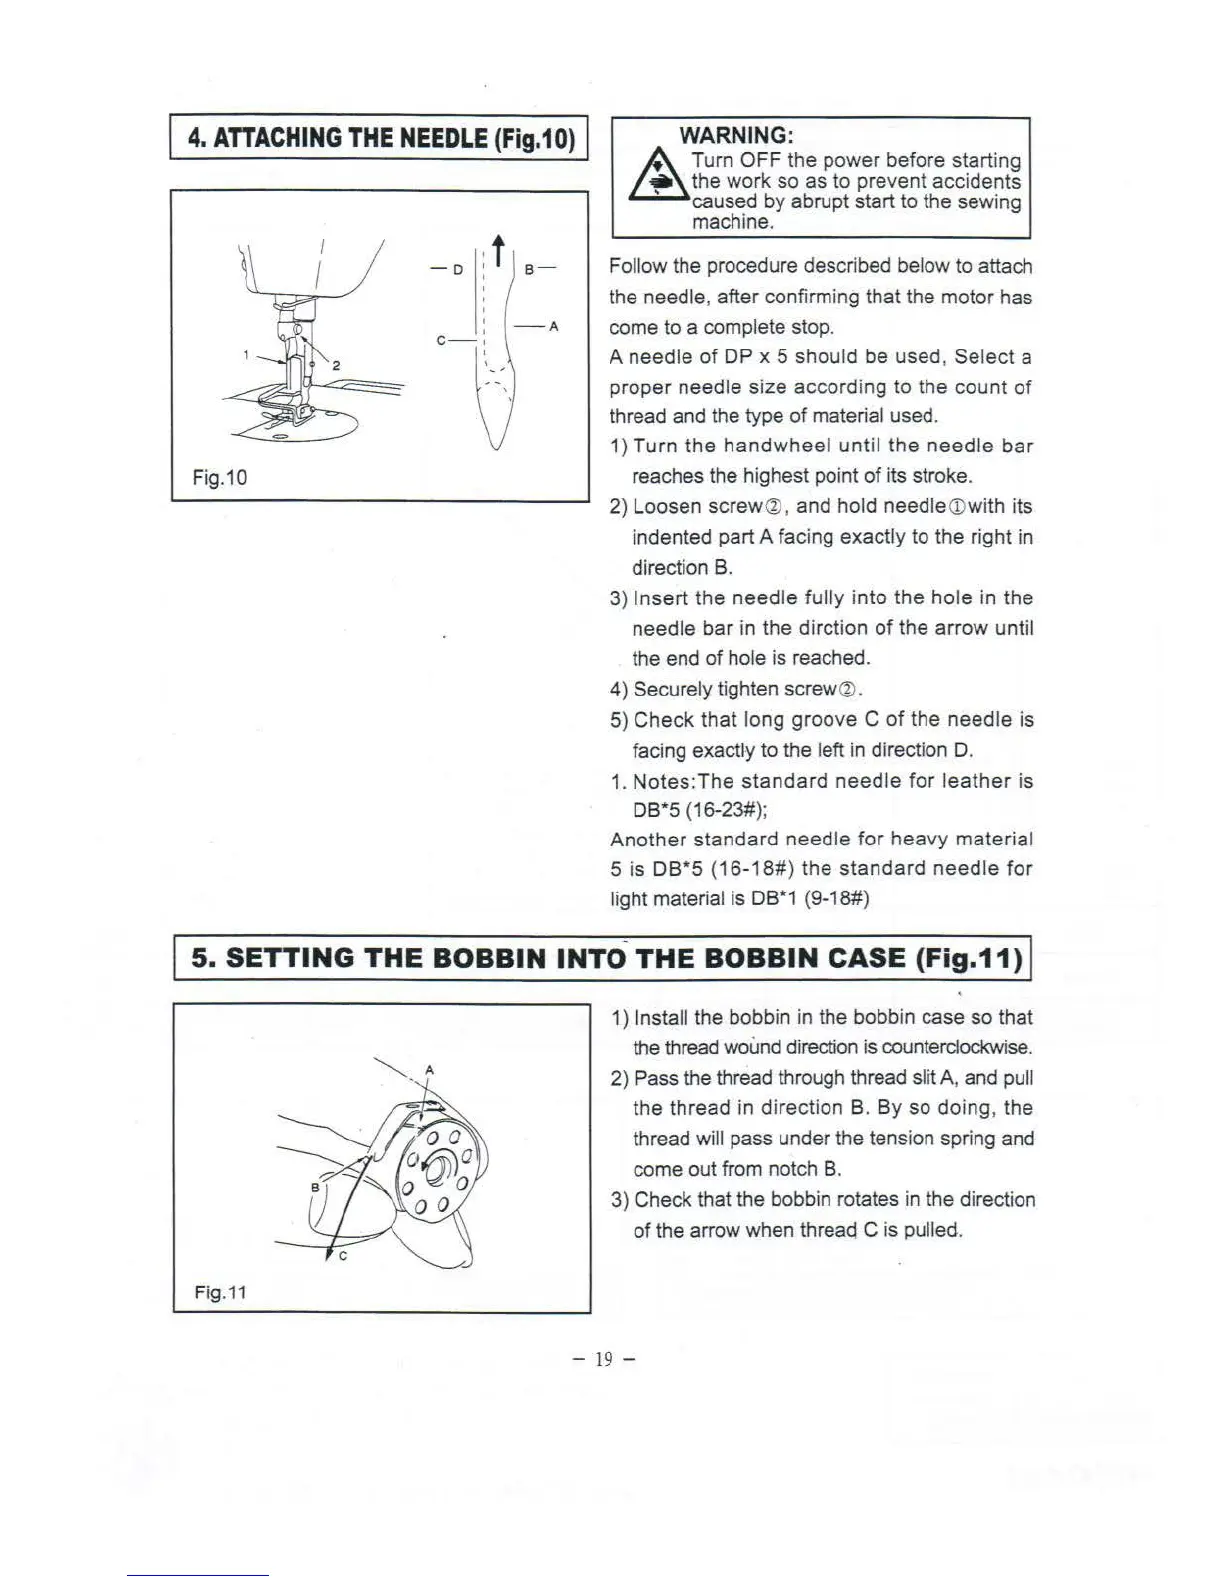
Follow the procedure described below to attach
the needle,
after
confirming that the
motor
has
come to a complete stop.
A
needle
of
DP
x 5
should
be used,
Se
l
ect
a
proper
needle
size
according
to the
count
of
thread and the type
of
material used.
1)
Turn
the
handwheel
until
the
needle
bar
reaches the highest point
of
its stroke.
2)
Loosen
screw
@,
and hold
needle
<D
with its
indented part A facing
exactly
to the right in
direction
B.
3)
Insert
the
needle
fully
into
the
hole
in
the
needle
bar
in
the
dirction
of
the
arrow
until
the end
of
hole is reached.
4)
Securely tighten screw
®.
5)
Check
that
long
groove
C
of
the
needle
is
facing exactly
to
the left in direction D.
1.
Notes:The
standard
needle
for
leather
is
DB*S {16-23#);
Another
standard
needle
for
heavy
material
5
is
DB*5
{16-18#)
the
standard
needle
for
light material is DB*1 (9-18#)
I
5.
SETTING
THE
BOBBIN
INTO
-
THE
BOBBIN
CASE
(Fig.11)
I
~-
A
Fig.
11
1) Install the bobbin in the bobbin case
so
that
the thread wound direction is counterclockwise.
2) Pass the thread through thread
sl
it
A, and pull
the
thread
in
direction
B.
By
so
doing
, the
thread
will pass under the tension spring and
come
out
from notch
B.
3) Check that the bobbin rotates in the direction
of
the arrow when thread C is pulled.
- 1
9-