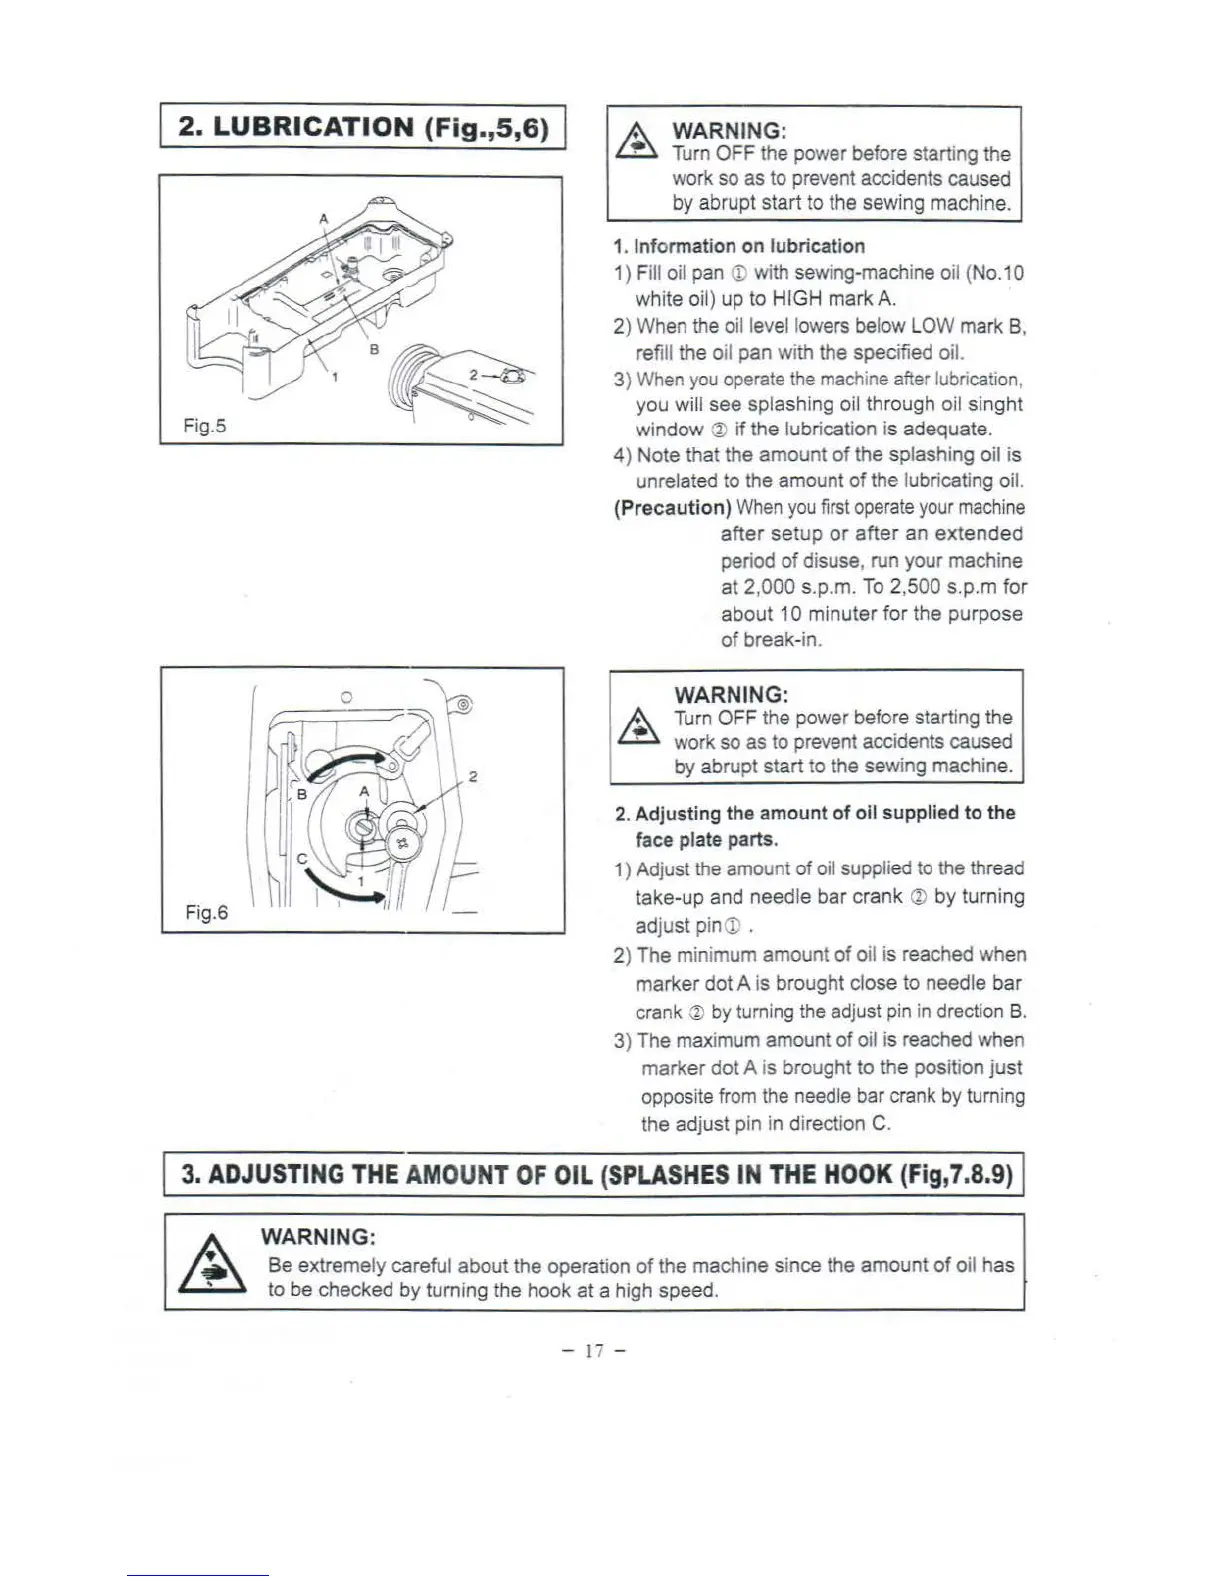
2.
LUBRICATION
(Fig.
,
5,6)
WARNING:
Fi
g.6
Turn
OFF
the power before starting the
work so as
to
prevent accidents caused
by
abrupt start to the sewing machine.
1.
Inf
orma
ti
on
on l
ubricat
ion
1)
Fill oil pan
<D
with sewing-machine oil (No.1 0
white oil) up
to
HIGH
mark
A.
2) When the
o
il
level lowers
be
l
ow
LOW mark B,
refi
ll
the oil
pan
with the specified oil.
3) When
you
operate
the
machine after lubrication,
you
will
see
splashing oil through oil
singht
window
<»
if
the lubrication is adequate.
4) Note
that
the
amount
of
the splashing oil is
unrelated to the amount
of
the lubricating oil.
(
Pr
ecau
t
io
n)
When
you
first operate
your
machine
after
setup
or
after
an
extended
per
iod
of
disuse, run your machine
at
2,0
00
s.p.m.
To
2,
500
s.p.m
for
about
1 0
minuter
for
the
purpose
of
break-in.
WARNING:
Turn OFF the power before starting the
work
so
as
to
prevent accidents caused
by
abrupt
start
to the sewing
mach
ine.
2. Ad
justing
the
amount
of
oil s
up
plied
to
the
face
plate parts.
1) Adjust the amount
of
oil suppli
ed
to
the thread
take
-up and
needle
bar
crank
~
by
turning
ad
ju
st
pin
eD
.
2)
The
minimum amount
of
oil is reached when
marker
dot
A is brought close to needle
bar
crank
~
by turning the adjust pin in drection
B.
3) The maximum amount
of
oil is reached when
mark
er
dot
A is brought
to
the
position
just
opposite from the needle bar crank by turni
ng
the adjust pin in direction C.
I
3.
ADJUSTING
THE
AM
OU
NT
OF
OIL
(
SPLASHES
IN
THE
HOOK
(Fig,7
.8.9) I
WARNING:
Be extremely careful about the operation
of
the machine since the amount
of
oil has
to
be
checked by turning the
hook
at
a high speed.
-
17
-
From the library of: Superior Sewing Machine & Supply LLC