+33 4 7642 9550 www.aaton.com Cantar-X User Manual v2.26 (r13) 2009 April 27
p.23
p.23
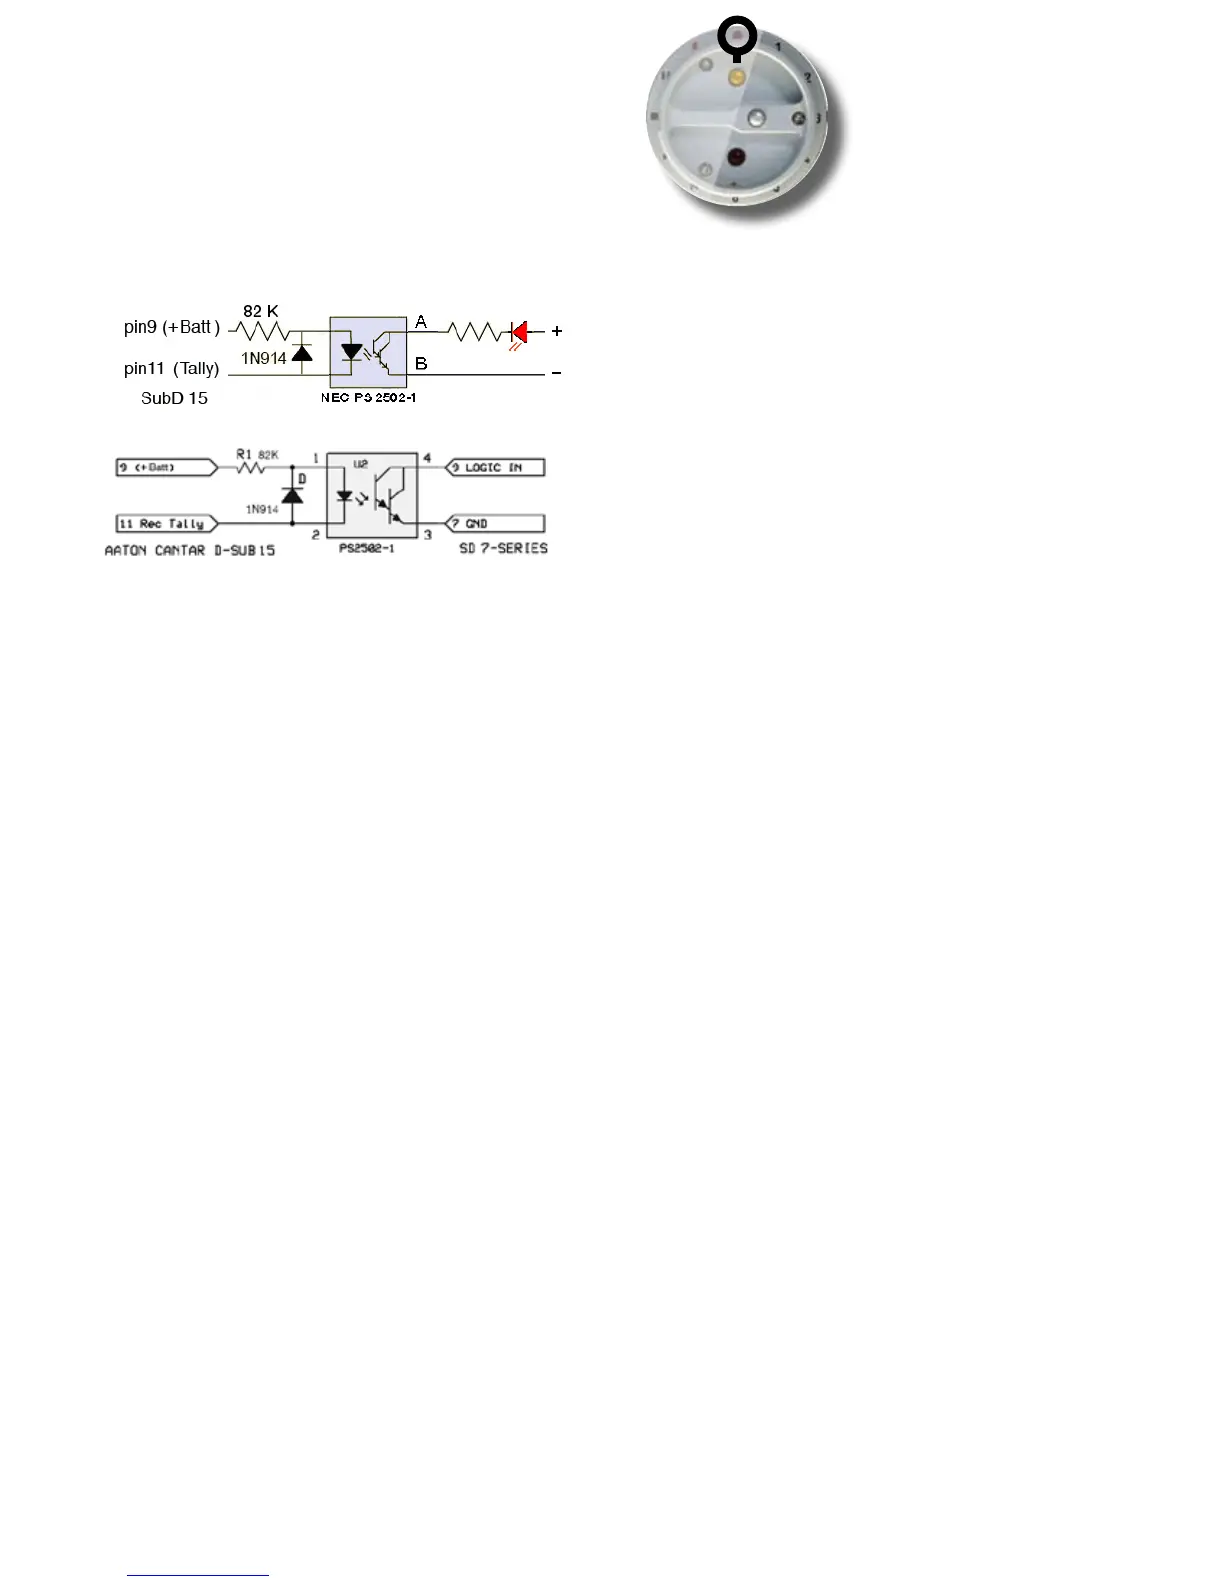
Record tally & SD remote
In REC, the SubD 15 pin-11 is grounded by an open collec-
tor transistor (max: 40mA). Do NOT use a coil activated
device on pin 11, the flyback voltage would kill the transistor.
Use an opto-coupler (see drawing) to avoid ground loops.
AutoSlate
This is the most precise and simplest method ever invent-
ed to sync images and sounds (p.46).
In AUDIO/TC.11, select the slate detection channel.
While in REC, press [shift] [silver] within six seconds after
a clapstick; the most plosive event preceding [shift] [silver]
creates a Slate Mark. The successive slates generated by a
multi-camera shoot are labeled SA, SB... SG, the slate TC is
displayed in roman characters in the Sound-Report.
The clapstick quality is displayed in the rectangular screen,
25% should be a minimum; at 75% score, you can congratu-
late the slateman!
If you forget to press [shift] [silver], AutoSlate detects the most
plosive sound of the take with a 95% chance of selecting the
clapstick; in this case the Sound-Report's Slate-TC appears in
'Italic' to show it must be either confirmed or ignored.
While in PLAY, [shift] [silver] starts the playback two seconds
before the slate-mark. Majax displays an upright slate icon
on start-slates and a bottom-up icon on tail-slates; click the
icon to listen to the slate announce.
User's markers
Press the [silver] button to create tabs labeled UM1, UM2...
UM10 on wind clicks, boom noise, dialogue slip, etc..
While in PLAY they are accessible with the [silver] button.
BLUE-REC
Rec&Play Live
see p.48
• Standard Playback and ADR1
Don't forget to route the digital input(s) carrying the play-
back signal(s); the analog inputs are recorded in the stan-
dard way. To launch the first play-card, press [ok] (if you are
using a keyboard, press [space]). To stop before reaching
the cue-out, press [ok]. To replay from the cue-in, press [ok].
To pause, press [esc], to resume, press [esc].
To reach the play-cards, two methods are available:
• the bare bone, where [shift] [>] browses the play-les, and
[>] browses the play-cards.
• the easiest, connect a PS2 keyboard, type the card IDs
(B12, F45, A08) and [enter]. Or use Tarkan, p.51.
Rec&Play Clone see p.48
Remix, ADR-2, and Re-Rec
Don't forget to route the digital input(s) carrying the play-
back signal(s).
Go to BLUE-REC, the last selected play-card of the Clone-X
Play-file starts playing. To abort the on-going 'cloning', go
to PPR, erase the file (Last take erasure, p.20) and return to
BLUE-REC.
Continuing to record live audio after the end point of the
cloned take generates a file which is longer than the original
mother file at the risk of overlapping timecode with the next
take. To get a clone of the same length as the original, i.e.
same start and stop TCs: go to BLUE-PPR and trigger the clon-
ing with the keyboard [crtl] [alt] [r]; the recording will stop on
the original file's end.
Bad remixes
You can hide unsatisfactory remix(es) as well as the original
file, and only send the good one to the back-up media: go
to BROWSE, 'edit' and 'trash'. If need be, you can rescue
them later from the day's folder still stored on the internal
drive.
Rec&Play sample-rate
Rec&Play only works at 48kHz ±0.1%. If there is a dis-
crepancy between the play-file sample rate and the Cantar
recording sample rate, a message (e.g. 'PF-47952Hz/Rec-
48000Hz') is displayed. You can nevertheless proceed
to BLUE-REC: the playback files will be played at the 'Live'
recording sample rate, inducing a speed change which can
be quite useful on filmed music shows transferred to NTSC.
REC 2. BLUE-REC