7-2 Applying Power Quick Install Guide 3AXD50000011888
7.5 Connect the Power Cables
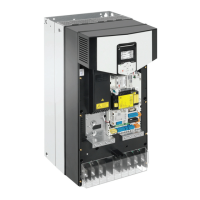
See Figures 5-1 and 5-3.
1. Undo the two mounting screws at the sides of the front cover.
2. Remove the cover by sliding it forward.
3. Attach the residual voltage warning sticker in the local language to the control panel mounting platform.
4. Remove the rubber grommets from the lead-through plate for the cables to be connected.
5. Fasten the cable conduits to the cable lead-through plate holes. Strip the cable ends. Slide the cables through the
connectors.
6. Connect the grounding conductors to the grounding terminals.
7. Connect the phase conductors of the input and motor cables. Tighten the screws.
8. Units with option +D150: Connect the brake resistor cable conductors to the R+ and R- terminals.
9. Install the control cable grounding shelf in the cable entry box.
10. Connect the motor cable at the motor end.
7.6 Connect the Control Cables
See Figure 4-4.
1. Fasten the cable conduits to the cable lead-through plate holes. Slide the cables through the connectors.
2. Strip the cable ends and cut to suitable length (note the extra length of the grounding conductors).
3. Ground the outer shields of all control cables 360 degrees at a grounding clamp in the cable entry box.
4. Ground the pair-cable shields to the grounding clamp. Leave the other end of the shields unconnected or ground them
indirectly via a high-frequency capacitor with a few nanofarads, eg, 3.3nF / 630V.
5. Connect the conductors to the appropriate terminals of the control board.
6. Wire the optional modules if included in the delivery.
7. Reinstall the front cover.
 Loading...


