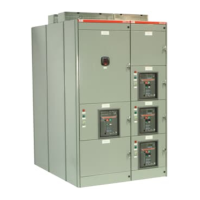
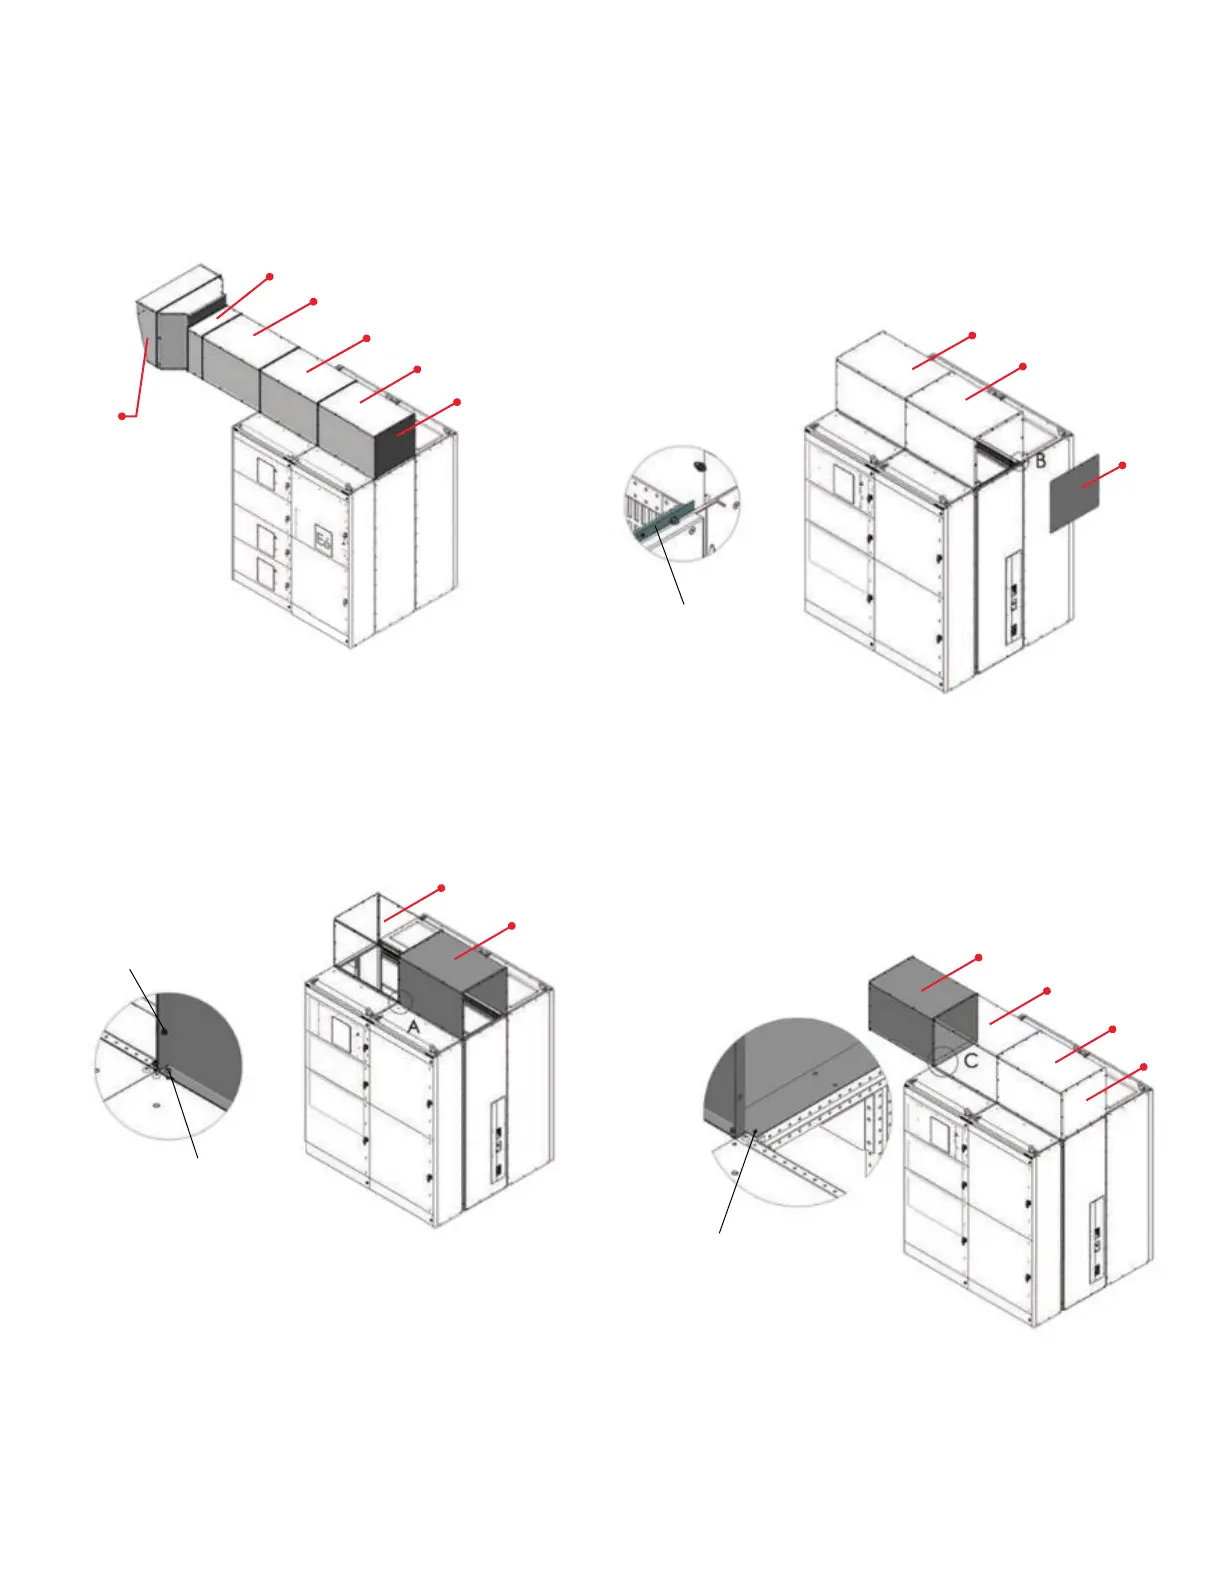
2.1. Install side-exhaust plenum
Extension and end flaps
1. Install the top cover above the busbar compartment,
securing it with the six M6 x 16 screws supplied with
each
section. Torque to 3.5 ft/lbs (4.7 Nm).
2. Connect each top cover to the adjacent cover with 10 M6 x
16 bolts, using the supplied washer and nuts for each bolt.
Torque to 3.5 ft/lbs (4.7 Nm).
Attach the top covers
3. Place the L-profile rail at the edge of the section
that will
be closed (opposite from the edge on the side of the
section where the plenum will vent).
Attach the L-profile
using four M6 x 16 screws.
Torque to 3.5 ft/lbs (4.7 Nm).
4. Install the end cover by inserting the rivet screws
through the L-profile and into the end cover, then
securing the cover in place with 10 M6-1 x 16 bolts,
using
the supplied washer and nuts for each bolt.
Attach end cover
5. After installing the top and end covers, install the
extension connection on the plenum. Attach the
extension to the switchgear section frame using four
M6
x 16 screws. Torque to 3.5 ft/lbs (4.7 Nm).
6. Attach the extension connection to switchgear frame
with 4 M6 x 16 screws, and to the top cover with 10 M61 x
16 bolts, using the supplied washers and
nuts for each
bolt.
Extension connector
7. Once the extension connection is in place, attach
additional extensions as needed to create the needed
plenum length. Connect each extension using 14 M61 x 16
bolts, washers and nuts. Torque to 3.5 ft/lbs (4.7 Nm).