Installation and maintenance instructions UniGear type ZS2 UniSafe-36 1YTW571780-012 Rev:E 01-2005 en Page: 13 of 25
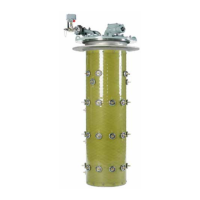
Fig:2.5.10
2500A Busbar connections with helicoil springs. Adjacent springs are in opposite direction.
The connection helicoil springs are contact-greased against oxidation.At the end of installation rotate a few
times the busbars for best connection surface.
The tee connectors on the droppers are pre-assembled during production and normally need not to be dis-
assembled. Below is for information.
*
Fig:2.5.11
**
Fig:2.5.12
***
Fig:2.5.13
* 1600-2000-2500A Busbar tee connector with brass expansion part un-tightened.
** Turn clock-wise the threaded tee connector minimum 3 of 7 full turns . This will give 12mm adjusting
margin for the aligned axis of the main busbars.
*** Tightening by the M10 bolt .For dis-assembly untighten the bolt by 10-15mm and hit by hammer to drop
and release the expansion brass part
Fig:2.5.14
Tee boot of transparent
polycarbonate
Fig:2.5.15
Tee boot on 2500A main busbar
L3 right extremity
Fig:2.5.16
Fasten with plastic strap after final
assembly
THE TEE BOOTS apply for all main busbar-dropper connections, check the correct size for tee boots and
place them on the main busbar before fixing the main busbar onto the dropper.
After finishing busbars assembly and checking for tightening torque and cleanliness, slide to close the
insulating tee-boots. Just push the two halfs together and secure with plastic strap around the dropper end.
The main busbar ending shall have a half shaped tee boot with closed-end.

 Loading...