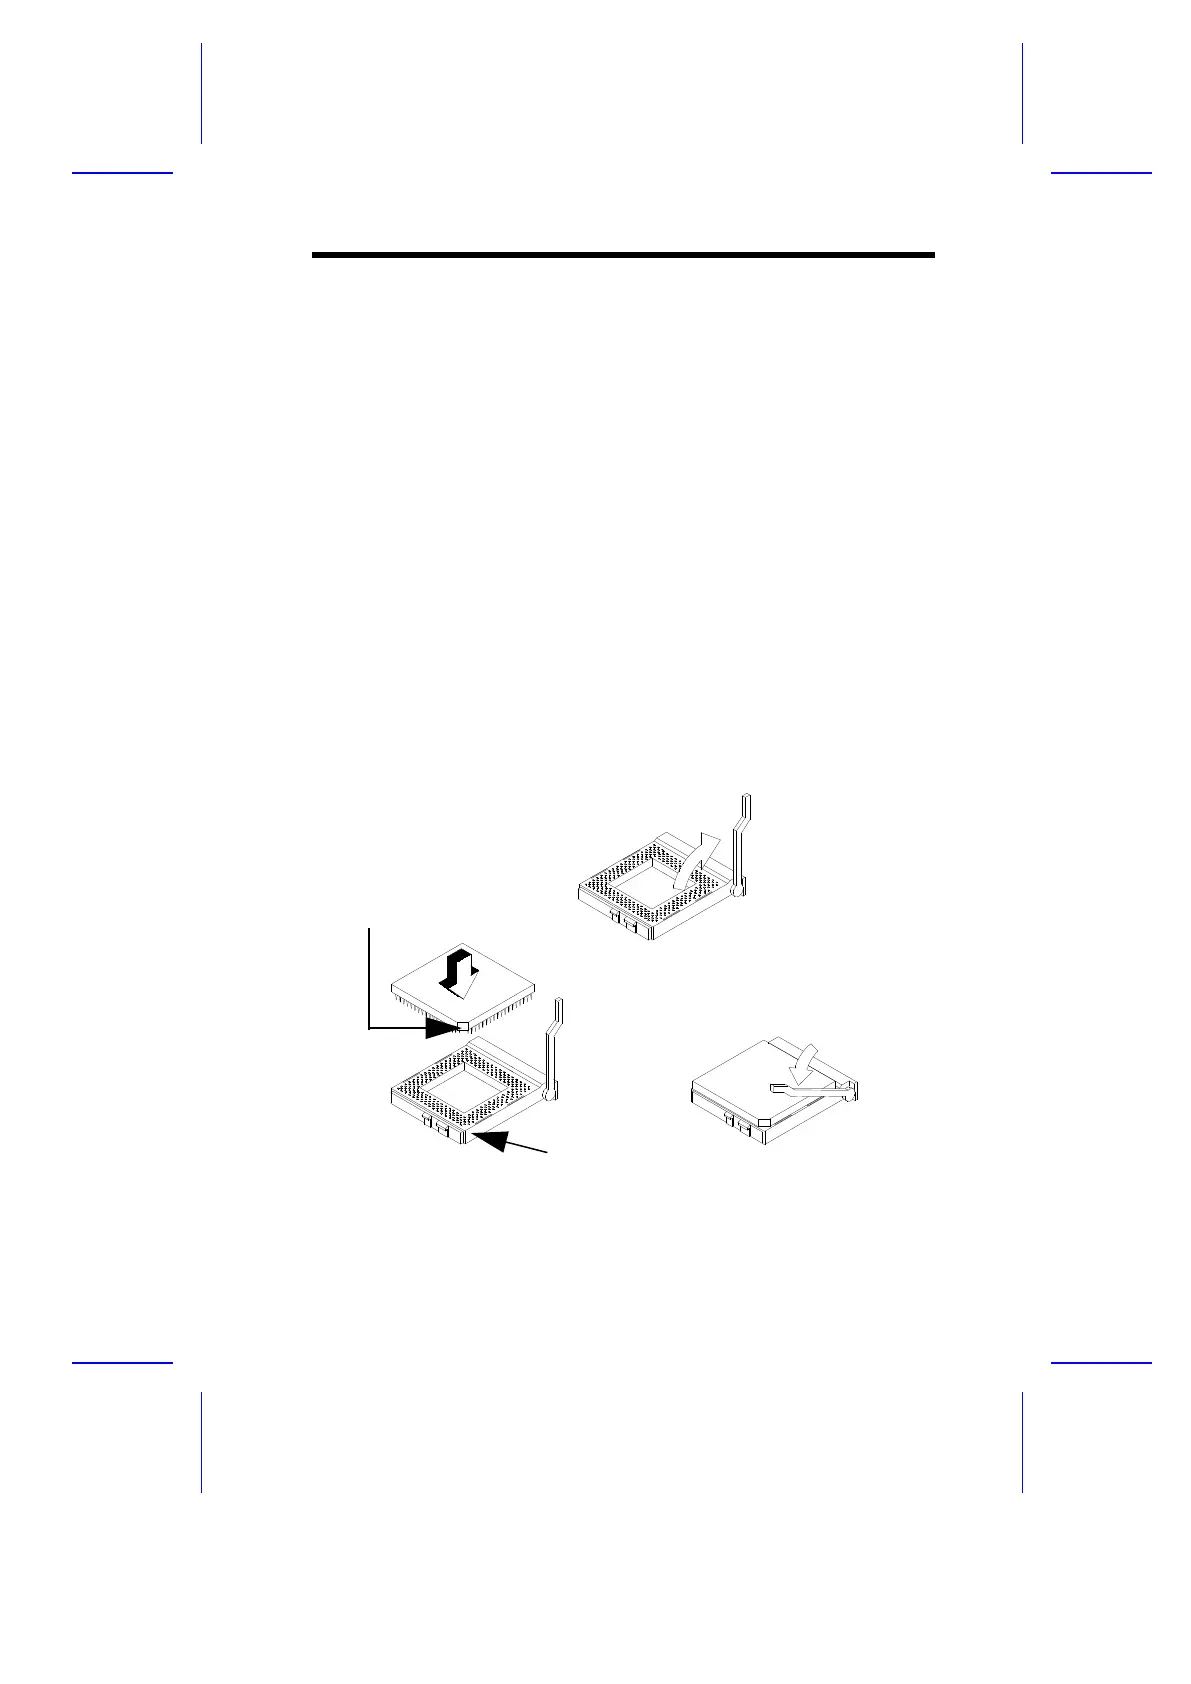
1.7 CPU Installation
The system board comes with a zero-insertion force (ZIF) CPU socket for
easy installation.
Follow these steps to install a Pentium CPU:
1. Set JP6 to the correct CPU core voltage, JP7 to the CPU I/O voltage,
and S1 for the CPU frequency. Refer to Tables 1-1 and 1-2 for the
appropriate settings and to your CPU documentation for more
information.
2. If you install a dual-voltage CPU, remove the shorting block on CN13.
See your CPU documentation for the specifications.
3. Lift up the CPU socket lever.
4. Insert the CPU into the socket. Make sure that the notched corner of the
CPU matches the pin 1 indicator on the socket.
5. Push down the socket lever.
Figure 1-7 Installing a Pentium CPU
System Board 1-15
STEP 1
STEP 2
STEP 3
Notched Corner
Pin 1 Indicator