19
ActronAir
®
is constantly seeking ways to improve the design of it’s products, therefore specications are subject to change without notice. Please check prior to purchase.
Copyright © 2016 Actron Engineering Pty. Ltd.
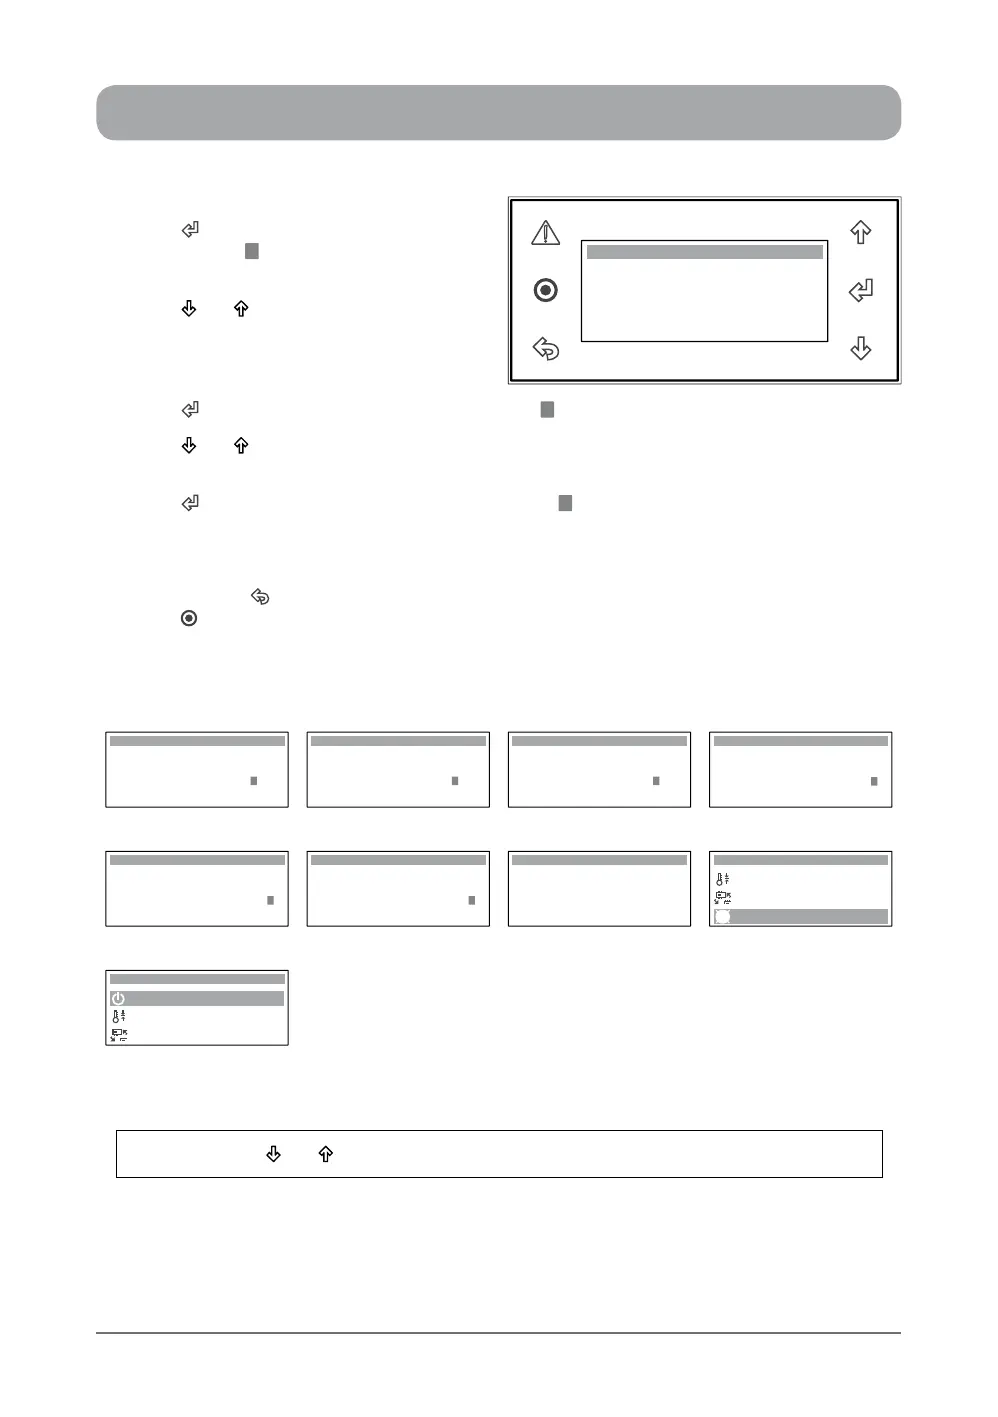
... SETTING THE CLOCK
Display Progression
Hour: 10:28
Enable Scheduler: No
Date: 22 / 09 / 14
Day: Monday
Clock
Hour: 09:28
Enable Scheduler: No
Date: 22 / 09 / 14
Day: Monday
Clock
Hour: 11:28
Enable Scheduler: No
Date: 22 / 09 / 14
Day: Monday
Clock
Hour: 10:28
Enable Scheduler: No
Date: 22 / 09 / 14
Day: Monday
Clock
Step 10 Step 11 (09:28) Step 11 (11:28) Step 12
Hour: 10:27
Enable Scheduler: No
Date: 22 / 09 / 14
Day: Monday
Clock
Hour: 10:29
Enable Scheduler: No
Date: 22 / 09 / 14
Day: Monday
Clock
Hour: 10:28
Enable Scheduler: No
Date: 22 / 09 / 14
Day: Monday
Clock
C. Mode of Operation
B. Setpoint
Main Menu 4/8
D. Clock / Scheduler
Step 13 (12:56) Step 13 (12:58) Step 14 Step 15
A. On / Off Unit
B. Setpoint
Main Menu 1/8
C. Mode of Operation
Step 15
10. Press “ ” Button to lock-in the Year & Date
and the cursor “ ” will move next to the hour
indicator.
11. Press “ ” or “ ” Button to change the hour.
NOTE: The Hour display is in 24 hour
format.This can be changed with an
incremental value of 1 hour.
12. Press “ ” Button to lock-in the hour and the cursor “ ” will move next to the minute indicator.
13. Press “ ” or “ ” Button to change the minute.
NOTE: Minute can be changed with an incremental value of 1 minute.
14. Press “ ” Button to lock-in the minute and the cursor “ ” will disappear. Set date & time are now
locked-in.
TO RETURN TO THE MAIN MENU
15. Keep pressing “ ” (Escape / Return) Button until you get to the Main Menu screen. Otherwise
press “ ” Button.
Hour: 10:28
Enable Scheduler: No
Date: 22 / 09 / 14
Day: Monday
Clock
Note: Use the “ ” or “ ” Button to toggle on the D. Clock / Scheduler sub-menu functions.
 Loading...