16 I
I – 2 Milling Specific Operations
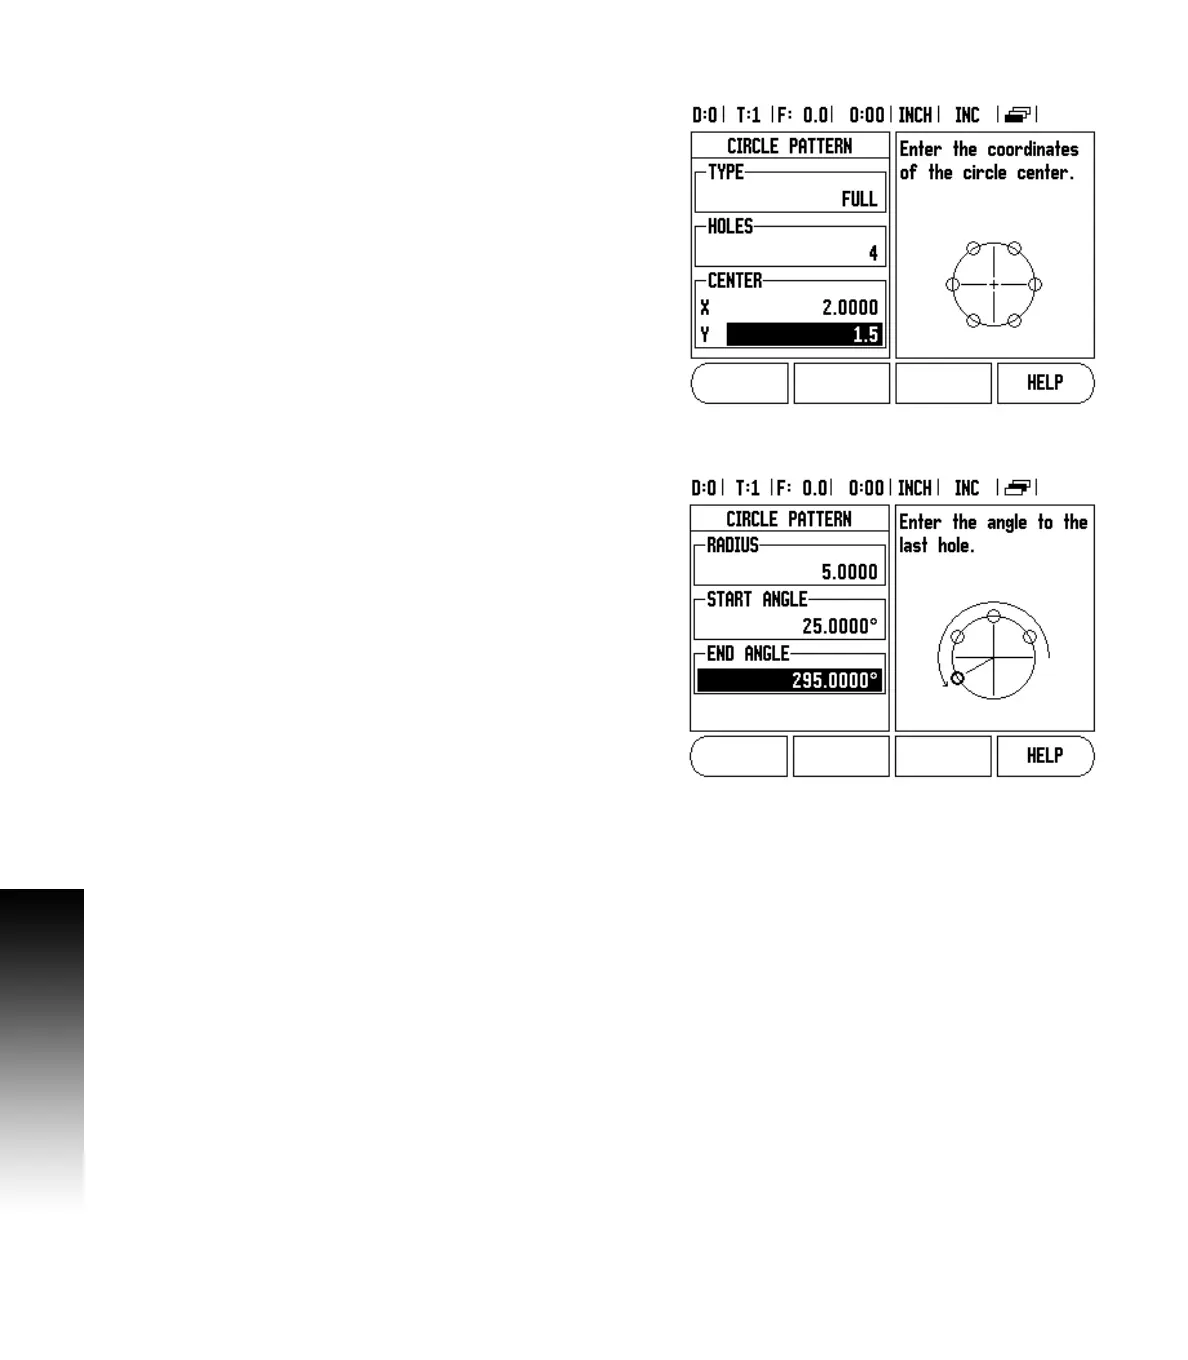
Circle pattern
Example: Enter data, and execute a circle pattern.
Holes (no. of): 4
Coordinates of center: X = 2.0” / Y = 1.5”
Bolt circle radius: 5
Start angle: Angle between X axis, and first hole: 25°
Hole depth: Z = -0.25”
1st step: Enter data
U Press CIRCLE PATTERN hard key.
U Enter the type of circle pattern (full). Cursor to the next field.
U Enter the number of holes (4).
U Enter the X, and Y coordinates of the circle center (X=2.0), (Y=1.5).
Cursor to the next field.
U Enter the radius of the circle pattern (5).
U Enter the start angle (25°).
U Enter the end angle (295°) (this can only be changed if entering a
“segment”). The End Angle is defined as the angle from the positive
X-axis to the end of the pattern.
U Enter the depth when needed. The depth of the hole is optional, and
may be left blank. If not required, press ENTER.
U Three views are available: Incremental DRO, Pattern Graphic, and
Absolute DRO. Press the VIEW soft key to toggle through the
available screens.
2nd step: Drill
U Move to hole:
U Traverse the X, and Y axes until display value zero.
U Drill:
U Traverse to display value zero in the tool axis. After drilling, retract
the drill in tool axis.
U Press the NEXT HOLE soft key.
U Continue to drill the remaining holes in the same way.
U When the pattern is complete, press the END soft key.