EasyManua.ls Logo

Adano 33888 - User Manual

Adano 33888
128 pages
Go to English
Print Icon
To Next Page IconTo Next Page
Loading...
Brugsanvisning · Bruksanvisning · Instruction manual
DK
GB
SE
Model 33888

Table of Contents

Question and Answer IconNeed help?

Do you have a question about the Adano 33888 and is the answer not in the manual?

Summary

WARNING SYMBOLS ON THE ROBOT

THE BOX CONTAINS

TECHNICAL DATA

SAFETY FEATURES

Anti-theft device;disabling device mechanism

Prevents unauthorized use via a security code.

Lift sensor

Stops blades if mower is lifted from the ground.

Obstacle sensor

Detects and avoids obstacles during operation.

Rain sensor

Stops operation in rainy weather.

Emergency stop button

Immediately stops mower and blades.

PRODUCT OVERVIEW

Stop button

Stops the robot and blades immediately.

Display

Shows status and settings of the robot.

Cut setting

Adjusts the cutting height.

Serial no.

Unique identifier for the robot.

BEFORE INSTALLATION

Planning the boundary wire layout

Guides the user on planning the boundary wire installation.

INSTALLATION AND LOCATION OF CHARGING STATION

Lightning protection

Recommendations for protecting the mower from lightning strikes.

BOUNDARY WIRE

Laying the boundary wire

Instructions on how to lay the boundary wire correctly.

Boundary wire preparation

Steps before laying the boundary wire.

Boundary wire around corners

How to lay the boundary wire around corners.

Boundary wire for garden obstacles

How to handle garden obstacles with the boundary wire.

Clearing fallen fruit and branches

Importance of clearing the lawn for operation.

Boundary wire and stones

How to handle stones in the cutting area.

Boundary wire on slopes

Guidelines for mowing on slopes.

Boundary wire with paths and paving

How to manage paths and paving.

Cutting along paving

How to cut grass along paved areas.

Uneven lawn surfaces

How to handle uneven lawn surfaces.

Boundary wire for flower beds

Protecting flower beds with boundary wire.

Using cable as an obstacle

Using cable to define obstacles.

Using parallel cables

Using parallel cables for navigation.

Boundary wire for pools and ponds

Isolating pools and ponds with boundary wire.

Narrow corridors

Requirements for narrow corridors.

CONNECTING THE BOUNDARY WIRE

Sleeve joint for cable repair

How to make watertight sleeve joints for cable repair.

POWERING THE CHARGING STATION

STARTING AND TESTING THE INSTALLATION

Initial cutting height adjustment

Initial adjustment of cutting height.

Robot placement for testing

Positioning the robot for initial test.

Entering the PIN code

How to enter the robot's PIN code.

Testing return to charging station

Verifying robot navigation to the charging station.

PROGRAMMING

SETTING THE PIN CODE

CHANGING THE START TIME AND CUTTING TIME

DESCRIPTION OF DISPLAY

ON;OFF button

Turns the robot on or off.

Start button

Starts the mowing cycle.

Home button

Returns the robot to the charging station.

Wi-Fi signal icon

Indicates Wi-Fi connection status.

INSTALLING THE APP

Download the app

Instructions for downloading the 'robotic-mower connect' app.

SETTING UP THE APP

Connection via QR code

Steps to connect using a QR code.

Manual connection (without QR code)

Controlling robot on secondary phone

USING THE APP

App Home Screen

The app's main screen overview.

Setting the mowing schedule

Setting and editing the robot's mowing schedule.

Edge trimming function

Option to trim lawn edges.

Editing schedule times

Settings

Starting point configuration

Defining multiple starting positions for the robot.

Rain delay settings

Configuring rain sensor delay settings.

Firmware update procedure

How to update the robot's firmware.

Wi-Fi settings

Connecting the robot to new Wi-Fi networks.

Change language

Log in app

THE ROBOTS FUNCTIONS

Recognising the boundary wire

How the robot detects and interacts with the boundary wire.

Stopping the robot

How to manually stop the robot using the STOP button.

Driving to the charging station

How the robot finds and returns to the charging station.

Adjusting the cutting height

How to adjust the mower's cutting height.

Cutting restrictions for robot

RAIN SENSOR

HANDLING THE ROBOT LAWNMOWER

Removing the cover

Steps to remove the robot's upper cover.

Attaching the cover

Steps to reattach the robot's upper cover.

Transporting and moving the robot

Safe methods for moving the robot.

CLEANING AND REPLACEMENT OF SPARE PARTS

Cleaning the plastic guards

How to clean the robot's plastic guards.

Cleaning the underside

How to clean the underside of the robot.

Cleaning the charging station

How to clean the charging station.

The knife blades

WINTER STORAGE

Preparing for spring

REPLACING THE BATTERY

ACCESSORIES

ERROR CODES

Error E1: Robot outside working area

Solution for robot being outside the working area.

Error E11: No boundary wire signal

Solution for no boundary wire signal.

Error E2: Wheel motor blocked

Solution for blocked or damaged wheel motor.

Error E3: Cutting blade blocked

Solution for blocked cutting blade.
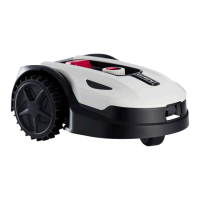
Error E5: Robot has been lifted

Error E6: Sensor detected overturned robot

Error E7: Tilt sensor triggered (steep slope)

Error E8: Return to charging station failed

Error BP: Battery temperature issue

Error EE: Unknown error

Issue: Increased noise;poor cutting

Issue: Robot runs in circles

EU DECLARATION OF CONFORMITY

ENVIRONMENTAL INFORMATION

SERVICE CENTRE

Adano 33888 Specifications

General IconGeneral
BrandAdano
Model33888
CategoryLawn Mower
LanguageEnglish