45
Performing upgrades
The AdderView CATx and CATx IP units are fully recongurable via ash
upgrades, as are the individual Computer Access Modules that are used to link
all host computers. The AdderView CATx IP models operate in a slightly different
manner to the non-IP models and so are upgraded differently:
• AdderView CATx models and Computer Access Modules require a Windows-
based computer system to be linked via the COM1/UPGRADE port.
• AdderView CATx IP models are upgraded via IP link and require a
network-connected Windows-based computer system.
Upgrading AdderView CATx models and CAMs
The KVM Firmware Uploader utility is available from the Adder Technology
website (www.adder.com) and allows you to check the current revision of
the AdderView CATx unit rmware as well as every Computer Access Module
connected to it.
Items required to use the upgrade utility
• Optional serial upgrade cable available from Adder (p/n: CAB-9M/9F-2M)
(see Appendix 7 for pin-out specications).
• A Windows-based upgrade computer with an RS232 serial port.
• The latest version of the KVM Firmware Uploader and rmware les for the
AdderView CATx - available from the Technical Support > Firmware Updates
section of the Adder Technology website (www.adder.com).
To use the KVM Firmware Uploader utility
1 - Obtain and run the KVM Firmware Uploader.
Download the latest AdderView CATx KVM Firmware Uploader from the
Adder Technology website and install it on a Windows-based upgrade
computer that will be connected to the AdderView CATx unt. The les
are supplied as a compressed ZIP le. Decompress the ZIP le with an
appropriate tool such as WinZip (www.winzip.com) and copy all contained
les to the same folder on the upgrade computer.
2 - Power off the AdderView CATx and select ash upgrade mode
Remove the power supply plug(s) from the rear panel of the AdderView
CATx and move option switch 1 on the back of the AdderView CATx to the
ON position (down).
3 - Connect the upgrade computer to the AdderView CATx
Connect the upgrade computer to the COM1/UPGRADE port on the rear panel
of the AdderView CATx unit using the optional upgrade cable. You do not
need to set the serial baud rate and protocol because the upgrade program
will do this automatically.
4 - Power on the AdderView CATx
Attach the power adapter to the AdderView CATx. The USER display should
now show which indicates that the AdderView CATx is ready to be
upgraded.
5 - Run the KVM Firmware Uploader utility
From that folder, select the KVMUploader icon to run the upgrade utility.
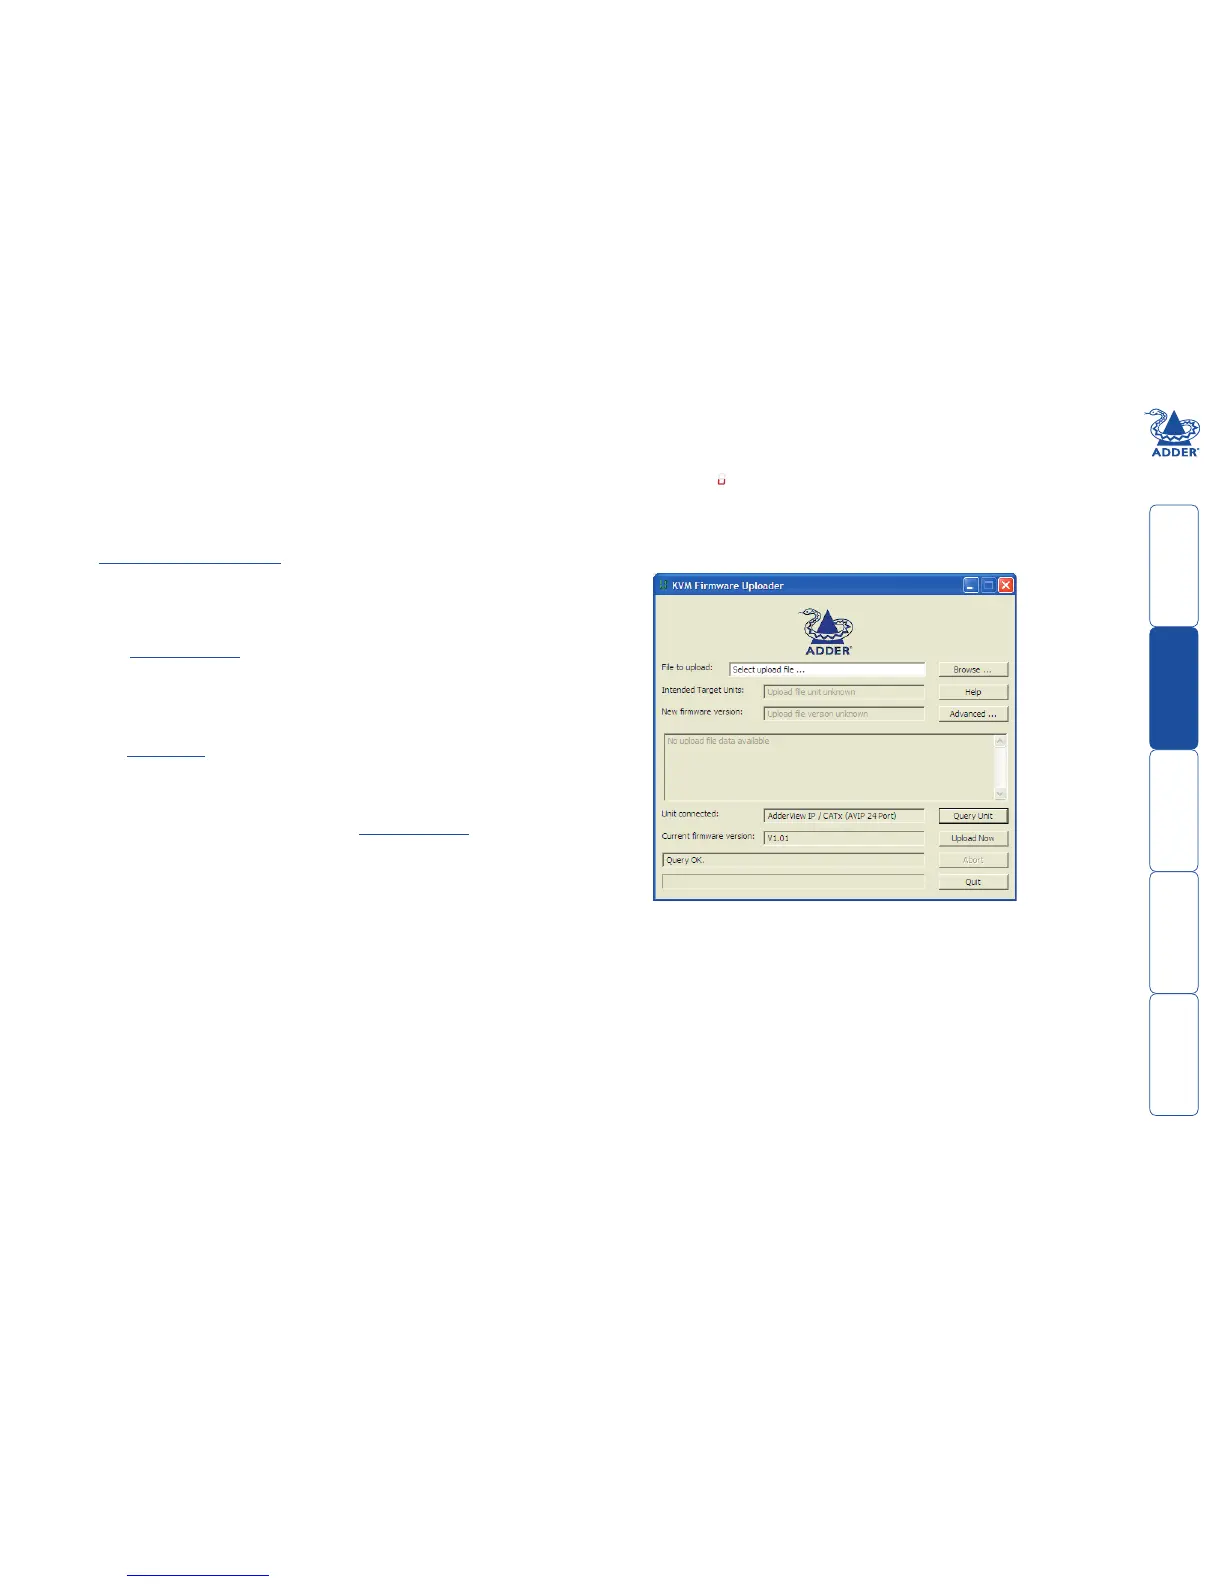
The KVM Firmware Uploader dialog will be displayed:
6 - Query the AdderView CATx unit
Click the Query Unit button to conrm that communication is possible with
the AdderView CATx and to establish the rmware details of the main unit
and all connected CAMs.
Note: The computer to which each CAM is connected must be powered
before the respective CAM can be accessed.
Note: AdderView CATx units in lower levels of cascade links (and their
respective CAMs) cannot be queried or upgraded while remaining in the
cascade arrangement.
If the application cannot contact the AdderView CATx, recheck the
connection cable and click the Advanced... button to check that the correct
serial port is being used. Change the serial port within the Advanced
section, if necessary.
continued